Difference between revisions of "Sacred:Interface"
| Line 74: | Line 74: | ||
{{:Sacred:View All Bonuses}} | {{:Sacred:View All Bonuses}} | ||
| + | |||
| + | [[Category:Gameplay]] | ||
Revision as of 04:56, 28 July 2019
|
ContentsGame Environment
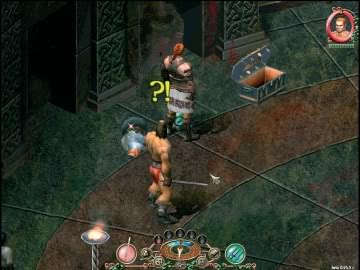
1. Left-click on an unoccupied space to move the Gladiator. 2. An NPC that is open for a short chat or has a task they would like you to tackle. 3. Left-click on boxes, chests, cabinets and other containers to open them. Press and hold the ALT key to view the names of the objects. 4. A colorful sparkle marks objects that can be collected. Press and hold the ALT key in order to display the names of all visible objects. 5. Move the mouse cursor onto the health display or the green bar to display a window with exact numeric values. Note: During the game, other characters may join you in your quest. Their portraits are displayed underneath yours and include information on their health. 6. The large needle of the quest compass always points directly towards the next main goal. If a sub quest has been completed, then a small blue compass needle points towards the person who has given you the quest. This is where you can claim your reward. If the task involves eliminating an enemy group, a small red compass needle shows the position of the nearest enemy. If you have placed a goal marker on the Ancaria world map (M key), another compass needle (also red) points precisely towards that point. Arranged around the compass are icons for five different potions: 
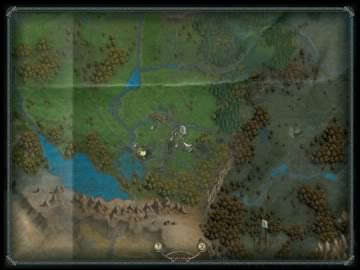
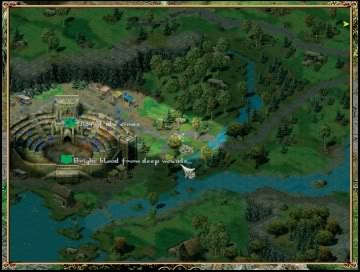
The World and the MapThere are two different maps that will help you find your way around Ancaria.
1. The overview map. On this map you can see all of Ancaria, including the names of places and attractions. Dotted red lines show how much of the country you have explored. You can access the world map with the ?M? key during the game.
Equipment, Traders and Private Stash
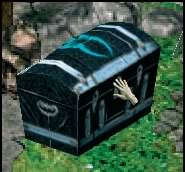
The Chest is a storage location available to all playing characters. A Chest is available to you in all villages, towns and cities, even abandoned ruins. It is depicted as a blue chest. Often it is near a well or near the center of town. These allows you to store the equipment you don't currently need but also do not wish to sell at this point.
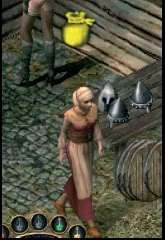
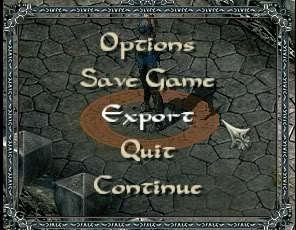
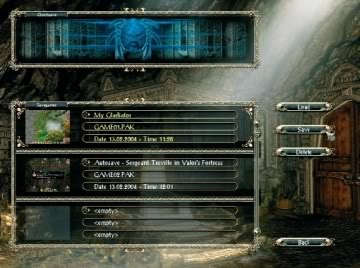
A Merchant is a special NPC found in most towns of Ancaria. Merchants usually wear a distinctive blue suit (sometimes red), and always have a bag icon over their head. Some towns have more than one merchant, while smaller towns or abandoned ruins might have none. Merchants are depicted on the large map by the same bag symbol displayed above their head. InteractionClicking the left mouse button on a merchant will open the store window (the mouse cursor will become a bag symbol). Both the character inventory and merchant's inventory will be displayed, making it possible to 'Buy' or 'Sell' items. The merchant has three inventory sections: Weapons, Armor, and Miscellaneous Items (potions, rings and amulets). If runes or scrolls have been sold to the merchant, they will remain in the Miscellaneous section until the item selection is replaced. You can switch between these three panes as you wish; the merchandise displayed will not change, however. It may shuffle around, but the selections will stay the same. Buying ItemsClick on an item in the merchant's inventory to be asked if you want to buy it. Right-click an item to purchase it immediately. Selling ItemsItems are always sold to a merchant for a fraction of their actual value. The safe method for selling items to a merchant is to click the mouse on an item while it is in your backpack. A confirmation window will open asking "Sell this?" and specifying the price the merchant will pay. You have the opportunity to change your mind and cancel the transaction. A faster method is to right click the item. It immediately transfers to the merchant inventory and you receive payment. Normally, the item will be visible in the merchant's inventory for repurchase, should you suffer seller's remorse. If, however, the merchant inventory is too full, and the item will not fit, then it is lost. Similarly, Unique Items are not retained by the merchant for resale. On the other hand, Set Items are retained. MenuYou can access the game menu using the ESC key during the game. Options that are currently not available show in red ("Save Game", for instance, in Closed Internet mode) Click on Saved games to access the menu in which you can save the game. At the center, you will see the slots for saved games as well as the name for that game. Click on one of the slots. This activates the Save, Load and Delete buttons that allow you to save, load or delete a game.
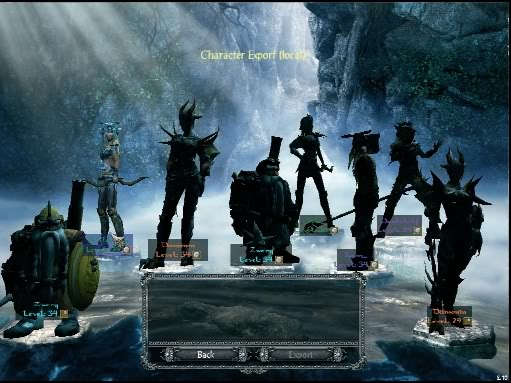
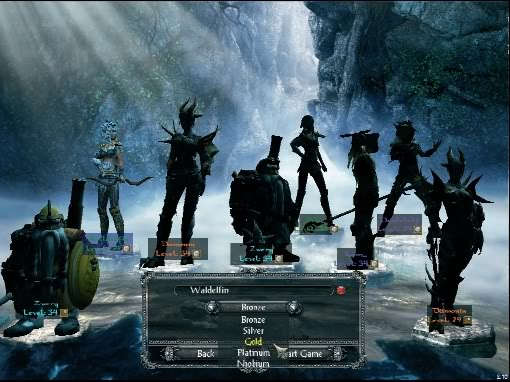
Your character and all its associated properties, objects and Combat Arts are now saved to the hard disk. When starting a new game, you can import a previously exported character. Just choose New Campaign in the Main Menu, then click on Import. The saved characters are now displayed for selection. Select the character and the desired difficulty level and launch yourself into the adventure again. Character Properties
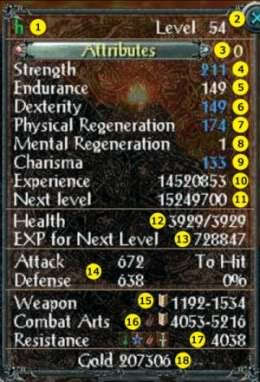
1. Your character. 2. Current level of experience. 3. Attribute points available for distribution. 4. Strength: increases the attack value and the melee damage. 5. Endurance: influences the bodys inherent protection and reduces the effects of poison. 6. Dexterity: influences defense values and ranged combat damage. 7. Physical Regeneration: speeds up the regeneration of health and combat arts. 8. Mental Regeneration: increases the damage of your spells and reduces the time you need to regenerate from poison attacks. 9. Charismatic characters benefit from lower prices when dealing with traders; such characters are often favored by certain gods, granting increased poison damage. 10. Experience points accumulated to date. 11. When you reach this experience value, your character gains a level. 12. The value in front shows your current state of health, the second value shows the maximum health. 13. This is the amount of points required to reach the next level of experience. 14. Attack, Defense and Hit Chance: This displays the values for your current weapon and armor in relation to the last opponent you have defeated. 15. The damage value and the type of weapon currently equipped. 16. The damage value and the type of Combat Art currently activate. 17. The cumulative resistance value. 18. Gold carried. Weapon Properties
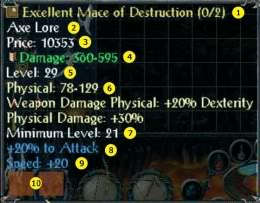
2. Skill base of weapon. 3. Price you will receive if you sell the weapon. 4. Expected total damage. 5. Weapon level - the higher the level, the more difficult the weapon is to handle. 6. Damage inflicted by a weapon: Subdivided into Physical, Fire, Magic, and Poison as well as possible bonus damage points within these damage types. 7. Minimum character level required to use the weapon. 8. Possible additional bonuses to attributes and skills granted by the weapon. Some of these bonuses are provided by the weapon itself. 9. In addition, further improvements are possible by forging (smithing) runes or objects into the weapon. 10. If available, this is where smithing slots, or sockets are displayed. There are four different colors: Bronze, Silver, Gold and (very rarely) Green. Bronze sockets insert items at their stated value. Silver, Gold and Green add a bit extra to fixed values, but not to percentage bonuses. Armor Properties
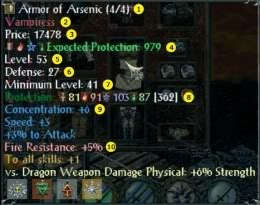
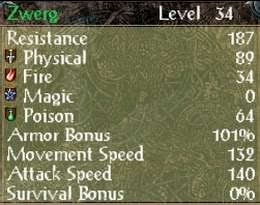
2. Specifies which character can use the armor. 3. If the item is part of a set, then the sets name is shown. 4. Price you will receive if you sell the armor. 5. Expected total protection 6. Level of the armor 7. Minimum level required to wear the armor. 8. Resistance provided by the armor: Subdivided into Physical, Fire, Magic, and Poison resistances. 9. Possible additional bonuses to attributes and skills granted by the armor. 10. In addition, further improvements are possible by forging (smithing) runes or objects into the weapon. 11. As with Weapons, Armor may also provide smithing slots. The same four colors: Bronze, Silver, Gold and Green are available. Depending on the color, additional points are added to the bonuses. Enemy DisplayWhen an enemy is nearby or is becomes a target, a color-coded circle will appear, indicating the level of difficulty of your opponents. Additionally, hovering the mouse cursor over your enemy will activate an information bar, providing more detail on the enemys current health points. In addition, the bar contains notes on the opponents level, name and type - such as Monster. The opponents resistance values are also displayed. The color of the text indicates whether the monster is a regular enemy, or a champion or boss type. Intuitive Symbols
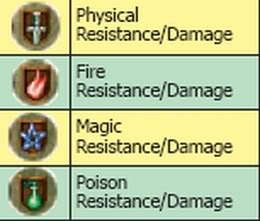
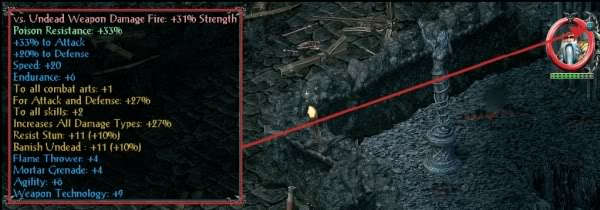
Symbols are used for resistance values (for opponents, armor and your character) as well as for damage caused by weapons or skills. If the resistance or damage values are not listed in absolute figures, the symbols transparency provides a good idea of this value. The more transparent a symbol is, the weaker the resistance and/or damage. View All Bonuses
|
||||||||||||||||||||||||||||
