Difference between revisions of "Sacred 2:Beyond the Wall"
Promatolya (talk | contribs) (New page: {{subst:Quest}}) |
|||
| (11 intermediate revisions by 8 users not shown) | |||
| Line 1: | Line 1: | ||
| + | <div class="plainlinks"> | ||
| − | |||
| − | |||
| − | |||
| − | |||
{| | {| | ||
| − | |WIDTH=" | + | |WIDTH="20%" VALIGN="TOP"|__TOC__ |
| − | |WIDTH=" | + | |WIDTH="50%" VALIGN="TOP"| |
| − | * '''Quest Objective:''' | + | * '''Quest Objective:''' Find [[Sacred 2:Guide Jaftar|Guide Jaftar]] , and find out what he knows about the lost elven party |
| − | * '''Quest Difficulty:''' | + | * '''Quest Difficulty:''' n/a |
| − | * '''Quest Giver:''' | + | * '''Quest Giver:''' Tavern keeper (of the Gambling Den) |
| − | * '''Location(s):''' | + | * '''Location(s):''' North of Griffinborough |
| − | * '''Prerequisite Quest:''' | + | * '''Prerequisite Quest:''' [[Sacred 2:Through the Wall|Through the Wall]] (This is the first quest, in the second chapter of the [[Sacred 2:Quests|Light storyline campaign]]) |
| − | * '''Next Quest:''' | + | * '''Next Quest:''' [[Sacred 2:Gar'Colossus|Gar'Colossus]] |
| − | * '''Reward:''' | + | * '''Reward:''' n/a |
| − | |WIDTH="20%" VALIGN="TOP"| | + | |WIDTH="20%" VALIGN="TOP"| |
| − | |||
| − | |||
|} | |} | ||
== Quick Walkthrough == | == Quick Walkthrough == | ||
| − | + | * Talk to the Tavern Keeper of the Gambling Den, just north of Griffinborough. | |
| + | * Go to the village he discribes, and search Guide Jaftar | ||
| + | * Kill guide jafter, and rescue the girls | ||
| + | * Go to the village Healer, and find a 'scroll of release' | ||
| + | * Go to the sick girl, in the house of the rescued girl. | ||
| + | * Heal the sick girl, and find out where [[Sacred 2:Enadris|Enadris]] hangs out. | ||
| + | |||
| + | == Detailed Walkthrough == | ||
| + | Finally, your first clue to the objective you have been given in the first chapter of the storyline. Again, we start of where we ended the second quest in the first chapter. | ||
| + | Talk to the tavern keeper in the Gambling Den. He will tell you that the group of elves you are after hired a guide by the name of Jaftar. Jaftar resides in a village not far west from the Inn, and you decide it's your best shot of finding him. Follow this path to get to the village, and find the entrance to the dungeon, as indicated on the other map. | ||
| + | |||
| + | {{S2frame|[[Image:btwPath1.jpg|400px]]|left}} | ||
| + | <br clear="both" /> | ||
| + | {{S2frame|[[Image:btwpath1b.jpg|400px]]|left}} | ||
| + | <br clear="both" /> | ||
| + | |||
| + | Inside the cave you will find your usual rats, but also some T-mutated rats if you run around. These are nice for experience, so make sure you grab a few. Follow this path in the cave to talk to Guide Jaftar. | ||
| + | |||
| + | {{S2frame|[[Image:btwcave.jpg|400px]]|left}} | ||
| + | <br clear="both" /> | ||
| + | {{S2frame|[[Image:guidejaftar.jpg|400px]]|left}} | ||
| + | <br clear="both" /> | ||
| + | |||
| + | Obviously something happened worth covering up, since Jaftar refuses to tell you what's happening. And just as you are about to leave it at that, he makes his most crucial, and last ever, mistake. He threatens you to not poke your nose around his affairs. | ||
| + | (How to deal with Ancarian heroes 101: DO NOT THREATEN THEM) | ||
| + | You decide to kill him and rescue the girls he is about to sell off into slavery. | ||
| + | |||
| + | {{S2frame|[[Image:opponentjaftar.jpg|400px]]|left}} | ||
| + | <br clear="both" /> | ||
| + | Right after you kill him, enter the adjacent room, and talk to [[Sacred 2:Larissa|Larissa]]. | ||
| + | {{S2frame|[[Image:larissa.jpg|400px]]|left}} | ||
| + | <br clear="both" /> | ||
| − | = | + | She will thank you and tell you that Jaftar is just a pawn. The entire concept is being run by a person known as the Broker. But she has no clue who this Broker is, or where he lives. Her younger sister, however, does know. Not giving any more thought as to why an young child knows the name and whereabouts of a gangster, you decide to hear the story out. |
| − | + | Larissa tells you that her sister is very sick, and she asks you to find a scroll of release, so that her soul can be free after she passes away. | |
| + | And where else to find it, then at the local drug store (healer) :). | ||
| + | |||
| + | Follow this path to get to the local healer. | ||
| + | |||
| + | {{S2frame|[[Image:Healer.jpg|400px]]|left}} | ||
| + | <br clear="both" /> | ||
| + | {{S2frame|[[Image:btwpath2.jpg|400px]]|left}} | ||
| + | <br clear="both" /> | ||
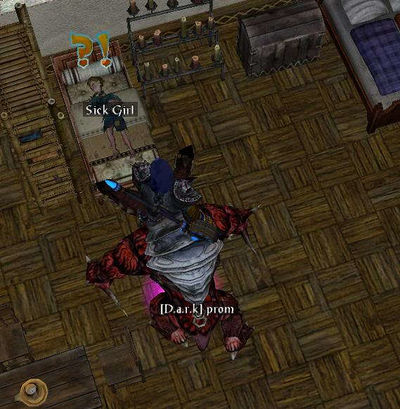
| + | After the healer sets you up with the scroll, cross the street and enter the house with the sick girl. She is in bed at the second floor. | ||
| + | {{S2frame|[[Image:sickgirl.jpg|400px]]|left}} | ||
| + | <br clear="both" /> | ||
| + | As soon as you start talking to her, she feels better, and is convinced you did something to heal her. You didn't but that really doesn't matter. She is better now, thanks to your unwilling healing powers. She tells you that the man you are after is called Enadris, and he lives in Orcish Byway. | ||
| + | With this the first quest of the second chapter comes to an end, leaving you with a trail to follow in your overall story, and another step closer to being a good little boy :) | ||
== Logbook Entry == | == Logbook Entry == | ||
| − | + | ||
| + | {| | ||
| + | |{{S2frame|[[Image:btwlog1.jpg|300px]]|left}} | ||
| + | |} | ||
| + | |||
== Notes == | == Notes == | ||
| − | + | * the T-mutated rats have magical damage. So best to add some magical relics to your armor bonus | |
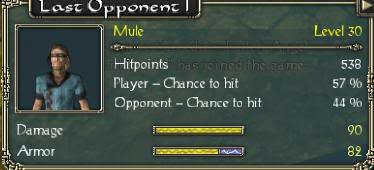
| + | * Mule's (Guide Jaftar opponent) level, damage and overall stats are based on the level of the character in the quest. Don't get pinned on these stats, but see em as a guideline to what to expect. | ||
| + | </div> | ||
| − | + | [[Category:Sacred 2 Light Campaign Quest|{{SUBPAGENAME}}]] | |
| − | + | [[Category:Sacred 2 Quest|{{SUBPAGENAME}}]] | |
| − | [[Category:Sacred 2 Light Campaign Quest]] | + | [[Category:Sacred 2 Artamark Quest|{{PAGENAME}}]] |
| − | [[Category:Sacred 2 | ||
| − | |||
| − | |||
| − | [[Category:Sacred 2 | ||
Latest revision as of 01:49, 11 September 2013
|
Quick Walkthrough
- Talk to the Tavern Keeper of the Gambling Den, just north of Griffinborough.
- Go to the village he discribes, and search Guide Jaftar
- Kill guide jafter, and rescue the girls
- Go to the village Healer, and find a 'scroll of release'
- Go to the sick girl, in the house of the rescued girl.
- Heal the sick girl, and find out where Enadris hangs out.
Detailed Walkthrough
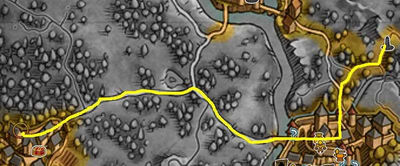
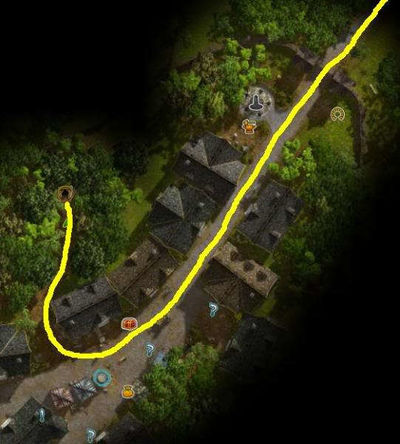
Finally, your first clue to the objective you have been given in the first chapter of the storyline. Again, we start of where we ended the second quest in the first chapter. Talk to the tavern keeper in the Gambling Den. He will tell you that the group of elves you are after hired a guide by the name of Jaftar. Jaftar resides in a village not far west from the Inn, and you decide it's your best shot of finding him. Follow this path to get to the village, and find the entrance to the dungeon, as indicated on the other map.
|
| ||
|
| ||
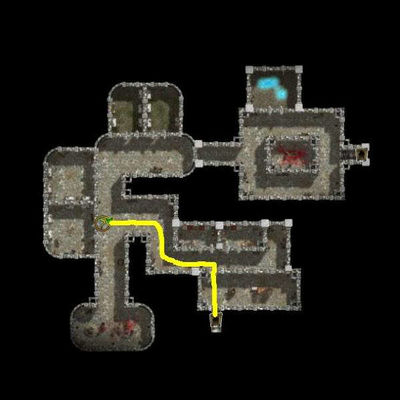
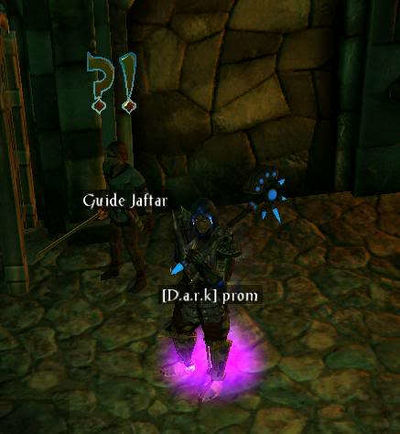
Inside the cave you will find your usual rats, but also some T-mutated rats if you run around. These are nice for experience, so make sure you grab a few. Follow this path in the cave to talk to Guide Jaftar.
|
| ||
|
| ||
Obviously something happened worth covering up, since Jaftar refuses to tell you what's happening. And just as you are about to leave it at that, he makes his most crucial, and last ever, mistake. He threatens you to not poke your nose around his affairs. (How to deal with Ancarian heroes 101: DO NOT THREATEN THEM) You decide to kill him and rescue the girls he is about to sell off into slavery.
|
| ||
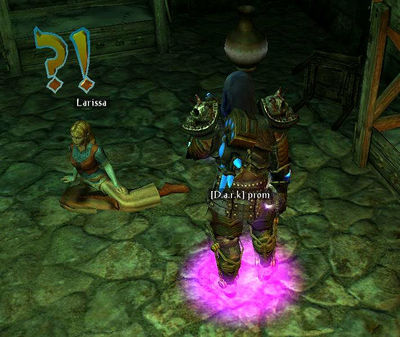
Right after you kill him, enter the adjacent room, and talk to Larissa.
|
| ||
She will thank you and tell you that Jaftar is just a pawn. The entire concept is being run by a person known as the Broker. But she has no clue who this Broker is, or where he lives. Her younger sister, however, does know. Not giving any more thought as to why an young child knows the name and whereabouts of a gangster, you decide to hear the story out. Larissa tells you that her sister is very sick, and she asks you to find a scroll of release, so that her soul can be free after she passes away. And where else to find it, then at the local drug store (healer) :).
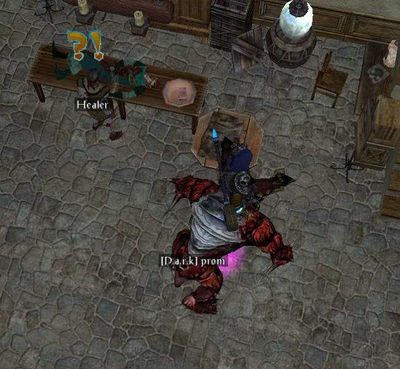
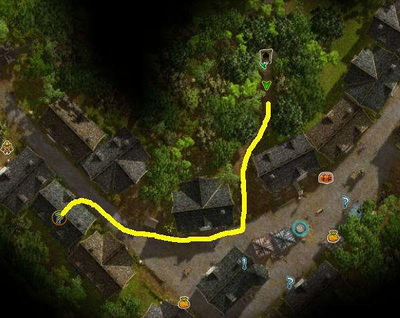
Follow this path to get to the local healer.
|
| ||
|
| ||
After the healer sets you up with the scroll, cross the street and enter the house with the sick girl. She is in bed at the second floor.
|
| ||
As soon as you start talking to her, she feels better, and is convinced you did something to heal her. You didn't but that really doesn't matter. She is better now, thanks to your unwilling healing powers. She tells you that the man you are after is called Enadris, and he lives in Orcish Byway. With this the first quest of the second chapter comes to an end, leaving you with a trail to follow in your overall story, and another step closer to being a good little boy :)
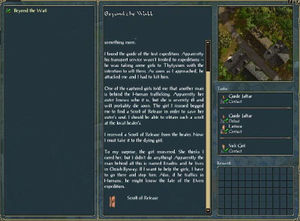
Logbook Entry
| |||||||||
Notes
- the T-mutated rats have magical damage. So best to add some magical relics to your armor bonus
- Mule's (Guide Jaftar opponent) level, damage and overall stats are based on the level of the character in the quest. Don't get pinned on these stats, but see em as a guideline to what to expect.
