Difference between revisions of "Sacred 2:Bloodmouth Must Die"
Jump to navigation
Jump to search
m (removed chain quest category) |
m (updated img links) |
||
| Line 15: | Line 15: | ||
* '''Next Quest:''' None | * '''Next Quest:''' None | ||
* '''Reward:''' [[Sacred 2:Gold|Gold]] | * '''Reward:''' [[Sacred 2:Gold|Gold]] | ||
| − | |WIDTH="20%" VALIGN="TOP"|[http:// | + | |WIDTH="20%" VALIGN="TOP"|[http://www.sacredwiki.org/images/Sacred_2/quests/Chapter01/Captain%20Bloodtongue/The%20Missing%20Scout/sacred2CaptainBloodtongue1m.jpg http://www.sacredwiki.org/images/Sacred_2/quests/Chapter01/Captain%20Bloodtongue/The%20Missing%20Scout/th_sacred2CaptainBloodtongue1m.jpg]<br><br> [http://www.sacredwiki.org/images/Sacred_2/quests/Chapter01/Captain%20Bloodtongue/The%20Missing%20Scout/sacred2Bloodtongue1.jpg http://www.sacredwiki.org/images/Sacred_2/quests/Chapter01/Captain%20Bloodtongue/The%20Missing%20Scout/th_sacred2Bloodtongue1.jpg] |
|} | |} | ||
| Line 26: | Line 26: | ||
== Detailed Walkthrough == | == Detailed Walkthrough == | ||
| − | Talk to Officer Rengelwyn to learn that he wants you to track down and kill Captain Bloodtongue - the leader of the pirates Menatrin is hiding from.<br>[http:// | + | Talk to Officer Rengelwyn to learn that he wants you to track down and kill Captain Bloodtongue - the leader of the pirates Menatrin is hiding from.<br> |
| + | [http://www.sacredwiki.org/images/Sacred_2/quests/Chapter01/Captain%20Bloodtongue/Bloodmouth%20Must%20Die/sacred2CaptainBloodtongue3a.jpg http://www.sacredwiki.org/images/Sacred_2/quests/Chapter01/Captain%20Bloodtongue/Bloodmouth%20Must%20Die/th_sacred2CaptainBloodtongue3a.jpg] <br><br> | ||
Return to Scout Menatrin's hiding place: | Return to Scout Menatrin's hiding place: | ||
| − | [http:// | + | [http://www.sacredwiki.org/images/Sacred_2/quests/Chapter01/Captain%20Bloodtongue/The%20Missing%20Scout/sacred2Bloodtongue1wt.jpg http://www.sacredwiki.org/images/Sacred_2/quests/Chapter01/Captain%20Bloodtongue/The%20Missing%20Scout/th_sacred2Bloodtongue1wt.jpg]<br> |
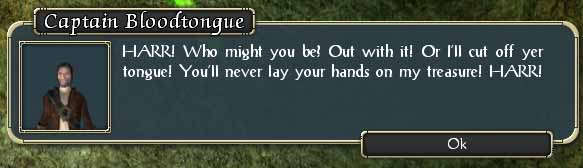
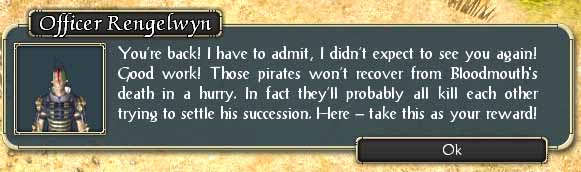
| − | There are several routes to reach Captain Bloodtongue; aim for the Southwest corner of the caves, or just use the route in the image below. The enemies in the easily-navigated part are earth elementals, whilst in the maze-like Southern part you will find pirates and snappers. Snappers can potentially freeze you in place for a few seconds, so be careful.<br | + | There are several routes to reach Captain Bloodtongue; aim for the Southwest corner of the caves, or just use the route in the image below. The enemies in the easily-navigated part are earth elementals, whilst in the maze-like Southern part you will find pirates and snappers. Snappers can potentially freeze you in place for a few seconds, so be careful.<br[http://www.sacredwiki.org/images/Sacred_2/quests/Chapter01/Captain%20Bloodtongue/Bloodmouth%20Must%20Die/sacred2Bloodtongue3wt.jpg http://www.sacredwiki.org/images/Sacred_2/quests/Chapter01/Captain%20Bloodtongue/Bloodmouth%20Must%20Die/th_sacred2Bloodtongue3wt.jpg] <br> Talk to and defeat Bloodtongue, then return to Rengelwyn for your reward.<br> |
| − | [http:// | + | [http://www.sacredwiki.org/images/Sacred_2/quests/Chapter01/Captain%20Bloodtongue/Bloodmouth%20Must%20Die/sacred2CaptainBloodtongue3b.jpg http://www.sacredwiki.org/images/Sacred_2/quests/Chapter01/Captain%20Bloodtongue/Bloodmouth%20Must%20Die/th_sacred2CaptainBloodtongue3b.jpg] [http://www.sacredwiki.org/images/Sacred_2/quests/Chapter01/Captain%20Bloodtongue/Bloodmouth%20Must%20Die/sacred2CaptainBloodtongue3c.jpg http://www.sacredwiki.org/images/Sacred_2/quests/Chapter01/Captain%20Bloodtongue/Bloodmouth%20Must%20Die/th_sacred2CaptainBloodtongue3c.jpg] |
| Line 39: | Line 40: | ||
== Logbook Entry == | == Logbook Entry == | ||
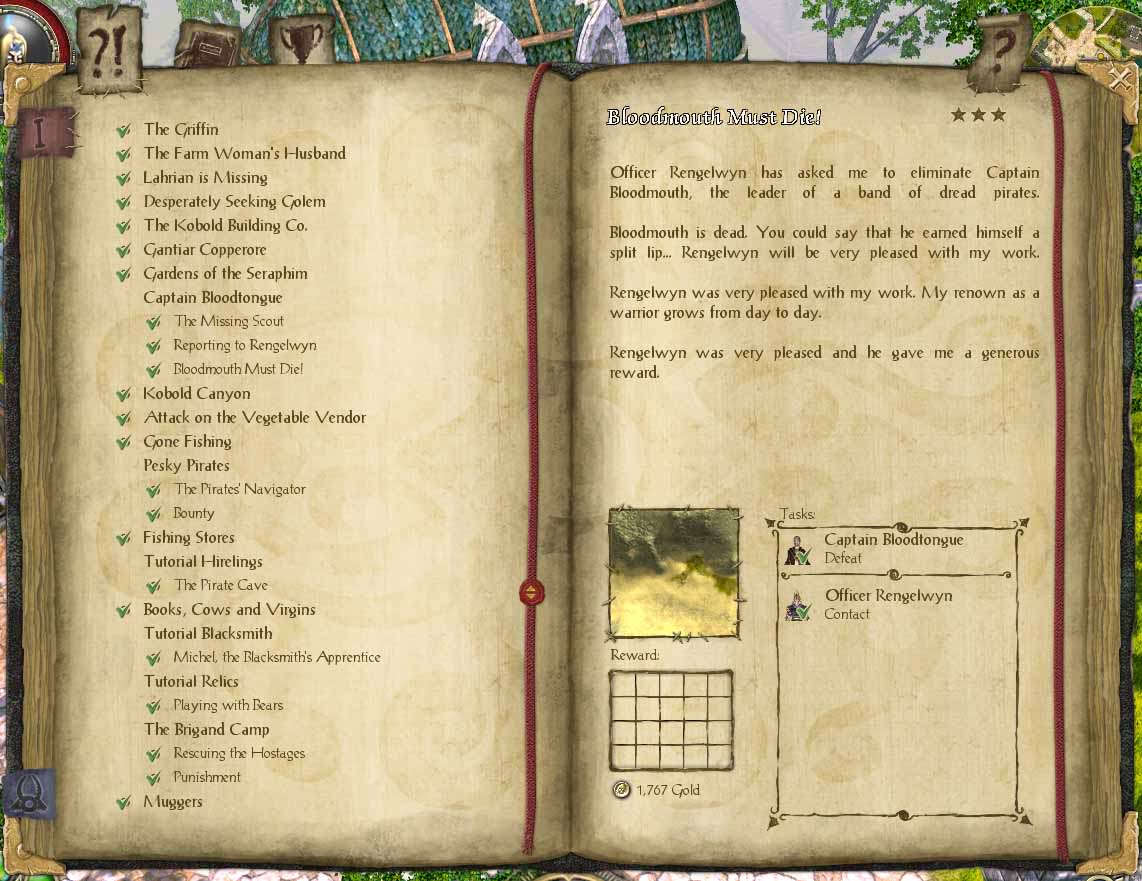
| − | [http:// | + | [http://www.sacredwiki.org/images/Sacred_2/quests/Chapter01/Captain%20Bloodtongue/Bloodmouth%20Must%20Die/S2LogBloodmouthMustDie.jpg http://www.sacredwiki.org/images/Sacred_2/quests/Chapter01/Captain%20Bloodtongue/Bloodmouth%20Must%20Die/th_S2LogBloodmouthMustDie.jpg] |
== Notes == | == Notes == | ||
Revision as of 08:48, 3 August 2009
|
|
Quick Walkthrough
- Talk to Officer Rengelwyn
- Kill Captain Bloodmouth/Bloodtongue
- Talk to Officer Rengelwyn
Detailed Walkthrough
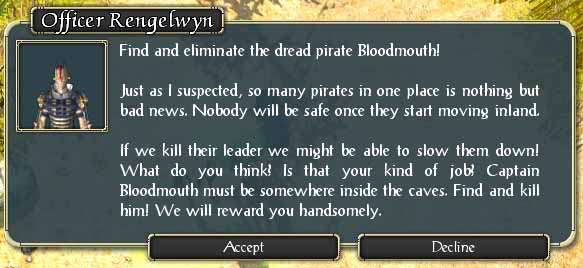
Talk to Officer Rengelwyn to learn that he wants you to track down and kill Captain Bloodtongue - the leader of the pirates Menatrin is hiding from.
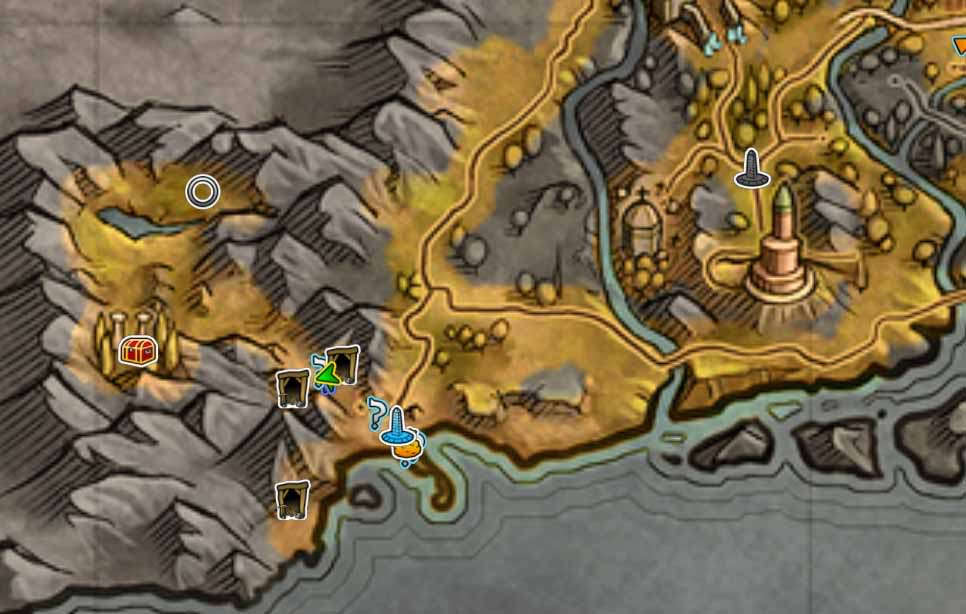
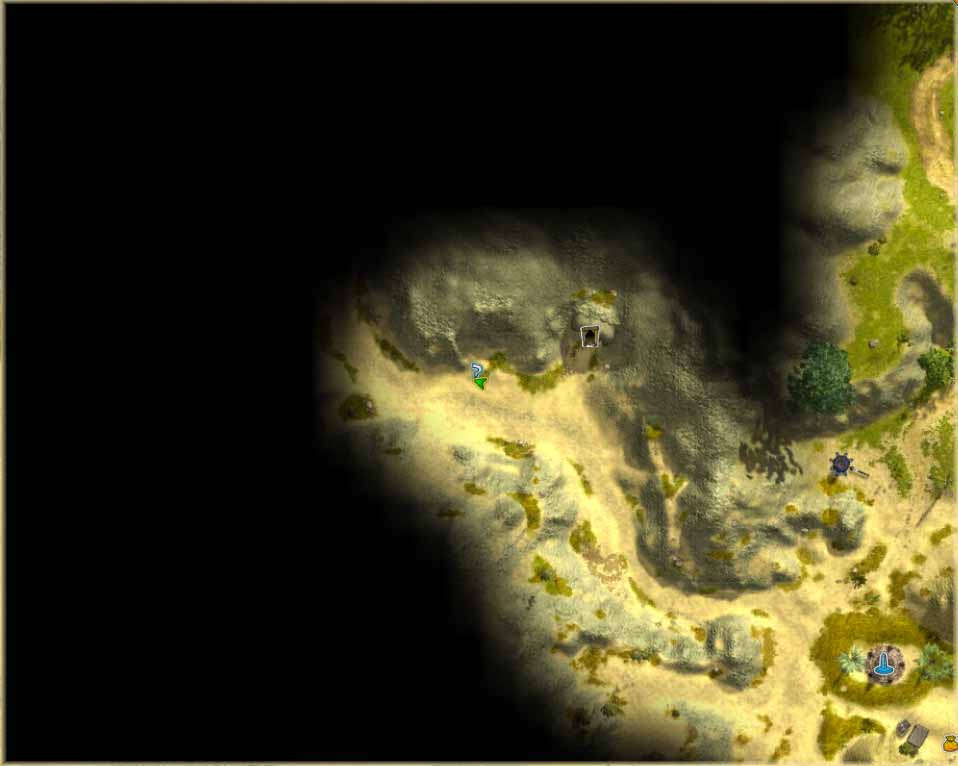
Return to Scout Menatrin's hiding place:
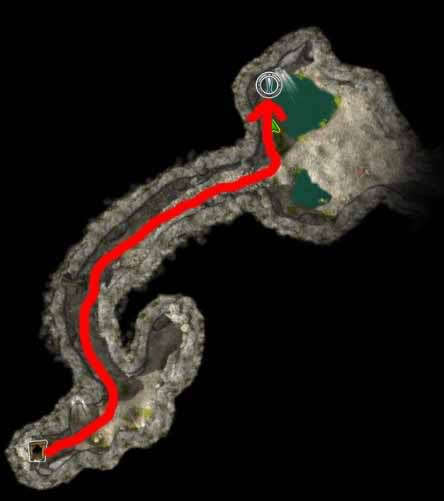
There are several routes to reach Captain Bloodtongue; aim for the Southwest corner of the caves, or just use the route in the image below. The enemies in the easily-navigated part are earth elementals, whilst in the maze-like Southern part you will find pirates and snappers. Snappers can potentially freeze you in place for a few seconds, so be careful.<br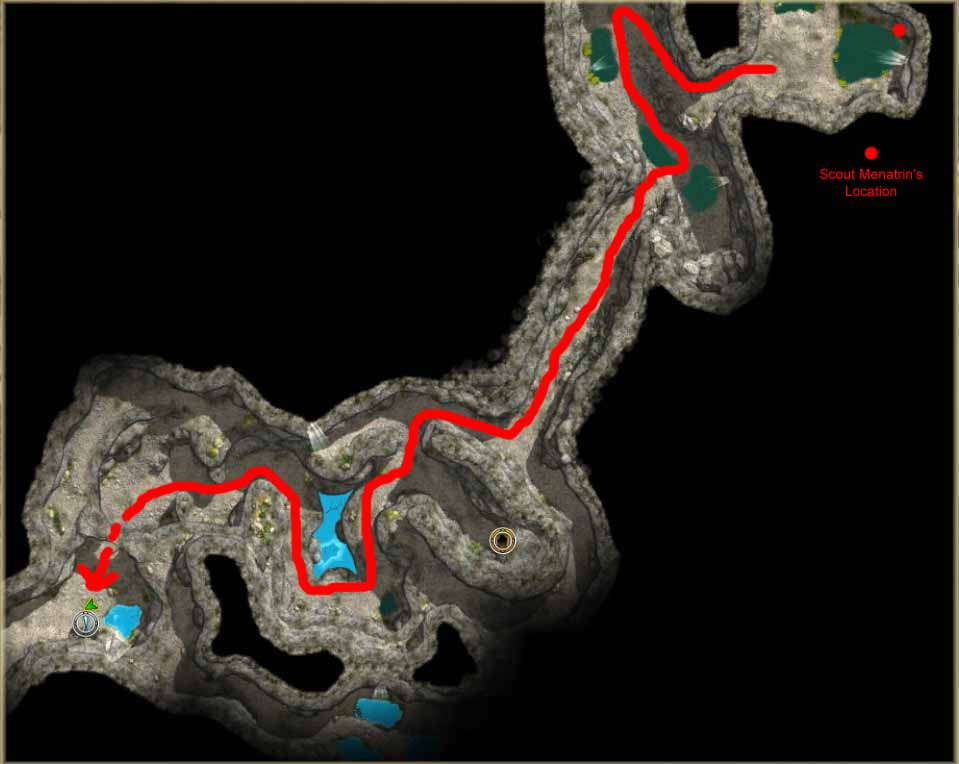
Talk to and defeat Bloodtongue, then return to Rengelwyn for your reward.
Logbook Entry
Notes
- Note: Although references are made to 'Captain Bloodmouth' several times, the enemy that you have to kill is definitely named 'Captain Bloodtongue', as is the quest chain
- Note: The door to the Southwest of Bloodtongue is a portal, but cannot be used...until...