Difference between revisions of "Sacred 2:Levied Tax"
(Edited for grammar) |
|||
| Line 26: | Line 26: | ||
== Detailed Walkthrough == | == Detailed Walkthrough == | ||
| − | Ok, so you decided to start doing the storyline campaign? Awesome! In the next few | + | Ok, so you decided to start doing the storyline campaign? Awesome! In the next few quest guides we'll guide you through the process, and help you in places where you might get stuck. |
| − | Well, starters first: Where do I start? Quite simple actually. Check the map on the top of the page, and find the house with the orange quest circle in it, right under the Sloeford Town square. In this house, on the second floor, you will find Principal Thordeth praying at, or standing near, his altar. | + | Well, for starters first: Where do I start? Quite simple actually. Check the map on the top of the page, and find the house with the orange quest circle in it, right under the Sloeford Town square. In this house, on the second floor, you will find Principal Thordeth praying at, or standing near, his altar. |
[http://s141.photobucket.com/albums/r64/promatolya/principalTrodeth.jpg http://i141.photobucket.com/albums/r64/promatolya/th_principalTrodeth.jpg] | [http://s141.photobucket.com/albums/r64/promatolya/principalTrodeth.jpg http://i141.photobucket.com/albums/r64/promatolya/th_principalTrodeth.jpg] | ||
| − | Talk to him when you find him. He will tell you that some bandits stole the entire annual tax levy. This is | + | Talk to him when you find him. He will tell you that some bandits stole the entire annual tax levy. This is ofcourse a serious problem. Seeing that you are on the 'good campaign' your character is shocked that such thievery still exists, and you decide to go after the scoundrels. |
Do so by following the left path first to the bridge to lead you over the river. As soon as you get close to the quest location, the map will indicate where to find the pouch of stolen jewels. So when the quest objective shifts position, follow the path indicated on the right map. | Do so by following the left path first to the bridge to lead you over the river. As soon as you get close to the quest location, the map will indicate where to find the pouch of stolen jewels. So when the quest objective shifts position, follow the path indicated on the right map. | ||
| Line 38: | Line 38: | ||
[http://s141.photobucket.com/albums/r64/promatolya/path2.jpg http://i141.photobucket.com/albums/r64/promatolya/th_path2.jpg] | [http://s141.photobucket.com/albums/r64/promatolya/path2.jpg http://i141.photobucket.com/albums/r64/promatolya/th_path2.jpg] | ||
| − | When you reach the location the map indicated, there will be some random | + | When you reach the location the map indicated, there will be some random enemies, but also 1 boss-type brigand. He has no fixed position, but when you reach the quest location, he is allways somewhere on your screen. When you kill him, he will drop the 'pouch with gems'. |
[http://s141.photobucket.com/albums/r64/promatolya/brigand1.jpg http://i141.photobucket.com/albums/r64/promatolya/th_brigand1.jpg] | [http://s141.photobucket.com/albums/r64/promatolya/brigand1.jpg http://i141.photobucket.com/albums/r64/promatolya/th_brigand1.jpg] | ||
| − | As soon as you pick up the pouch of gems, the map will indicate you have to go to | + | As soon as you pick up the pouch of gems, the map will indicate you have to go to Thylyssium. The easiest, and fastest way to get there, is by following the path below. It is however recommended that you also activate the resurrection monolith there, and grab the waypoint while you are at it. The monolith will slightly cut down on your traveling time further down the quest |
[http://s141.photobucket.com/albums/r64/promatolya/path3.jpg http://i141.photobucket.com/albums/r64/promatolya/th_path3.jpg] | [http://s141.photobucket.com/albums/r64/promatolya/path3.jpg http://i141.photobucket.com/albums/r64/promatolya/th_path3.jpg] | ||
| Line 66: | Line 66: | ||
As soon as you talk to him again, the first part of this quest will be completed. You will notice that after your conversation Liosilath still has the (?!) mark above his head. This is to activate the second part of the storyline quest in act 1 ([[Sacred 2:Through the Wall|Through the Wall]]). | As soon as you talk to him again, the first part of this quest will be completed. You will notice that after your conversation Liosilath still has the (?!) mark above his head. This is to activate the second part of the storyline quest in act 1 ([[Sacred 2:Through the Wall|Through the Wall]]). | ||
| − | |||
== Logbook Entry == | == Logbook Entry == | ||
Revision as of 23:34, 23 May 2009
|
|
Quick Walkthrough
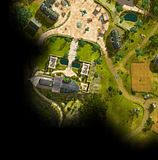
- Talk to Principal Trodeth, in the big house, directly south of the Sloeford town square (see map above)
- Go north, and retrieve the pouch of stolen tax money
- Deliver the bag of stolen jewelery to the Senator in Thylysium
- Talk to the Senate guard
- Take the Senate Guard's advice and go to the "Drunken Elf" Inn, to talk to Liosilath
- Take the purse with jewelery to Teacher Solael
- Return to the Thylysium acadamy to talk to Liosilath again.
Detailed Walkthrough
Ok, so you decided to start doing the storyline campaign? Awesome! In the next few quest guides we'll guide you through the process, and help you in places where you might get stuck.
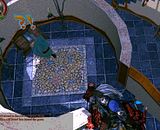
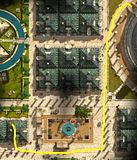
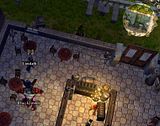
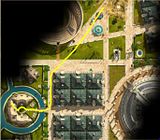
Well, for starters first: Where do I start? Quite simple actually. Check the map on the top of the page, and find the house with the orange quest circle in it, right under the Sloeford Town square. In this house, on the second floor, you will find Principal Thordeth praying at, or standing near, his altar.
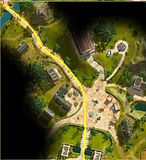
Talk to him when you find him. He will tell you that some bandits stole the entire annual tax levy. This is ofcourse a serious problem. Seeing that you are on the 'good campaign' your character is shocked that such thievery still exists, and you decide to go after the scoundrels. Do so by following the left path first to the bridge to lead you over the river. As soon as you get close to the quest location, the map will indicate where to find the pouch of stolen jewels. So when the quest objective shifts position, follow the path indicated on the right map.
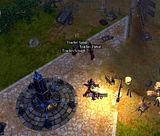
When you reach the location the map indicated, there will be some random enemies, but also 1 boss-type brigand. He has no fixed position, but when you reach the quest location, he is allways somewhere on your screen. When you kill him, he will drop the 'pouch with gems'.
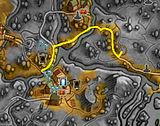
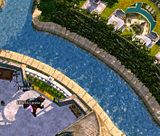
As soon as you pick up the pouch of gems, the map will indicate you have to go to Thylyssium. The easiest, and fastest way to get there, is by following the path below. It is however recommended that you also activate the resurrection monolith there, and grab the waypoint while you are at it. The monolith will slightly cut down on your traveling time further down the quest
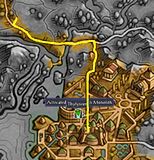
When you reach the destination, there will be a few senate guards. Talk to the one that has the (?!) marks on his head. He will tell you that you don't just bribe people in broad daylight. Go to the 'Drunken Elf' inn, and meet up with the contact person there. Bribing wasn't your plan all along, and you notice something is off the hook here. You decide to follow up on his advice though, and you head for the drunken elf inn. You are best off following this path.
When you get there, a person called Liosilath should be in the inn. Find him, and talk to him
He will tell you that the bribing, to which the senate guard reffered, is part of an elaborate corrupt governament. The jewels would be in better hands when they are delivered to the local teacher, who is building a school for the children. Obviously education is a good thing (even though children often seem to disagree), and you decide this Liosilath person is completely right, and you head to teacher Solael, to hand him the stolen tax money. Do so either by running back to the monolith, back the way you came, or press f12 if you activated the monolith like indicated. This way you respawn next to the monolith. Solael, and some fellow teachers, can be found right next to the monolith.
He thanks you, and praises Liosilath on his fine work. Seeing the fact that everyone seems so impressed by this figure, you decide to go to the academy and talk to this Liosilath person again, and take up on what he has to tell you. Follow this path to get to the academy, and find Liosilath inside.
As soon as you talk to him again, the first part of this quest will be completed. You will notice that after your conversation Liosilath still has the (?!) mark above his head. This is to activate the second part of the storyline quest in act 1 (Through the Wall).
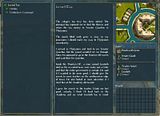
Logbook Entry
Notes
- Don't forget to take the waypoint (WP) and monolith on your way to see the Senate Guard in Thylysium.
- On your way to thylysium you see a gang of bandits attacking a lady in robes. Saving her from the bandits is a hidden quest, which grants you a significant experience bonus, when you talk to her husband, right upon entering Thylysium.
