Difference between revisions of "Sacred 2:Renders"
Jump to navigation
Jump to search
(→Ice and Blood Renders: updated, formatted) |
(→Fallen Angel Renders: added various renders) |
||
| Line 2: | Line 2: | ||
=='''Fallen Angel Renders'''== | =='''Fallen Angel Renders'''== | ||
| + | ===Character Backdrop Screens=== | ||
| + | ---- | ||
| + | {|valign="top" width="100%" padding="10px" style="font-size:1em;font-weight:bold;text-align:center" | ||
| + | |-valign="top" | ||
| + | |||
| + | |width="180px"|Dryad Backdrop | ||
| + | <center>{{S2frame|[[File:Dryadlight.jpg|x160px]]|none}}</center> | ||
| + | |||
| + | |width="180px"|Dryad Backdrop 2 | ||
| + | <center>{{S2frame|[[File:Dryadshadow.jpg|x160px]]|none}}</center> | ||
| + | |||
| + | |width="180px"|High Elf Backdrop 1 | ||
| + | <center>{{S2frame|[[File:High Elf backdrop 1.jpg|x160px]]|none}}</center> | ||
| + | |||
| + | |width="180px"|High Elf Backdrop 2 | ||
| + | <center>{{S2frame|[[File:High Elf backdrop 2.jpg|x160px]]|none}}</center> | ||
| + | |} | ||
| + | |||
| + | |||
| + | {|valign="top" width="100%" padding="10px" style="font-size:1em;font-weight:bold;text-align:center" | ||
| + | |-valign="top" | ||
| + | |||
| + | |width="180px"|Inquisitor Backdrop | ||
| + | <center>{{S2frame|[[File:Inquisitor backdrop 4.jpg|x160px]]|none}}</center> | ||
| + | |||
| + | |width="180px"|Seraphim Backdrop 2 | ||
| + | <center>{{S2frame|[[File:Seraphim backdrop 0.jpg|x160px]]|none}}</center> | ||
| + | |||
| + | |width="180px"|Shadow Warrior Backdrop | ||
| + | <center>{{S2frame|[[File:SW Loading Screen.jpg|x160px]]|none}}</center> | ||
| + | |||
| + | |width="180px"|Temple Guardian Backdrop 1 | ||
| + | <center>{{S2frame|[[File:Tg light path.jpg|x160px]]|none}}</center> | ||
| + | |} | ||
| + | |||
| + | |||
| + | {|valign="top" width="100%" padding="10px" style="font-size:1em;font-weight:bold;text-align:center" | ||
| + | |-valign="top" | ||
| + | |||
| + | |width="180px"|Temple Guardian Backdrop 2 | ||
| + | <center>{{S2frame|[[File:Tg shadow path.jpg|x160px]]|none}}</center> | ||
| + | |} | ||
| + | |||
| + | ===Various Character Renderings=== | ||
| + | ---- | ||
| + | {|valign="top" width="100%" padding="10px" style="font-size:1em;font-weight:bold;text-align:center" | ||
| + | |-valign="top" | ||
| + | |||
| + | |width="180px"|Seraphim | ||
| + | <center>{{S2frame|[[File:Renderings seraphim 4.jpg|x160px]]|none}}</center> | ||
| + | |||
| + | |width="180px"|Seraphim 2 | ||
| + | <center>{{S2frame|[[File:Renderings seraphim black.jpg|x160px]]|none}}</center> | ||
| + | |||
| + | |width="180px"|Seraphim 3 | ||
| + | <center>{{S2frame|[[File:Renderings seraphim gradient.jpg|x160px]]|none}}</center> | ||
| + | |||
| + | |width="180px"|Seraphim 4 | ||
| + | <center>{{S2frame|[[File:Sacred2-Seraphim.jpg|x160px]]|none}}</center> | ||
| + | |||
| + | |} | ||
| + | |||
| + | |||
| + | {|valign="top" width="100%" padding="10px" style="font-size:1em;font-weight:bold;text-align:center" | ||
| + | |-valign="top" | ||
| + | |||
| + | |width="180px"|Shadow Warrior | ||
| + | <center>{{S2frame|[[File:Renderings SWdark black05.jpg|x160px]]|none}}</center> | ||
| + | |||
| + | |width="180px"|Shadow Warrior 2 | ||
| + | <center>{{S2frame|[[File:Renderings SWdark black04.jpg|x160px]]|none}}</center> | ||
| + | |||
| + | |width="180px"|Shadow Warrior 3 | ||
| + | <center>{{S2frame|[[File:Renderings SWdark black03.jpg|x160px]]|none}}</center> | ||
| + | |||
| + | |width="180px"|Shadow Warrior 4 | ||
| + | <center>{{S2frame|[[File:Renderings SWdark black02.jpg|x160px]]|none}}</center> | ||
| + | |||
| + | |} | ||
| + | |||
| + | |||
| + | {|valign="top" width="100%" padding="10px" style="font-size:1em;font-weight:bold;text-align:center" | ||
| + | |-valign="top" | ||
| + | |||
| + | |width="180px"|High Elf Power | ||
| + | <center>{{S2frame|[[File:Renderings HE 1.jpg|x160px]]|none}}</center> | ||
| + | |||
| + | |} | ||
| + | |||
| + | '''Enemies''' | ||
| + | ---- | ||
{|valign="top" width="100%" padding="10px" style="font-size:1em;font-weight:bold;text-align:center" | {|valign="top" width="100%" padding="10px" style="font-size:1em;font-weight:bold;text-align:center" | ||
|-valign="top" | |-valign="top" | ||
Revision as of 02:55, 7 September 2013
Contents
Fallen Angel Renders
Character Backdrop Screens
Dryad Backdrop
|
Dryad Backdrop 2
|
High Elf Backdrop 1
|
High Elf Backdrop 2
| ||||||||||||||||||||||||||||||||||||


Inquisitor Backdrop
|
Seraphim Backdrop 2
|
Shadow Warrior Backdrop
|
Temple Guardian Backdrop 1
| ||||||||||||||||||||||||||||||||||||


Temple Guardian Backdrop 2
| |||||||||

Various Character Renderings
Seraphim
|
Seraphim 2
|
Seraphim 3
|
Seraphim 4
| ||||||||||||||||||||||||||||||||||||


Shadow Warrior
|
Shadow Warrior 2
|
Shadow Warrior 3
|
Shadow Warrior 4
| ||||||||||||||||||||||||||||||||||||


High Elf Power
| |||||||||

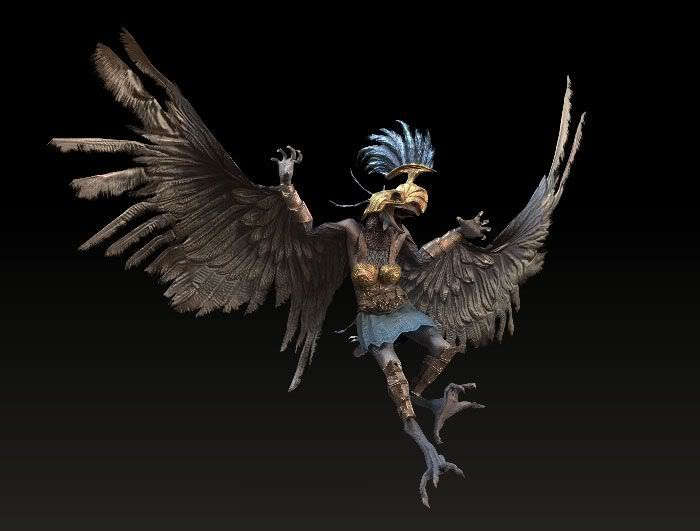
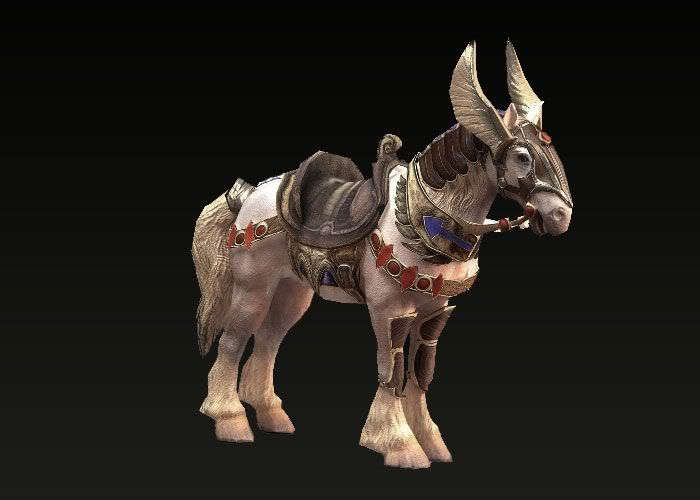
Enemies
Harpy
|
Golem
|
Horse
| |||||||||||||||||||||||||||

Ice and Blood Renders
Ice Phoenix
|
Phoenix Wire-to-Finish
|
Dragon
|
Dragon Wire-to-Finish
| ||||||||||||||||||||||||||||||||||||
Berserk Wire-to-Finish 1
|
Berserk Wire-to-Finish 2
|
Berserk Wire-to-Finish 3
|
Dragon Mage Wire-to-Finish 1
| ||||||||||||||||||||||||||||||||||||
Dragon Mage Wire-to-Finish 2
|
Dragon Mage Wire-to-Finish 3
|
Dragon Magic Armor Wire-to-Finish 1
|
Dragon Magic Armor Wire-to-Finish 2
| ||||||||||||||||||||||||||||||||||||
Dragon Magic Armor Wire-to-Finish 3
|
Dragon Special Armor Wire-to-Finish 1
|
Dragon Special Armor Wire-to-Finish 2
|
Dragon Special Armor Wire-to-Finish 3
| ||||||||||||||||||||||||||||||||||||
Carrier Imp
| |||||||||||||||||||||||||||||||||||||||


