Difference between revisions of "Sacred 2:The Pirate Cave"
(added m-map start location, edited quick walkthrough to match 'standard' style, added pix to detailed walkthrough, swapped logbook text for img) |
m (updated img links, added hireling tips to notes) |
||
| Line 15: | Line 15: | ||
* '''Next Quest:''' None | * '''Next Quest:''' None | ||
* '''Reward:''' [[Sacred 2:Gold|Gold]] | * '''Reward:''' [[Sacred 2:Gold|Gold]] | ||
| − | |WIDTH="20%" VALIGN="TOP"|[http:// | + | |WIDTH="20%" VALIGN="TOP"| [http://www.sacredwiki.org/images/Sacred_2/quests/Chapter01/Tutorial%20Hirelings%20aka%20The%20Pirate%20Cave/sacred2ThePirateCavem.jpg http://www.sacredwiki.org/images/Sacred_2/quests/Chapter01/Tutorial%20Hirelings%20aka%20The%20Pirate%20Cave/th_sacred2ThePirateCavem.jpg] <br><br> [http://www.sacredwiki.org/images/Sacred_2/quests/Chapter01/Tutorial%20Hirelings%20aka%20The%20Pirate%20Cave/sacred2TutorialHirelings.jpg http://www.sacredwiki.org/images/Sacred_2/quests/Chapter01/Tutorial%20Hirelings%20aka%20The%20Pirate%20Cave/th_sacred2TutorialHirelings.jpg] |
|} | |} | ||
| Line 29: | Line 29: | ||
== Detailed Walkthrough == | == Detailed Walkthrough == | ||
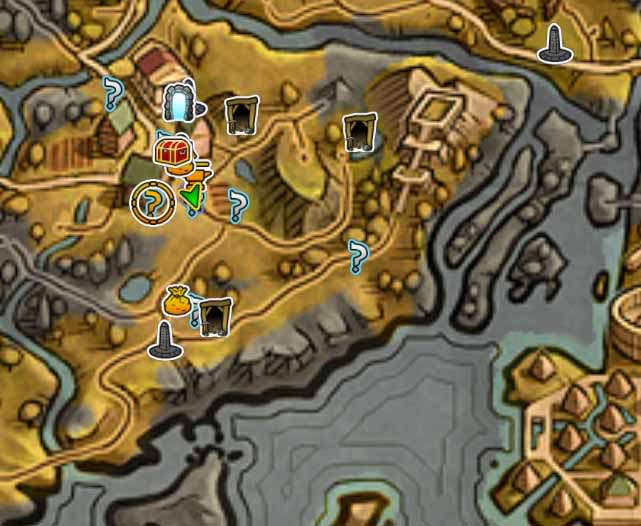
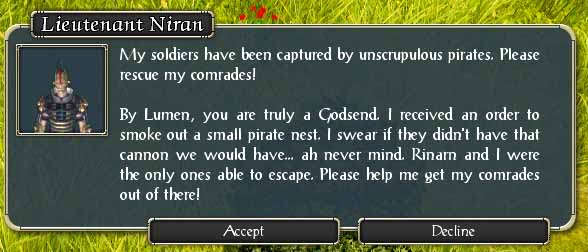
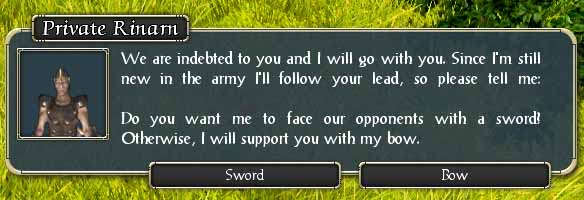
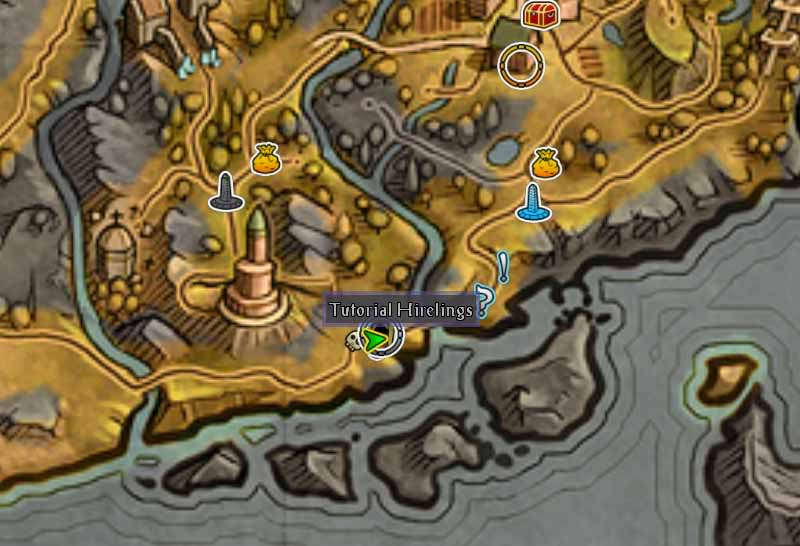
Talk to Lieutenant Niram South of Sloeford to get the quest (he’s the one on the floor), then talk to Private Rinarn to gain him as a hireling. It’s usually best to set him as a bow user, since this makes him stand off from enemies and traps and slightly increases his chances of surviving. With the new hireling commands (# to set aggro distance and / to set group/individual attack modes) you can also try and make him stay nearby and not go haring off into battle without you...but it’s probably still best if you just slaughter everything in your path, whatever level it is.<br> | Talk to Lieutenant Niram South of Sloeford to get the quest (he’s the one on the floor), then talk to Private Rinarn to gain him as a hireling. It’s usually best to set him as a bow user, since this makes him stand off from enemies and traps and slightly increases his chances of surviving. With the new hireling commands (# to set aggro distance and / to set group/individual attack modes) you can also try and make him stay nearby and not go haring off into battle without you...but it’s probably still best if you just slaughter everything in your path, whatever level it is.<br> | ||
| − | [http:// | + | [http://www.sacredwiki.org/images/Sacred_2/quests/Chapter01/Tutorial%20Hirelings%20aka%20The%20Pirate%20Cave/sacred2ThePirateCavea.jpg http://www.sacredwiki.org/images/Sacred_2/quests/Chapter01/Tutorial%20Hirelings%20aka%20The%20Pirate%20Cave/th_sacred2ThePirateCavea.jpg] [http://www.sacredwiki.org/images/Sacred_2/quests/Chapter01/Tutorial%20Hirelings%20aka%20The%20Pirate%20Cave/sacred2ThePirateCaveb.jpg http://www.sacredwiki.org/images/Sacred_2/quests/Chapter01/Tutorial%20Hirelings%20aka%20The%20Pirate%20Cave/th_sacred2ThePirateCaveb.jpg] <br> |
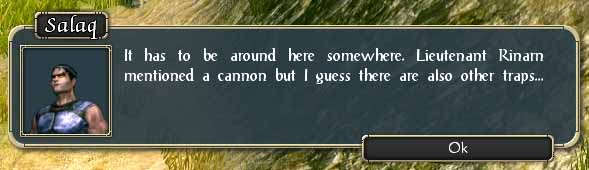
| − | Head South to Happy Cow Farm, and then take the Southwest path towards the Golden Coast. Head West along the Golden Coast and cross over the small inlet. A message will pop up to warn you that you are close to your destination, and that there are cannon and traps to watch out for. Keep to the coast as you head West and you will find a cave entrance with a soldier standing outside. You should find that you are directly South of the stone circle in the quest [[Sacred 2:The Lost Amulets|The Lost Amulets]].<br> | + | Head South to Happy Cow Farm, and then take the Southwest path towards the Golden Coast. Head West along the Golden Coast and cross over the small inlet. A message will pop up to warn you that you are close to your destination, and that there are cannon and traps to watch out for.<br> |
| − | [http:// | + | [http://www.sacredwiki.org/images/Sacred_2/quests/Chapter01/Tutorial%20Hirelings%20aka%20The%20Pirate%20Cave/sacred2ThePirateCavec.jpg http://www.sacredwiki.org/images/Sacred_2/quests/Chapter01/Tutorial%20Hirelings%20aka%20The%20Pirate%20Cave/th_sacred2ThePirateCavec.jpg] <br> |
| + | Keep to the coast as you head West and you will find a cave entrance with a soldier standing outside. You should find that you are directly South of the stone circle in the quest [[Sacred 2:The Lost Amulets|The Lost Amulets]].<br> | ||
| + | [http://www.sacredwiki.org/images/Sacred_2/quests/Chapter01/Tutorial%20Hirelings%20aka%20The%20Pirate%20Cave/sacred2ThePirateCavewt1.jpg http://www.sacredwiki.org/images/Sacred_2/quests/Chapter01/Tutorial%20Hirelings%20aka%20The%20Pirate%20Cave/th_sacred2ThePirateCavewt1.jpg] <br> | ||
Apply any buffs you want running whilst in the cave, and then go inside. If you want Private Rinarn to have the best chance of survival (recommended) you need to move quickly, making sure you take out any traps before he can run onto them, and taking out the cannons as quickly as you can. Keep a sharp eye on his health bar, and drink a light health potion whenever his health hits 50% or lower. I would recommend that you leave looting crates/boxes etc. until you are on the way out with no enemies left, and pick up loot dropped by enemies as it falls.<br><br> | Apply any buffs you want running whilst in the cave, and then go inside. If you want Private Rinarn to have the best chance of survival (recommended) you need to move quickly, making sure you take out any traps before he can run onto them, and taking out the cannons as quickly as you can. Keep a sharp eye on his health bar, and drink a light health potion whenever his health hits 50% or lower. I would recommend that you leave looting crates/boxes etc. until you are on the way out with no enemies left, and pick up loot dropped by enemies as it falls.<br><br> | ||
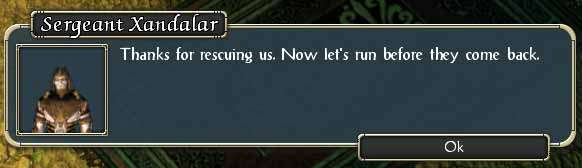
Once you have killed the 5 named pirates the soldiers will be freed. Talk to them to gain them as hirelings and lead them all back to the exit of the cave.<br> | Once you have killed the 5 named pirates the soldiers will be freed. Talk to them to gain them as hirelings and lead them all back to the exit of the cave.<br> | ||
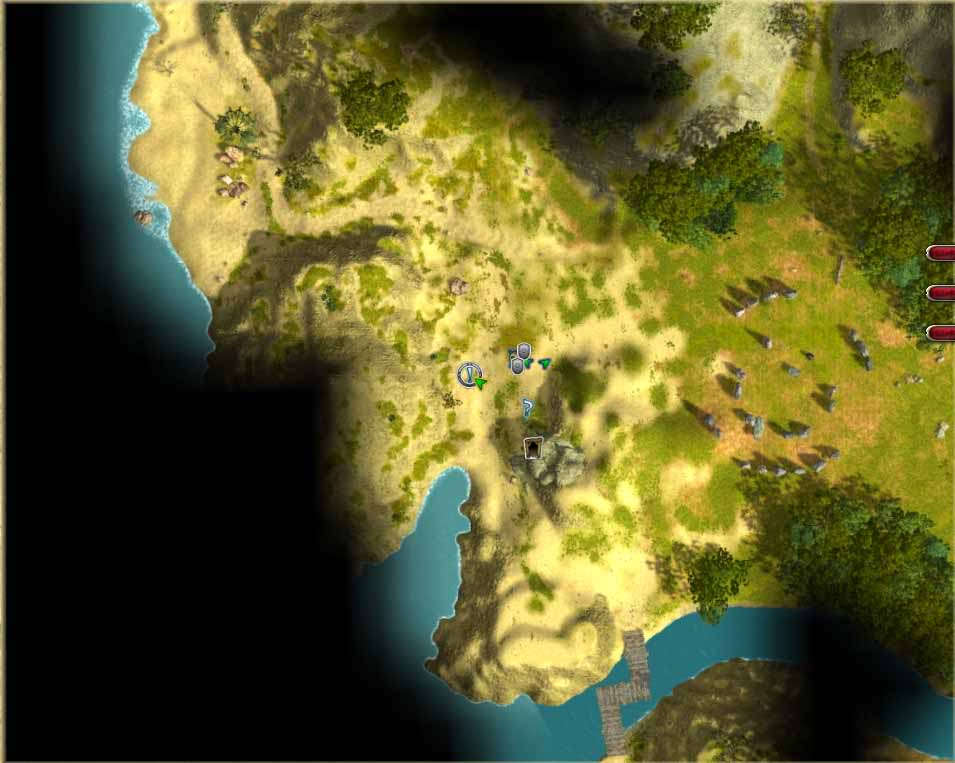
| − | [http://s165.photobucket.com/albums/u53/zephyr_goldwing/Sacred2%20Wiki%20Imgs/sacred2ThePirateCavewt2.jpg http://i165.photobucket.com/albums/u53/zephyr_goldwing/Sacred2%20Wiki%20Imgs/th_sacred2ThePirateCavewt2.jpg]<br>Quickly run to Niran (now Southwest of the cave) to complete the quest and get your reward before any enemies in the vicinity can deal you a nasty, last-minute fail.<br> | + | [http://s165.photobucket.com/albums/u53/zephyr_goldwing/Sacred2%20Wiki%20Imgs/sacred2ThePirateCavewt2.jpg http://i165.photobucket.com/albums/u53/zephyr_goldwing/Sacred2%20Wiki%20Imgs/th_sacred2ThePirateCavewt2.jpg] [http://www.sacredwiki.org/images/Sacred_2/quests/Chapter01/Tutorial%20Hirelings%20aka%20The%20Pirate%20Cave/sacred2ThePirateCaved.jpg http://www.sacredwiki.org/images/Sacred_2/quests/Chapter01/Tutorial%20Hirelings%20aka%20The%20Pirate%20Cave/th_sacred2ThePirateCaved.jpg] <br> Quickly run to Niran (now Southwest of the cave) to complete the quest and get your reward before any enemies in the vicinity can deal you a nasty, last-minute fail.<br> |
| − | [http:// | + | [http://www.sacredwiki.org/images/Sacred_2/quests/Chapter01/Tutorial%20Hirelings%20aka%20The%20Pirate%20Cave/sacred2ThePirateCavewt3.jpg http://www.sacredwiki.org/images/Sacred_2/quests/Chapter01/Tutorial%20Hirelings%20aka%20The%20Pirate%20Cave/th_sacred2ThePirateCavewt3.jpg] [http://www.sacredwiki.org/images/Sacred_2/quests/Chapter01/Tutorial%20Hirelings%20aka%20The%20Pirate%20Cave/sacred2ThePirateCavee.jpg http://www.sacredwiki.org/images/Sacred_2/quests/Chapter01/Tutorial%20Hirelings%20aka%20The%20Pirate%20Cave/th_sacred2ThePirateCavee.jpg] |
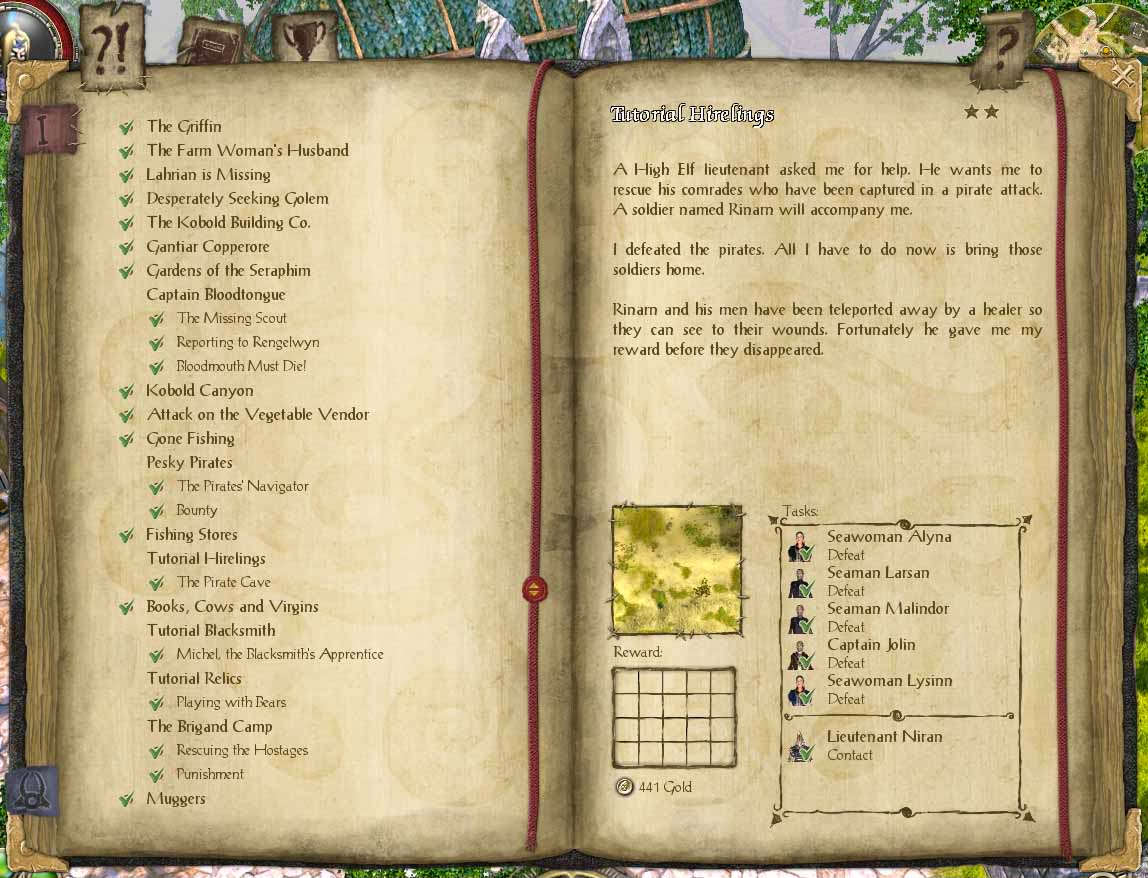
== Logbook Entry == | == Logbook Entry == | ||
| − | [http:// | + | [http://www.sacredwiki.org/images/Sacred_2/quests/Chapter01/Tutorial%20Hirelings%20aka%20The%20Pirate%20Cave/S2LogTutorialHirelings.jpg http://www.sacredwiki.org/images/Sacred_2/quests/Chapter01/Tutorial%20Hirelings%20aka%20The%20Pirate%20Cave/th_S2LogTutorialHirelings.jpg] |
| Line 44: | Line 46: | ||
== Notes == | == Notes == | ||
| + | * Note: Despite being a 'tutorial' on hirelings you are given no useful information (or even hints) about 'hirelings'. Private Rinarn is also the only 'hireling' whose method of attack (bow/sword) you can choose in any way. | ||
| + | * Hireling tips: | ||
| + | :# Drinking a health potion will heal any hirelings you have as well as yourself; this can be vital on escort quests | ||
| + | :# v2.40 (PC) can use '/' to determine whether hirelings attack individually or as a group | ||
| + | :# v2.40 (PC) can use '#' to determine how far away from the PC hirelings will wander | ||
* Note: Private Rinarn can be a major pain in this quest, since if he dies Lieutenant Niran is not impressed (even if you get his other men out) and you ‘fail’ the quest. | * Note: Private Rinarn can be a major pain in this quest, since if he dies Lieutenant Niran is not impressed (even if you get his other men out) and you ‘fail’ the quest. | ||
* Note: It is easy to pick up the quest [[Sacred 2:Fishing Stores|Fishing Stores]] and the first part of the chain quest [[Sacred 2:Pesky Pirates|Pesky Pirates]] whilst doing this quest; the quest giver for Fishing Stores is on the route, and the quest giver for Pesky Pirates is at the cave where this quest takes place – the first part of Pesky Pirates also takes place in this cave and can be completed at the same time. | * Note: It is easy to pick up the quest [[Sacred 2:Fishing Stores|Fishing Stores]] and the first part of the chain quest [[Sacred 2:Pesky Pirates|Pesky Pirates]] whilst doing this quest; the quest giver for Fishing Stores is on the route, and the quest giver for Pesky Pirates is at the cave where this quest takes place – the first part of Pesky Pirates also takes place in this cave and can be completed at the same time. | ||
Revision as of 09:48, 3 August 2009
|
|
Quick Walkthrough
- Talk to Lieutenant Niram
- Talk to Private Rinarn
- Rescue the soldiers
- Talk to Lieutenant Niram
Detailed Walkthrough
Talk to Lieutenant Niram South of Sloeford to get the quest (he’s the one on the floor), then talk to Private Rinarn to gain him as a hireling. It’s usually best to set him as a bow user, since this makes him stand off from enemies and traps and slightly increases his chances of surviving. With the new hireling commands (# to set aggro distance and / to set group/individual attack modes) you can also try and make him stay nearby and not go haring off into battle without you...but it’s probably still best if you just slaughter everything in your path, whatever level it is.
Head South to Happy Cow Farm, and then take the Southwest path towards the Golden Coast. Head West along the Golden Coast and cross over the small inlet. A message will pop up to warn you that you are close to your destination, and that there are cannon and traps to watch out for.
Keep to the coast as you head West and you will find a cave entrance with a soldier standing outside. You should find that you are directly South of the stone circle in the quest The Lost Amulets.
Apply any buffs you want running whilst in the cave, and then go inside. If you want Private Rinarn to have the best chance of survival (recommended) you need to move quickly, making sure you take out any traps before he can run onto them, and taking out the cannons as quickly as you can. Keep a sharp eye on his health bar, and drink a light health potion whenever his health hits 50% or lower. I would recommend that you leave looting crates/boxes etc. until you are on the way out with no enemies left, and pick up loot dropped by enemies as it falls.
Once you have killed the 5 named pirates the soldiers will be freed. Talk to them to gain them as hirelings and lead them all back to the exit of the cave.

Quickly run to Niran (now Southwest of the cave) to complete the quest and get your reward before any enemies in the vicinity can deal you a nasty, last-minute fail.

Logbook Entry
Notes
- Note: Despite being a 'tutorial' on hirelings you are given no useful information (or even hints) about 'hirelings'. Private Rinarn is also the only 'hireling' whose method of attack (bow/sword) you can choose in any way.
- Hireling tips:
- Drinking a health potion will heal any hirelings you have as well as yourself; this can be vital on escort quests
- v2.40 (PC) can use '/' to determine whether hirelings attack individually or as a group
- v2.40 (PC) can use '#' to determine how far away from the PC hirelings will wander
- Note: Private Rinarn can be a major pain in this quest, since if he dies Lieutenant Niran is not impressed (even if you get his other men out) and you ‘fail’ the quest.
- Note: It is easy to pick up the quest Fishing Stores and the first part of the chain quest Pesky Pirates whilst doing this quest; the quest giver for Fishing Stores is on the route, and the quest giver for Pesky Pirates is at the cave where this quest takes place – the first part of Pesky Pirates also takes place in this cave and can be completed at the same time.