Difference between revisions of "Sacred 2:Almost Godlike"
m |
Gogoblender (talk | contribs) |
||
| (9 intermediate revisions by 5 users not shown) | |||
| Line 1: | Line 1: | ||
| − | |||
| − | |||
<div class="plainlinks"> | <div class="plainlinks"> | ||
{|WIDTH="100%" | {|WIDTH="100%" | ||
| Line 6: | Line 4: | ||
|WIDTH="35%" VALIGN="TOP"| | |WIDTH="35%" VALIGN="TOP"| | ||
* '''Quest Objective:''' Eliminate the dragon [[Sacred 2:Magmadur|Magmadur]] | * '''Quest Objective:''' Eliminate the dragon [[Sacred 2:Magmadur|Magmadur]] | ||
| − | * '''Quest Difficulty:''' | + | * '''Quest Difficulty:''' 5 Stars |
| − | * '''Quest Giver:''' | + | * '''Quest Giver:''' [[Sacred 2:Nicole|Seraphim Nicole]] |
| − | * '''Location(s):''' | + | * '''Location(s):''' [[Sacred 2:Seraphim_Island|Seraphim Island]] |
| − | * '''Prerequisite Quest:''' | + | * '''Prerequisite Quest:''' [[Sacred 2:The Arena Above the Clouds|The Arena Above the Clouds]] |
| − | * '''Next Quest:''' | + | * '''Next Quest:''' None |
| − | * '''Reward:''' | + | * '''Reward:''' [[Sacred 2:Gold|Gold]], [[Sacred 2:Experience|Experience]] |
| − | |WIDTH="50%" VALIGN="TOP"| | + | |WIDTH="50%" VALIGN="TOP"| |
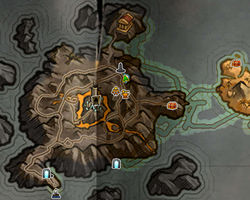
| − | + | {{S2frame|[[Image:Nicole worldmap.jpg|250px]][[Image:Nicole map.jpg|250px]]|right|'''[[Sacred 2:Map of Ancaria|View the Ancaria Interactive Map]]'''}} | |
| − | {{S2frame|[[Image: | ||
|} | |} | ||
{|WIDTH="100%" | {|WIDTH="100%" | ||
|WIDTH="60%" VALIGN="TOP"| | |WIDTH="60%" VALIGN="TOP"| | ||
== Quick Walkthrough == | == Quick Walkthrough == | ||
| − | + | * Talk to the [[Sacred 2:Nicole|Seraphim Nicole]]. She will teleport you to the dragon's location. | |
| − | * | + | * Talk to [[Sacred 2:Magmadur|Magmadur]], the dragon. |
| − | * | + | * Kill Magmadur. You will automatically be teleported back to Nicole's location. |
| − | * | + | * Talk to Nicole again to get your reward. |
| − | |WIDTH="40%" VALIGN="TOP"|{{S2frame|[[Image: | + | |WIDTH="40%" VALIGN="TOP"|{{S2frame|[[Image:Almost godlike camera1.jpg|500px]]}} |
|} | |} | ||
== Detailed Walkthrough == | == Detailed Walkthrough == | ||
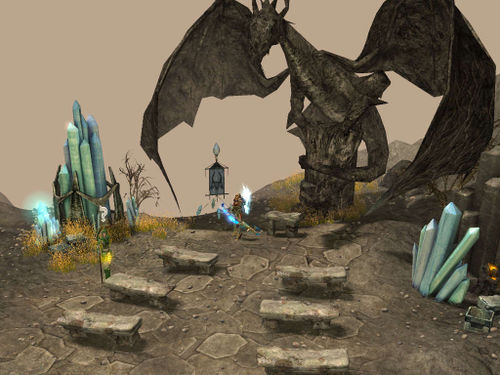
| − | + | Starting from the Resurrection Monolith in the northeast of the Seraphim Island, travel south along the road. After going a short distance, there will be an opening to the east with benches and a dragon statue commemorating the alliance between the Dragons and the Seraphim. On the north side of this opening, you will find a Seraphim named Nicole. Nicole will tell you about a marauding dragon named Magmadur. The dragon has eaten a Seraphim named Katharina, and, for that, Nicole asks you to kill Magmadur.<br> | |
| − | + | ''This dialog is different for the [[Sacred 2:Seraphim|Seraphim]] and for the other characters.''<br> | |
| + | '''Seraphim's version:''' | ||
| + | {{S2 Dialogue|NPC NAME=Nicole|PORTRAIT FILE NAME=dialog553.png|DIALOGUE=Kill Magmadur the dragon!<br /><br /> | ||
| + | Hello sister. As you know, the Seraphim and the dragons were once allies, but that was long ago. Recently the dragon Magmadur has become a thorn in our side. He's been destroying Temples and has devastated the area several times. That alone wouldn't be reason for violence, but he also killed our sister Katharina! She tried to reason with him, and he killed her just for that! Sophia has ordered us to end his miserable existence. Are you willing to punish Magmadur for his crimes? I’ll send you to his cave right away.}} | ||
| − | + | '''Other characters' version:''' | |
| − | {{ | + | {{S2 Dialogue|NPC NAME=Nicole|PORTRAIT FILE NAME=dialog553.png|DIALOGUE=Kill Magmadur the dragon!<br /><br /> |
| − | <br | + | The Seraphim and the dragons were once allies, but that was long ago. Today we mostly go our separate ways. Recently the dragon Magmadur has become a thorn in our side. He's been destroying Temples and has devastated the area several times. That alone wouldn't be reason for violence, but he also killed our ambassador, my sister Katharina. That's why Sophia has sentenced him to death. Are you willing to punish Magmadur for his crimes? I'll send you to his cave right away.}} |
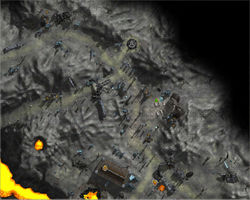
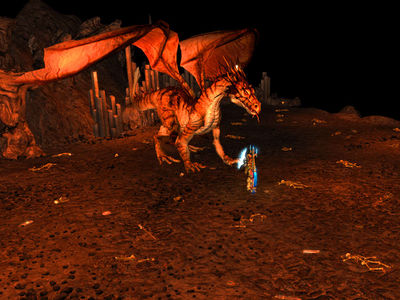
| − | + | Once you agree, Nicole will teleport you to the dragon's lair. <br> | |
| − | {{S2frame|[[Image: | + | {{S2frame|[[Image:Almost godlike camera2.jpg|400px]]|left}} |
<br clear="both" /> | <br clear="both" /> | ||
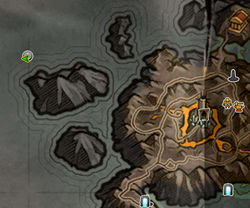
| − | + | {{S2frame|[[Image:Magmadur worldmap.jpg|250px]][[Image:Magmadur map.jpg|250px]]|left]]}} | |
| − | |||
| − | {{S2frame|[[Image: | ||
<br clear="both" /> | <br clear="both" /> | ||
| + | Magmadur will try to eat you as well. | ||
| + | {{S2 Dialogue|NPC NAME=Magmadur|PORTRAIT FILE NAME=Magmadur-dialog.png|DIALOGUE=You dare to threaten and even intend to kill me! That puny Seraphim also believed she could order me around. Her flesh was tender. Did you know that the flesh of immortals tastes different from that of mortals! It's sweeter somehow. It's not very filling though, so you've shown up at the right time. Prepare for death!}} | ||
| − | + | After you defeat the dragon, you will automatically be teleported back to Nicole. Speak with her again to claim your reward.<br> | |
| − | |||
| − | |||
| − | + | {{S2 Dialogue|NPC NAME=Nicole|PORTRAIT FILE NAME=dialog553.png|DIALOGUE=Well done! Sophia will be happy. Take this as a sign of our gratitude. }} | |
| − | + | == Quest Boss == | |
| − | |||
| − | == | + | === [[Sacred 2:Magmadur|Magmadur]] === |
| − | + | {{:Sacred 2:Magmadur}} | |
| − | |||
| − | |||
| − | == | + | == Logbook Entry == |
| − | |||
| − | |||
| − | |||
| − | |||
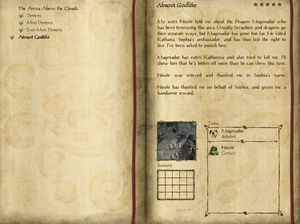
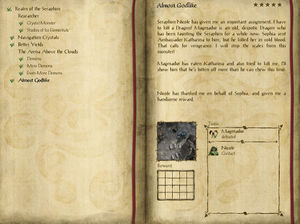
| − | + | ''Though this quest's gameplay is similar to all the characters, they would, however, have different logbook entries.'' | |
| − | |||
| − | |||
{| | {| | ||
| − | |{{S2frame|[[Image: | + | |'''Seraphim's logbook:''' |
| − | |{{S2frame|[[Image: | + | {{S2frame|[[Image:Almost godlike log sera.jpg|300px]]|left}} |
| + | |'''Other characters' logbook:''' | ||
| + | {{S2frame|[[Image:Almost godlike log others.jpg|300px]]|left}} | ||
|} | |} | ||
== Notes == | == Notes == | ||
| − | + | * This quest is available only in the singleplayer campaign. | |
| + | |||
| + | |||
</div> | </div> | ||
| − | |||
[[Category:Sacred 2 Quest|{{PAGENAME}}]] | [[Category:Sacred 2 Quest|{{PAGENAME}}]] | ||
[[Category:Sacred 2 Side Quest|{{PAGENAME}}]] | [[Category:Sacred 2 Side Quest|{{PAGENAME}}]] | ||
| − | [[Category:Sacred 2 | + | [[Category:Sacred 2 Single Player Quest|{{SUBPAGENAME}}]] |
| − | + | [[Category:Sacred 2 The Dragon Sea Islands Quest|{{PAGENAME}}]] | |
| − | |||
| − | [[Category:Sacred 2 | ||
| − | |||
| − | |||
| − | |||
Latest revision as of 17:32, 18 November 2013
|
| ||||||||||
Quick Walkthrough
|
| |||||||||
Detailed Walkthrough
Starting from the Resurrection Monolith in the northeast of the Seraphim Island, travel south along the road. After going a short distance, there will be an opening to the east with benches and a dragon statue commemorating the alliance between the Dragons and the Seraphim. On the north side of this opening, you will find a Seraphim named Nicole. Nicole will tell you about a marauding dragon named Magmadur. The dragon has eaten a Seraphim named Katharina, and, for that, Nicole asks you to kill Magmadur.
This dialog is different for the Seraphim and for the other characters.
Seraphim's version:
Kill Magmadur the dragon!
Hello sister. As you know, the Seraphim and the dragons were once allies, but that was long ago. Recently the dragon Magmadur has become a thorn in our side. He's been destroying Temples and has devastated the area several times. That alone wouldn't be reason for violence, but he also killed our sister Katharina! She tried to reason with him, and he killed her just for that! Sophia has ordered us to end his miserable existence. Are you willing to punish Magmadur for his crimes? I’ll send you to his cave right away.
Other characters' version:
Kill Magmadur the dragon!
The Seraphim and the dragons were once allies, but that was long ago. Today we mostly go our separate ways. Recently the dragon Magmadur has become a thorn in our side. He's been destroying Temples and has devastated the area several times. That alone wouldn't be reason for violence, but he also killed our ambassador, my sister Katharina. That's why Sophia has sentenced him to death. Are you willing to punish Magmadur for his crimes? I'll send you to his cave right away.
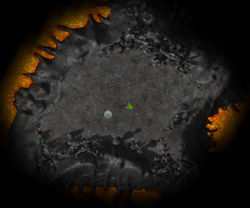
Once you agree, Nicole will teleport you to the dragon's lair.
|
| ||
|
| ||
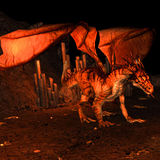
Magmadur will try to eat you as well.
You dare to threaten and even intend to kill me! That puny Seraphim also believed she could order me around. Her flesh was tender. Did you know that the flesh of immortals tastes different from that of mortals! It's sweeter somehow. It's not very filling though, so you've shown up at the right time. Prepare for death!
After you defeat the dragon, you will automatically be teleported back to Nicole. Speak with her again to claim your reward.
Quest Boss
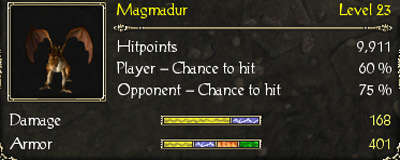
Magmadur
|
|
Damage Types: Weakest Against: Quest:Almost Godlike Quest Location: Seraphim Island in Dragon Sea Islands | ||||||||||||||||||
Logbook Entry
Though this quest's gameplay is similar to all the characters, they would, however, have different logbook entries.
Seraphim's logbook:
|
Other characters' logbook:
| ||||||||||||||||||
Notes
- This quest is available only in the singleplayer campaign.
