Difference between revisions of "Sacred 2:Children and Demons II"
(→Notes) |
|||
| (2 intermediate revisions by 2 users not shown) | |||
| Line 1: | Line 1: | ||
{{Languages}} | {{Languages}} | ||
| − | |||
<div class="plainlinks"> | <div class="plainlinks"> | ||
| − | {| | + | {|WIDTH="100%" |
| − | |WIDTH=" | + | |WIDTH="15%" VALIGN="TOP"|__TOC__ |
| − | |WIDTH=" | + | |WIDTH="35%" VALIGN="TOP"| |
* '''Quest Objective:''' Rescue the children from their slavery | * '''Quest Objective:''' Rescue the children from their slavery | ||
| − | * '''Quest Difficulty:''' | + | * '''Quest Difficulty:''' None |
* '''Quest Giver:''' [[Sacred 2: Little Girl|Little Girl]] | * '''Quest Giver:''' [[Sacred 2: Little Girl|Little Girl]] | ||
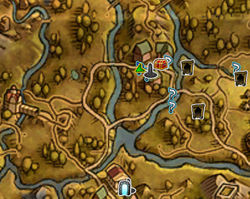
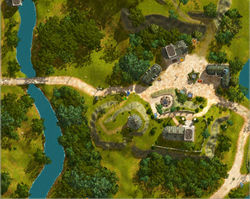
* '''Location(s):''' [[Sacred 2: Twainbrook|Twainbrook]] | * '''Location(s):''' [[Sacred 2: Twainbrook|Twainbrook]] | ||
* '''Prerequisite Quest:''' [[Sacred 2: Children and Demons|Children and Demons]] | * '''Prerequisite Quest:''' [[Sacred 2: Children and Demons|Children and Demons]] | ||
* '''Next Quest:''' [[Sacred 2: The Hunt|The Hunt]] | * '''Next Quest:''' [[Sacred 2: The Hunt|The Hunt]] | ||
| − | * '''Reward:''' | + | * '''Reward:''' None |
| − | |WIDTH=" | + | |WIDTH="50%" VALIGN="TOP"| {{S2frame|[[Image:Little girl worldmap.jpg|250px]][[Image:Little girl map.jpg|250px]]|right|'''[[Sacred 2:Map of Ancaria|View the Ancaria Interactive Map]]'''}} |
| − | |||
| − | [ | ||
|} | |} | ||
| − | + | {|WIDTH="100%" | |
| + | |WIDTH="60%" VALIGN="TOP"| | ||
== Quick Walkthrough == | == Quick Walkthrough == | ||
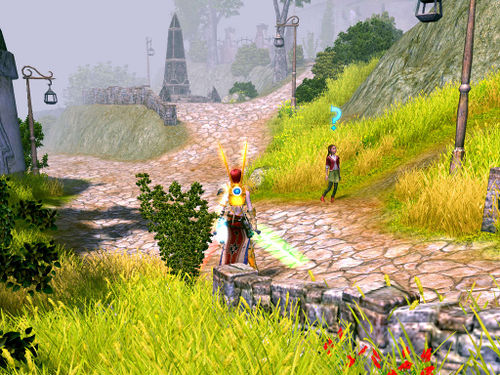
| − | * Talk to | + | * Talk to the [[Sacred 2:Little Girl|Little Girl]] near the entrance to [[Sacred 2: Twainbrook|Twainbrook]]. |
| − | * | + | * Walk up the hill next to the place where the girl is standing. |
| − | * Talk to Overseer Savant | + | * Talk to [[Sacred 2:Overseer Savant|Overseer Savant]]. |
| − | * Kill Overseer Savant, Overseer Deromar and Ralion | + | * Kill Overseer Savant, [[Sacred 2:Overseer Deromar|Overseer Deromar]] and [[Sacred 2:Ralion|Ralion]]. |
| − | * Talk to Cleaner Marolen | + | * Talk to [[Sacred 2:Cleaner Marolen|Cleaner Marolen]] inside the house on the top of the hill. |
| − | * Kill Cleaner Marolen | + | * Kill Cleaner Marolen. |
| − | * Talk to the Child | + | * Talk to the [[Sacred 2:Child - Children and Demons II|Child]] who is standing just outside this house. |
| − | * Talk to Elodriel | + | * Escort the Child and the Little Girl to [[Sacred 2:Elodriel|Elodriel]]. |
| − | + | * Talk to Elodriel to finish this quest. | |
| − | + | |WIDTH="40%" VALIGN="TOP"|{{S2frame|[[Image:Children and demons2 camera0.jpg|500px]]}} | |
| − | + | |} | |
== Detailed Walkthrough == | == Detailed Walkthrough == | ||
| − | After learning | + | After learning that some elves are using children as slaves from [[Sacred 2:Elodriel|Elodriel]], your Seraphim wants to stop this misdeed and starts looking for the way to do so. While heading towards the west entrance of [[Sacred 2:Twainbrook|Twainbrook]], you can see a [[Sacred 2:Little Girl|Little Girl]] standing on a rough track that leads uphill. This girl looks scared. Talk to her to learn that some 'guards' are threatening her. Is she one of the victims of the slavery racket?<br> |
| − | [ | + | [[Image:Children and demons2 dialog 1.png|430px]]<br> |
| − | + | After walking a bit further down the road that begins where the girl is standing, you can see an elf. Is he one of the 'guards' the girl mentioned? <br> | |
| − | [ | + | {{S2frame|[[Image:Children and demons2 camera2.jpg|400px]]|left}} |
| − | + | <br clear="both" /> | |
| − | + | Maybe talking to him would clarify the situation.<br> | |
| − | + | [[Image:Children and demons2 dialog 2.png|430px]]<br> | |
| − | [ | + | [[Sacred 2:Overseer Savant|Overseer Savant]] really was the one who threatened the girl with punishment, and now he tries to make out the girl was lying. He was cruel to the children and rude to you, so you kill him and head further uphill. There you can find and kill two more slave drivers - [[Sacred 2:Ralion|Ralion]] and [[Sacred 2:Overseer Deromar|Overseer Deromar]].<br> |
| − | + | At the top of the hill you can see a house and a [[Sacred 2:Child - Children and Demons II|Child]] standing next to it. This child is probably another victim, but now he doesn't want to talk to you about this case. Maybe the boy has something more to fear. Trying to find it out, you go inside the house and talk to [[Sacred 2:Cleaner Marolen|Cleaner Marolen]], who is standing there.<br> | |
| − | [ | + | [[Image:Children and demons2 dialog 3.png|430px]]<br> |
| − | + | She tries to tell you that she wasn’t involved, but her speech makes you understand that she's lying. So, she used to beat the poor children... Now you'd kill her for that.<br> | |
| − | [ | + | When she's dead, there is nothing more to do in the house. So you head back outside and see that the boy wishes to talk to you now.<br> |
| − | The next part of the chain | + | {{S2frame|[[Image:Children and demons2 camera3.jpg|400px]]|left}} |
| − | [ | + | <br clear="both" /> |
| − | + | Talk to the Child, who asks you to bring him home.<br> | |
| − | + | [[Image:Children and demons2 dialog 4.png|430px]]<br> | |
| + | After you talk to the boy, both children would join you. Since you aren't sure where their home is, you decide to lead them to [[Sacred 2:Elodriel|Elodriel]].<br> | ||
| + | [[Sacred 2:Elodriel|Elodriel]] recognizes the children and promises to bring them back to their parents.<br> | ||
| + | [[Image:Children and demons2 dialog 5.png|430px]]<br> | ||
| + | Talking to Elodriel completes this part of the chain. The next part of the chain takes place in [[Sacred 2:Thylysium|Thylysium]]. Take a look at the [[Sacred 2:Map of Ancaria|Ancaria Interactive Map]] to know how to travel there. | ||
| + | == Quest Enemies == | ||
| + | === [[Sacred 2:Overseer Savant|Overseer Savant]] === | ||
| + | {{:Sacred 2:Overseer Savant}} | ||
| + | === [[Sacred 2:Overseer Deromar|Overseer Deromar]] === | ||
| + | {{:Sacred 2:Overseer Deromar}} | ||
| + | === [[Sacred 2:Ralion|Ralion]] === | ||
| + | {{:Sacred 2:Ralion}} | ||
| + | === [[Sacred 2:Cleaner Marolen|Cleaner Marolen]] === | ||
| + | {{:Sacred 2:Cleaner Marolen}} | ||
| + | == Hirelings and Escorts == | ||
| + | * [[Sacred 2:Child - Children and Demons II|Child]] - Escort. Tries to escape the fight. | ||
| + | * [[Sacred 2:Little Girl|Little Girl]] - Escort. Tries to escape the fight. | ||
== Logbook Entry == | == Logbook Entry == | ||
| − | [ | + | {| |
| − | + | |{{S2frame|[[Image:Children demons2 log 1.jpg|300px]]|left}} | |
| − | + | |{{S2frame|[[Image:Children demons2 log 2.jpg|300px]]|left}} | |
| + | |} | ||
== Notes == | == Notes == | ||
| − | * | + | * You can kill Ralion and Overseer Deromar before you talk to Overseer Savant if you want to minimise the number of enemies you might face at once. |
| Line 66: | Line 81: | ||
[[Category:Sacred 2 Class Quest|{{SUBPAGENAME}}]] | [[Category:Sacred 2 Class Quest|{{SUBPAGENAME}}]] | ||
[[Category:Sacred 2 Quest|{{SUBPAGENAME}}]] | [[Category:Sacred 2 Quest|{{SUBPAGENAME}}]] | ||
| + | [[Category:Sacred 2 Tyr Lysia Quest|{{PAGENAME}}]] | ||
Latest revision as of 00:13, 20 December 2011
|
| ||||||||||
Quick Walkthrough
|
| |||||||||
Detailed Walkthrough
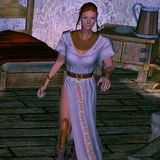
After learning that some elves are using children as slaves from Elodriel, your Seraphim wants to stop this misdeed and starts looking for the way to do so. While heading towards the west entrance of Twainbrook, you can see a Little Girl standing on a rough track that leads uphill. This girl looks scared. Talk to her to learn that some 'guards' are threatening her. Is she one of the victims of the slavery racket?

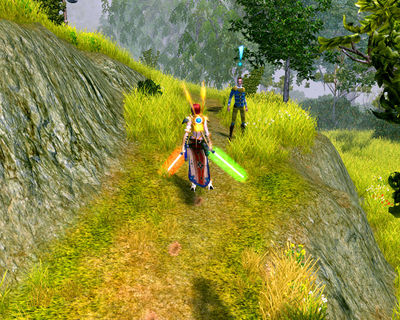
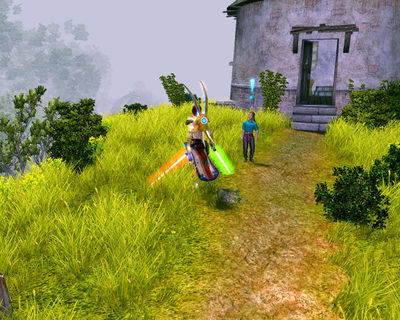
After walking a bit further down the road that begins where the girl is standing, you can see an elf. Is he one of the 'guards' the girl mentioned?
|
| ||
Maybe talking to him would clarify the situation.

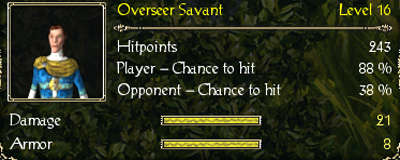
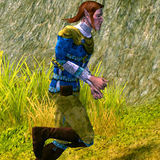
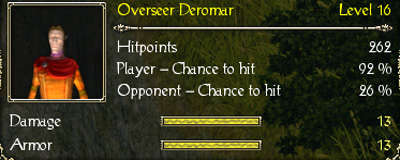
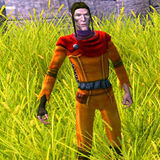
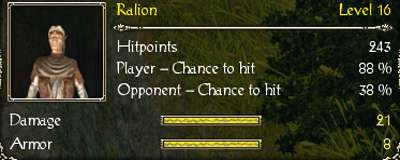
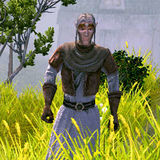
Overseer Savant really was the one who threatened the girl with punishment, and now he tries to make out the girl was lying. He was cruel to the children and rude to you, so you kill him and head further uphill. There you can find and kill two more slave drivers - Ralion and Overseer Deromar.
At the top of the hill you can see a house and a Child standing next to it. This child is probably another victim, but now he doesn't want to talk to you about this case. Maybe the boy has something more to fear. Trying to find it out, you go inside the house and talk to Cleaner Marolen, who is standing there.

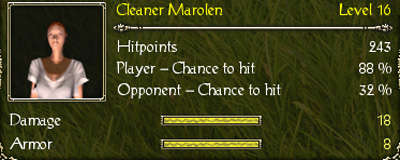
She tries to tell you that she wasn’t involved, but her speech makes you understand that she's lying. So, she used to beat the poor children... Now you'd kill her for that.
When she's dead, there is nothing more to do in the house. So you head back outside and see that the boy wishes to talk to you now.
|
| ||
Talk to the Child, who asks you to bring him home.

After you talk to the boy, both children would join you. Since you aren't sure where their home is, you decide to lead them to Elodriel.
Elodriel recognizes the children and promises to bring them back to their parents.

Talking to Elodriel completes this part of the chain. The next part of the chain takes place in Thylysium. Take a look at the Ancaria Interactive Map to know how to travel there.
Quest Enemies
Overseer Savant
|
|
Damage Types: Weakest Against: Quest:Children and Demons II Quest Location: Twainbrook in Tyr Lysia | ||||||||||||||||||
Overseer Deromar
|
|
Damage Types: Weakest Against: Quest:Children and Demons II Quest Location: Twainbrook in Tyr Lysia | ||||||||||||||||||
Ralion
|
|
Damage Types: Weakest Against: Quest:Children and Demons II Quest Location: Twainbrook in Tyr Lysia | ||||||||||||||||||
Cleaner Marolen
|
|
Damage Types: Weakest Against: Quest:Children and Demons II Quest Location: Twainbrook in Tyr Lysia | ||||||||||||||||||
Hirelings and Escorts
- Child - Escort. Tries to escape the fight.
- Little Girl - Escort. Tries to escape the fight.
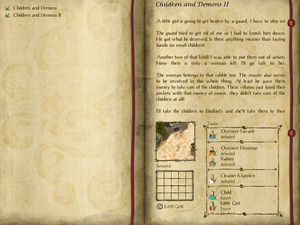
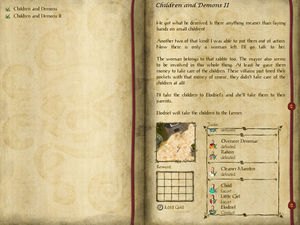
Logbook Entry
|
| ||||||||||||||||||
Notes
- You can kill Ralion and Overseer Deromar before you talk to Overseer Savant if you want to minimise the number of enemies you might face at once.
