Difference between revisions of "Sacred 2:Crown Witness"
m |
|||
| (5 intermediate revisions by 4 users not shown) | |||
| Line 1: | Line 1: | ||
{{Languages}} | {{Languages}} | ||
| − | |||
<div class="plainlinks"> | <div class="plainlinks"> | ||
| − | {| | + | {|WIDTH="100%" |
| − | |WIDTH=" | + | |WIDTH="15%" VALIGN="TOP"|__TOC__ |
| − | |WIDTH=" | + | |WIDTH="35%" VALIGN="TOP"| |
| − | * '''Quest Objective:''' Confront the Lord of | + | * '''Quest Objective:''' Confront the [[Sacred 2:Lord of a Castle|Lord of a Castle]] about the weapon thefts |
* '''Quest Difficulty:''' ***** | * '''Quest Difficulty:''' ***** | ||
| − | * '''Quest Giver:''' Informant Harol | + | * '''Quest Giver:''' [[Sacred 2:Informant Harol|Informant Harol]] |
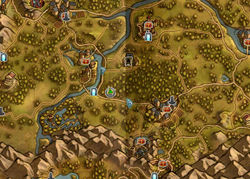
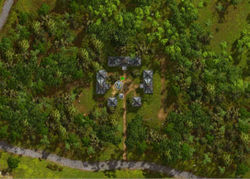
| − | * '''Location(s):''' Central Artamark | + | * '''Location(s):''' Central [[Sacred 2:Artamark|Artamark]] |
* '''Prerequisite Quest:''' [[Sacred 2:Pawn Sacrifice|Pawn Sacrifice]] | * '''Prerequisite Quest:''' [[Sacred 2:Pawn Sacrifice|Pawn Sacrifice]] | ||
* '''Next Quest:''' None - mercifully! | * '''Next Quest:''' None - mercifully! | ||
| − | * '''Reward:''' Gold, Experience points and some high end goodies. | + | * '''Reward:''' [[Sacred 2:Gold|Gold]], [[Sacred 2:Experience|Experience]] points and some high end goodies. |
| − | |WIDTH=" | + | |WIDTH="50%" VALIGN="TOP"| |
| − | + | {{S2frame|[[Image:campmap.jpg|250px]][[Image:camptab.jpg|250px]]|right|'''[[Sacred 2:Map of Ancaria|View the Ancaria Interactive Map]]'''}} | |
|} | |} | ||
| − | + | {|WIDTH="100%" | |
| + | |WIDTH="60%" VALIGN="TOP"| | ||
== Quick Walkthrough == | == Quick Walkthrough == | ||
* Talk to Harol again. | * Talk to Harol again. | ||
* Assemble your troops | * Assemble your troops | ||
| − | * Go on a commando raid in Fortress Reikenstein | + | * Go on a commando raid in [[Sacred 2:Fortress Reikenstein|Fortress Reikenstein]] |
| − | * Confront the Lord of | + | * Confront the [[Sacred 2:Lord of a Castle|Lord of a Castle]] |
* Talk to Harol the Informant | * Talk to Harol the Informant | ||
* Collect your rewards | * Collect your rewards | ||
| − | + | |WIDTH="40%" VALIGN="TOP"|{{S2frame|[[Image:camploc.jpg|500px]]}} | |
| + | |} | ||
== Detailed Walkthrough == | == Detailed Walkthrough == | ||
| Line 37: | Line 38: | ||
== Logbook Entry == | == Logbook Entry == | ||
| − | [ | + | {{S2frame|[[File:Crownwitnesslog.jpg|300px]]|none}} |
== Notes == | == Notes == | ||
| − | As an alternative way to get to the Fortress - go back to Black Oaks, back down the basement entrance, down to the lower level, down the river in the boat and up the stairs located in the room next door to the one you found the Weapons Dealer and his cronies in. If you go up the stairs, you wind up at a doorway exactly opposite the one that you would take if you got there by way of the surface route. | + | As an alternative way to get to the Fortress - go back to [[Sacred 2:Black Oaks|Black Oaks]], back down the basement entrance, down to the lower level, down the river in the boat and up the stairs located in the room next door to the one you found the Weapons Dealer and his cronies in. If you go up the stairs, you wind up at a doorway exactly opposite the one that you would take if you got there by way of the surface route. |
This quest doesn't really deserve 5 stars. Compared to the hair pulling events of the previous quest, this quest is a cake walk. It maybe deserves 3 stars - tops. There's just not nearly enough resistance to really deserve a full 5 stars. The few rats and the one fire spewing trap that get thrown in your way just aren't that hard to eliminate if you're by yourself, let alone with a small army. | This quest doesn't really deserve 5 stars. Compared to the hair pulling events of the previous quest, this quest is a cake walk. It maybe deserves 3 stars - tops. There's just not nearly enough resistance to really deserve a full 5 stars. The few rats and the one fire spewing trap that get thrown in your way just aren't that hard to eliminate if you're by yourself, let alone with a small army. | ||
| Line 47: | Line 48: | ||
</div> | </div> | ||
| − | [[Category:Sacred 2 Chain Quest]|{{PAGENAME}}] | + | [[Category:Sacred 2 Quest|{{PAGENAME}}]] |
| + | [[Category:Sacred 2 Chain Quest Part|{{PAGENAME}}]] | ||
| + | [[Category:Sacred 2 Artamark Quest|{{PAGENAME}}]] | ||
Latest revision as of 05:06, 8 November 2013
|
| ||||||||||
Quick Walkthrough
|
| |||||||||
Detailed Walkthrough
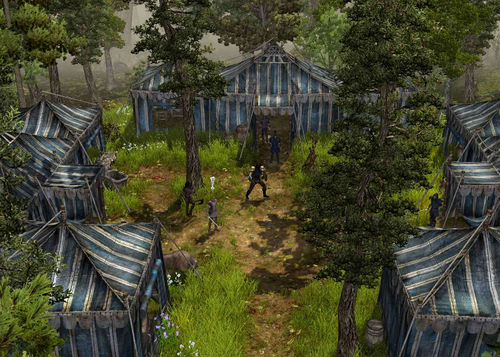
Harol has what he needs to build a case against the Lord of the Castle. All he needs to do now is arrest him. So you, Harol and some of Griffinborough's finest troops go on a commando raid. Make your way to Fortress Reikenstein and go into the underground entrance. Kill all the rodents and the fire spewing trap before making your way upstairs on either the left or right side of the room. Kill any rats or bats there and go upstairs to the next level up and exit into the courtyard of Fortress Reikenstein.
Go up the stairs to the castle and you will see the Lord of the Castle waiting for you. When you talk to him, you will find he's been expecting you. And he drops dead - presumably from some fast acting poison.
Talk to Harol, who will then lavish you with a pile of gold, experience points and possibly a set item or other goodies. Quest - mercifully complete.
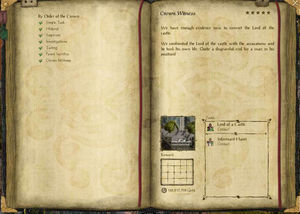
Logbook Entry
|
| ||
Notes
As an alternative way to get to the Fortress - go back to Black Oaks, back down the basement entrance, down to the lower level, down the river in the boat and up the stairs located in the room next door to the one you found the Weapons Dealer and his cronies in. If you go up the stairs, you wind up at a doorway exactly opposite the one that you would take if you got there by way of the surface route.
This quest doesn't really deserve 5 stars. Compared to the hair pulling events of the previous quest, this quest is a cake walk. It maybe deserves 3 stars - tops. There's just not nearly enough resistance to really deserve a full 5 stars. The few rats and the one fire spewing trap that get thrown in your way just aren't that hard to eliminate if you're by yourself, let alone with a small army.


