Difference between revisions of "Sacred 2:Fresh Bandages"
(New page: {{subst:Quest}}) |
(removed old dialog pics) |
||
| (6 intermediate revisions by 2 users not shown) | |||
| Line 1: | Line 1: | ||
| − | |||
| − | |||
| − | |||
<div class="plainlinks"> | <div class="plainlinks"> | ||
{|WIDTH="100%" | {|WIDTH="100%" | ||
|WIDTH="15%" VALIGN="TOP"|__TOC__ | |WIDTH="15%" VALIGN="TOP"|__TOC__ | ||
|WIDTH="35%" VALIGN="TOP"| | |WIDTH="35%" VALIGN="TOP"| | ||
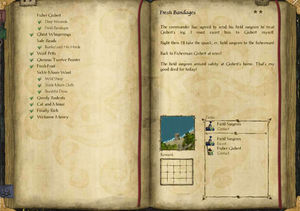
| − | * '''Quest Objective:''' | + | * '''Quest Objective:''' Return to [[Sacred 2:Fisher Gisbert-NPC|Fisher Gisbert]] with the [[Sacred 2:Field Surgeon|Field Surgeon]] |
| − | * '''Quest Difficulty:''' | + | * '''Quest Difficulty:''' 2 Stars |
| − | * '''Quest Giver:''' | + | * '''Quest Giver:''' [[Sacred 2:Commander-NPC|Commander]] |
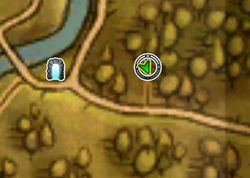
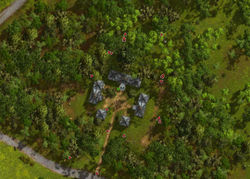
| − | * '''Location(s):''' | + | * '''Location(s):''' South of the [[Sacred 2:Wargfels|Wargfels]] portal west of [[Sacred 2:Black Oaks|Black Oaks]] |
| − | * '''Prerequisite Quest:''' | + | * '''Prerequisite Quest:''' [[Sacred 2:Deep Wounds|Deep Wounds]] |
| − | * '''Next Quest:''' | + | * '''Next Quest:''' None |
| − | * '''Reward:''' | + | * '''Reward:''' [[Sacred 2:Gold|Gold]] [[Sacred 2:Experience|Experience]] |
| − | |WIDTH="50%" VALIGN="TOP"| | + | * '''Main Quest Page:''' [[Sacred 2:Fisher Gisbert|Fisher Gisbert]] |
| + | |WIDTH="50%" VALIGN="TOP"| | ||
| − | {{S2frame|[[Image: | + | {{S2frame|[[Image:commander-map.jpg|250px]][[Image:commander-tab.jpg|250px]]|right|'''[[Sacred 2:Map of Ancaria|View the Ancaria Interactive Map]]'''}} |
|} | |} | ||
{|WIDTH="100%" | {|WIDTH="100%" | ||
|WIDTH="60%" VALIGN="TOP"| | |WIDTH="60%" VALIGN="TOP"| | ||
== Quick Walkthrough == | == Quick Walkthrough == | ||
| − | + | ||
| − | * | + | * Talk to the [[Sacred 2:Commander-NPC|Commander]] |
| − | * | + | * Talk to the [[Sacred 2:Field Surgeon|Field Surgeon]] |
| − | * | + | * Escort the surgeon back to [[Sacred 2:Fisher Gisbert-NPC|Fisher Gisbert]] |
| − | |WIDTH="40%" VALIGN="TOP"|{{S2frame|[[Image: | + | |WIDTH="40%" VALIGN="TOP"|{{S2frame|[[Image:commander-loc.jpg|500px]]}} |
|} | |} | ||
== Detailed Walkthrough == | == Detailed Walkthrough == | ||
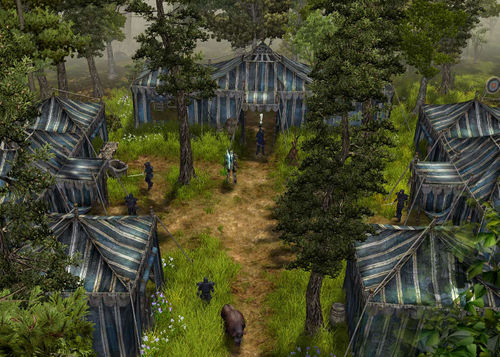
| − | + | Talk to the Commander and explain the Fisher Gisbert needs a surgeon urgently. Seem this isn't the first time 'old Gisbert' has called requesting the services of the surgeon | |
| − | + | {{S2 Dialogue|NPC NAME=Commander|PORTRAIT FILE NAME=dialog303.png|DIALOGUE=Escort the field surgeon to Gisbert! | |
| + | Well well, so old Gisbert hurt himself again. Things are quiet here at the moment, I think we can manage without our field surgeon for a few hours. You'll have to escort him to Gisbert yourself though, I can't spare any soldier for this task.}} | ||
| − | |||
| − | + | The Commander quickly agrees to let the surgeon go and attend poor Gisbert but you'll have to provide escort. He can't spare any of the soldiers seen wandering aimlessly around. | |
| − | |||
| + | {{S2 Dialogue|NPC NAME=Field Surgeon|PORTRAIT FILE NAME=dialog303.png|DIALOGUE=Treat a civilian? Me?! That will make a nice change from popping blisters. Wait a minute, I'll get my bag! | ||
| − | + | Right ! Let's go!}} | |
| − | |||
| − | |||
| − | |||
| − | |||
| + | Wants a break from popping blisters huh? Hope he doesn't mind gangrene. You'll have to keep an eye on the field surgeon as you head back. He's not good at fighting and if he dies, well Gisbert might too. But of course both you and the doc make it safely to the fisherman. | ||
| − | + | {{S2 Dialogue|NPC NAME=Fisher Gisbert|PORTRAIT FILE NAME=dialog009.png|DIALOGUE=So you have returned! Thank you! Please, take this as a sign of my gratitude.}} | |
| − | |||
| − | + | Looks like the fisherman will be fine after all. Maybe he should take up rocking in a chair on the porch....no sharp points and it's on the ground level. | |
| − | |||
| − | |||
| − | |||
| − | |||
| − | |||
| − | |||
| − | |||
| − | |||
| − | |||
== Hirelings and Escorts == | == Hirelings and Escorts == | ||
| − | |||
| − | |||
| − | |||
| + | * [[Sacred 2:Field Surgeon|Field Surgeon]] - Escort. Not Immortal. If killed quest will fail. | ||
== Logbook Entry == | == Logbook Entry == | ||
| − | + | ||
{| | {| | ||
| − | |{{S2frame|[[Image: | + | |{{S2frame|[[Image:bandage-log.jpg|300px]]|left}} |
| − | + | ||
|} | |} | ||
== Notes == | == Notes == | ||
| − | + | ||
</div> | </div> | ||
| − | + | ||
[[Category:Sacred 2 Quest|{{PAGENAME}}]] | [[Category:Sacred 2 Quest|{{PAGENAME}}]] | ||
| − | + | [[Category:Sacred 2 Chain Quest Part|{{PAGENAME}}]] | |
| − | [[Category:Sacred 2 Chain Quest | + | [[Category:Sacred 2 Artamark Quest|{{PAGENAME}}]] |
| − | |||
| − | |||
| − | |||
| − | |||
| − | [[Category:Sacred 2 | ||
| − | |||
Latest revision as of 03:09, 2 September 2014
|
| ||||||||||
Quick Walkthrough
|
| |||||||||
Detailed Walkthrough
Talk to the Commander and explain the Fisher Gisbert needs a surgeon urgently. Seem this isn't the first time 'old Gisbert' has called requesting the services of the surgeon
Escort the field surgeon to Gisbert!
Well well, so old Gisbert hurt himself again. Things are quiet here at the moment, I think we can manage without our field surgeon for a few hours. You'll have to escort him to Gisbert yourself though, I can't spare any soldier for this task.
The Commander quickly agrees to let the surgeon go and attend poor Gisbert but you'll have to provide escort. He can't spare any of the soldiers seen wandering aimlessly around.
Treat a civilian? Me?! That will make a nice change from popping blisters. Wait a minute, I'll get my bag!
Right ! Let's go!
Wants a break from popping blisters huh? Hope he doesn't mind gangrene. You'll have to keep an eye on the field surgeon as you head back. He's not good at fighting and if he dies, well Gisbert might too. But of course both you and the doc make it safely to the fisherman.
Looks like the fisherman will be fine after all. Maybe he should take up rocking in a chair on the porch....no sharp points and it's on the ground level.
Hirelings and Escorts
- Field Surgeon - Escort. Not Immortal. If killed quest will fail.
Logbook Entry
| |||||||||


