Difference between revisions of "Sacred 2:Ghosts of the Dishonored"
Jump to navigation
Jump to search
m (Preliminary) |
(Initial commit) |
||
| Line 3: | Line 3: | ||
|WIDTH="15%" VALIGN="TOP"|__TOC__ | |WIDTH="15%" VALIGN="TOP"|__TOC__ | ||
|WIDTH="35%" VALIGN="TOP"| | |WIDTH="35%" VALIGN="TOP"| | ||
| − | * '''Quest Objective:''' | + | * '''Quest Objective:''' Release ghosts from their torment |
| − | * '''Quest Difficulty:''' | + | * '''Quest Difficulty:''' 1 stars |
* '''Quest Giver:''' None | * '''Quest Giver:''' None | ||
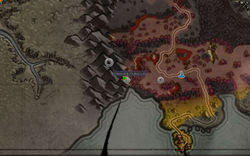
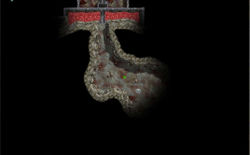
* '''Location(s):''' [[Sacred 2:Lost Crypt|Lost Crypt]] within the [[Sacred 2:Cursed Forest|Cursed Forest]] | * '''Location(s):''' [[Sacred 2:Lost Crypt|Lost Crypt]] within the [[Sacred 2:Cursed Forest|Cursed Forest]] | ||
* '''Prerequisite Quest:''' None | * '''Prerequisite Quest:''' None | ||
* '''Next Quest:''' None | * '''Next Quest:''' None | ||
| − | * '''Reward:''' | + | * '''Reward:''' [[Sacred 2:Experience|Experience]] |
|WIDTH="50%" VALIGN="TOP"| | |WIDTH="50%" VALIGN="TOP"| | ||
{{S2frame|[[Image:GhostsDishonored_StartMap.jpg|250px]][[Image:GhostsDishonored_StartTabMap.jpg|250px]]|right|'''[[Sacred 2:Map of Ancaria|View the Ancaria Interactive Map]]'''}} | {{S2frame|[[Image:GhostsDishonored_StartMap.jpg|250px]][[Image:GhostsDishonored_StartTabMap.jpg|250px]]|right|'''[[Sacred 2:Map of Ancaria|View the Ancaria Interactive Map]]'''}} | ||
| Line 17: | Line 17: | ||
== Quick Walkthrough == | == Quick Walkthrough == | ||
* This quest being automatically upon entering the area | * This quest being automatically upon entering the area | ||
| − | * | + | * Talk to each of the eight ghosts to release them from their torment |
| − | + | |WIDTH="40%" VALIGN="TOP"|{{S2frame|[[Image:GhostsDishonored_GhostsCamera.jpg|500px]]}} | |
| − | |||
| − | |WIDTH="40%" VALIGN="TOP"|{{S2frame|[[Image: | ||
|} | |} | ||
== Detailed Walkthrough == | == Detailed Walkthrough == | ||
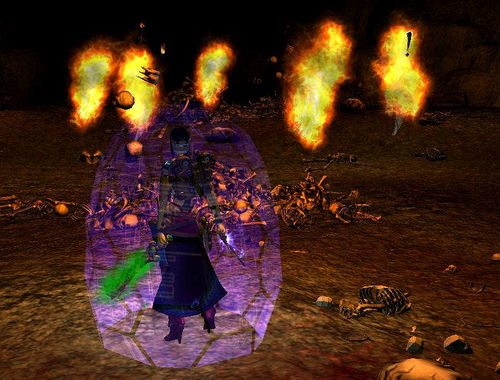
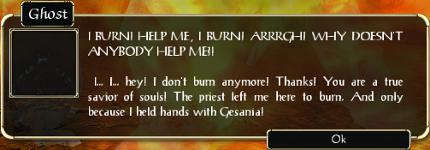
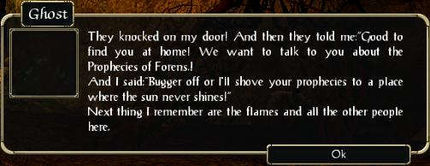
| − | + | When you enter the far southeast chamber in the Lost Crypt, you will find eight ghosts burning like torches. Talk to each of the ghosts and release their tortured souls. | |
| − | {{S2frame|[[Image: | + | {{S2frame|[[Image:GhostsDishonored_Ghost1Dialog.jpg|430px]]|left}} |
<br clear="both" /> | <br clear="both" /> | ||
| − | + | {{S2frame|[[Image:GhostsDishonored_Ghost2Dialog.jpg|430px]]|left}} | |
| − | < | + | <br clear="both" /> |
| − | {{S2frame|[[Image: | + | {{S2frame|[[Image:GhostsDishonored_Ghost3Dialog.jpg|430px]]|left}} |
| + | <br clear="both" /> | ||
| + | {{S2frame|[[Image:GhostsDishonored_Ghost4Dialog.jpg|430px]]|left}} | ||
| + | <br clear="both" /> | ||
| + | {{S2frame|[[Image:GhostsDishonored_Ghost5Dialog.jpg|430px]]|left}} | ||
<br clear="both" /> | <br clear="both" /> | ||
| − | {{S2frame|[[Image: | + | {{S2frame|[[Image:GhostsDishonored_Ghost6Dialog.jpg|430px]]|left}} |
<br clear="both" /> | <br clear="both" /> | ||
| − | {{S2frame|[[Image: | + | {{S2frame|[[Image:GhostsDishonored_Ghost7Dialog.jpg|430px]]|left}} |
<br clear="both" /> | <br clear="both" /> | ||
| − | + | {{S2frame|[[Image:GhostsDishonored_Ghost8Dialog.jpg|430px]]|left}} | |
| − | |||
| − | {{S2frame|[[Image: | ||
<br clear="both" /> | <br clear="both" /> | ||
| − | + | This quest is now complete. | |
| − | |||
| − | |||
| − | |||
| − | |||
| − | |||
| − | |||
| − | |||
| − | |||
| − | |||
| − | |||
== Logbook Entry == | == Logbook Entry == | ||
{| | {| | ||
| − | |{{S2frame|[[Image: | + | |{{S2frame|[[Image:GhostsDishonored_Logbook.jpg|300px]]|left}} |
| − | |||
|} | |} | ||
== Notes == | == Notes == | ||
| + | * The first time I took this quest, I left the chamber without talking to the ghosts. After that, my game always crashed when I tried to reenter the chamber. For this reason, I recommend that you complete the quest as soon as taking it. | ||
| Line 66: | Line 56: | ||
[[Category:Sacred 2 Quest|{{PAGENAME}}]] | [[Category:Sacred 2 Quest|{{PAGENAME}}]] | ||
[[Category:Sacred 2 Side Quest|{{PAGENAME}}]] | [[Category:Sacred 2 Side Quest|{{PAGENAME}}]] | ||
| − | |||
| − | |||
| − | |||
| − | |||
| − | |||
| − | |||
| − | |||
Revision as of 01:38, 19 May 2011
|
| ||||||||||
Quick Walkthrough
|
| |||||||||
Detailed Walkthrough
When you enter the far southeast chamber in the Lost Crypt, you will find eight ghosts burning like torches. Talk to each of the ghosts and release their tortured souls.
|
| ||
|
| ||
|
| ||
|
| ||
|
| ||
|
| ||
|
| ||
|
| ||
This quest is now complete.
Logbook Entry
| |||||||||
Notes
- The first time I took this quest, I left the chamber without talking to the ghosts. After that, my game always crashed when I tried to reenter the chamber. For this reason, I recommend that you complete the quest as soon as taking it.
