|
|
| Line 1: |
Line 1: |
| − | {{Languages}}
| |
| | | | |
| | | | |
| | | | |
| | + | <div class="plainlinks"> |
| | + | {|WIDTH="100%" |
| | + | |WIDTH="15%" VALIGN="TOP"|__TOC__ |
| | + | |WIDTH="35%" VALIGN="TOP"| |
| | + | * '''Quest Objective:''' TYPE IN OBJECTIVE OF QUEST |
| | + | * '''Quest Difficulty:''' TYPE IN NUMBER OF STARS THIS QUEST INDICATES AS DIFFICULTY |
| | + | * '''Quest Giver:''' TYPE IN FULL NAME OF NPC QUEST GIVER [[Sacred 2:QUEST GIVER |QUEST GIVER ]] |
| | + | * '''Location(s):''' TYPE IN REGION AND/OR TOWN THE QUEST IS GIVEN IN [[Sacred 2:REGION|REGION]] [[Sacred 2:PLACE|PLACE]] |
| | + | * '''Prerequisite Quest:''' TYPE IN PREREQUISITE QUEST IF ONE IS NEEDED TO BE GIVEN THIS [[Sacred 2:QUEST|QUEST]] |
| | + | * '''Next Quest:''' TYPE IN NAME OF NEXT [[Sacred 2:QUEST|QUEST]] |
| | + | * '''Reward:''' TYPE IN REWARD RECEIVED UPON COMPLETION OF THIS QUEST [[Sacred 2:Gold|Gold]] [[Sacred 2:Experience|Experience]] |
| | + | |WIDTH="50%" VALIGN="TOP"|UPLOAD A "TAB" MAP AND "M" MAP PICTURE SHOWING THE LOCATION WHERE THIS QUEST BEGINS AND REPLACE THIS TEXT WITH IT HERE. EXAMPLE: |
| | | | |
| − | <div class="plainlinks">
| + | {{S2frame|[[Image:sample_worldmap.jpg|250px]][[Image:Quest_Name_map.jpg|250px]]|right|'''[[Sacred 2:Map of Ancaria|View the Ancaria Interactive Map]]'''}} |
| − | {| | + | |} |
| − | |WIDTH="20%" VALIGN="TOP"|__TOC__
| + | {|WIDTH="100%" |
| − | |WIDTH="50%" VALIGN="TOP"|
| + | |WIDTH="60%" VALIGN="TOP"| |
| − | * '''Quest Objective:''' Try and help [[Sacred 2:Shirka|Shirka Alana]] find an honest trade
| + | == Quick Walkthrough == |
| − | * '''Quest Difficulty:'''
| + | TYPE IN A FEW SENTENCES WHAT THE QUESTS GOALS ARE AND HOW TO ACHIEVE THEM USING BULLET FORM. FOR EXAMPLE: |
| − | * '''Quest Giver:''' [[Sacred 2:Shirka|Shirka Alana]]
| + | * TALK TO "QUEST GIVER" |
| − | * '''Location(s):''' [[Sacred 2:Sloeford|Sloeford]]
| + | * KILL 20 "ENEMY TYPE" AND COLLECT "WHATEVER QUEST ITEMS THEY DROP" |
| − | * '''Prerequisite Quest:''' None
| + | * RETURN TO "QUEST GIVER" FOR REWARD |
| − | * '''Next Quest:''' [[Sacred 2:The Great Wall|The Great Wall]]
| + | |WIDTH="40%" VALIGN="TOP"|{{S2frame|[[Image:Quest_Location.jpg|500px]]}} |
| − | * '''Reward:'''
| |
| − | |WIDTH="20%" VALIGN="TOP"|[http://www.sacredwiki.org/images/Sacred_2/quests/Inquisitor%20Blue%20Quests/Shirka%20Alana/sacred2ShirkaAlanam.jpg http://www.sacredwiki.org/images/Sacred_2/quests/Inquisitor%20Blue%20Quests/Shirka%20Alana/th_sacred2ShirkaAlanam.jpg] | |
| − | <br />
| |
| − | [http://www.sacredwiki.org/images/Sacred_2/quests/Inquisitor%20Blue%20Quests/Shirka%20Alana/sacred2ShirkaAlana.jpg http://www.sacredwiki.org/images/Sacred_2/quests/Inquisitor%20Blue%20Quests/Shirka%20Alana/th_sacred2ShirkaAlana.jpg] | |
| | |} | | |} |
| | | | |
| − | == Quick Walkthrough == | + | == Detailed Walkthrough == |
| − | * Talk to [[Sacred 2:Shirka|Shirka Alana]] (twice)
| + | TYPE IN ADDITIONAL INFO. LINKS TO PICTURES, MAPS, VIDEOS ARE PERMITTED IN THIS FIELD. PICTURES OF DIALOGUES MUST BE 430PX WIDE AND SHOULD NOT BE FRAMED. WHEN YOU WANT TO SHOW A TAB MAP AND "m" MAP IMAGE BESIDE EACHTOTHER IN A FRAME THEY MUST EACH BE SET TO 250PX. |
| − | * Talk to the [[Sacred 2:Soldier - Shirka Alana|Soldier]]
| + | |
| − | * Talk to the [[Sacred 2:Commander's Guard|Commander's Guard]]
| + | KEEP IN MIND THIS SECTION IS MEANT TO HAVE WRITTEN CONTENT AND NOT JUST FOR PICTURES. TELL THE STORY OF THIS QUEST FOR READERS TO ENJOY. BE CREATIVE AND HAVE FUN WITH IT! |
| − | * Kill all of [[Sacred 2:Alana's Brigands|Alana's Brigands]]
| + | |
| − | * Talk to [[Sacred 2:Shirka|Shirka Alana]]
| + | |
| − | * Travel to the Docks in [[Sacred 2:Thylysium|Thylysium]]
| + | PICTURES SUCH AS TO SHOW LOCATIONS SHOULD BE FRAMED AND MUST BE 400PX WIDE. FRAMED IMAGES NEED A SPECIAL LINE OF CODE AFTER EACH WHICH YOU CAN SEE IN THE CODE BELOW; '''<NOWIKI><br clear="both" /></NOWIKI>''' |
| − | * Talk to [[Sacred 2:Shirka|Shirka Alana]]
| + | |
| − | * Escort [[Sacred 2:Shirka|Shirka]] into the sewers to meet [[Sacred 2:Varnar|Varnar]]
| + | {{S2frame|[[Image:Quest_Name_camera1.jpg|400px]]|left}} |
| − | * Talk to [[Sacred 2:Varnar|Varnar]]
| + | <br clear="both" /> |
| − | * Talk to the [[Sacred 2:Commander - Shirka Alana|Commander]]
| + | |
| − | * Kill the [[Sacred 2:Commander - Shirka Alana|Commander]]
| + | |
| − | * Talk to [[Sacred 2:Varnar|Varnar]]
| + | {{S2frame|[[Image:Quest_Name_camera2.jpg|400px]]|left}} |
| − | * Escort [[Sacred 2:Shirka|Shirka]] to the gates of the Inquisition Headquarters
| + | <br clear="both" /> |
| − | * Talk to the [[Sacred 2:Recruiting Officer|Recruiting Officer]]
| + | |
| − | * Talk to the [[Sacred 2:Monk - Thylisium|Monk]]
| + | WHEN YOU WANT TO SHOW A TAB MAP AND "m" MAP IMAGE BESIDE EACHTOTHER IN A FRAME THEY MUST EACH BE SET TO 250PX. |
| − | * Kill the [[Sacred 2:Monk - Thylisium|Monk]]
| + | {{S2frame|[[Image:sample_worldmap.jpg|250px]][[Image:Quest_Name_map.jpg|250px]]|left]]}} |
| − | * Travel to [[Sacred 2:Clearview|Clearview]]
| + | <br clear="both" /> |
| − | * Talk to the [[Sacred 2:Monk - Clearview|Monk]]
| + | |
| − | * Kill 5 [[Sacred 2:Monk - Clearview|Monks]]
| + | |
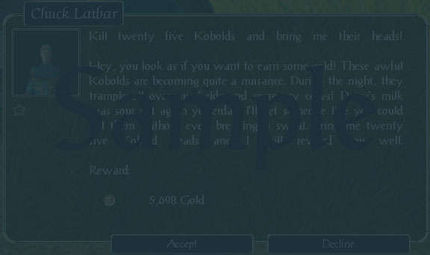
| | + | DIALOGUES CAN BE CUT OUT NICELY LIKE THIS ONE: |
| | + | |
| | + | [[Image:NPC_name_dialog.jpg|430px]] |
| | | | |
| | + | OR CROPPED WITH A FRAME: |
| | | | |
| | + | {{S2frame|[[Image:NPC_name_dialog2.jpg|430px]]|left}} |
| | + | <br clear="both" /> |
| | | | |
| − | == Detailed Walkthrough == | + | == Quest Enemies == |
| − | Talk to [[Sacred 2:Shirka|Shirka Alana]], then talk to her again and she will run off.<br>
| + | QUEST ENEMIES SHOULD BE IMPORTED FROM THEIR OWN PAGE USING THE EXAMPLE CODE BELOW. DESCRIBE ANY SPECIAL ATTACKS THEY HAVE OR OTHER IMPORTANT INFO IF YOU LIKE. |
| − | [http://www.sacredwiki.org/images/Sacred_2/quests/Inquisitor%20Blue%20Quests/Shirka%20Alana/sacred2ShirkaAlanaa.jpg http://www.sacredwiki.org/images/Sacred_2/quests/Inquisitor%20Blue%20Quests/Shirka%20Alana/th_sacred2ShirkaAlanaa.jpg] [http://www.sacredwiki.org/images/Sacred_2/quests/Inquisitor%20Blue%20Quests/Shirka%20Alana/sacred2ShirkaAlanab.jpg http://www.sacredwiki.org/images/Sacred_2/quests/Inquisitor%20Blue%20Quests/Shirka%20Alana/th_sacred2ShirkaAlanab.jpg]<br>
| |
| − | A [[Sacred 2:Soldier - Shirka Alana|Soldier]] will walk up nearby from the opposite direction, talk to him to get some more information. He tells you to talk to the commander of the Northern High Elf Outpost.<br>
| |
| − | [http://www.sacredwiki.org/images/Sacred_2/quests/Inquisitor%20Blue%20Quests/Shirka%20Alana/sacred2ShirkaAlanac.jpg http://www.sacredwiki.org/images/Sacred_2/quests/Inquisitor%20Blue%20Quests/Shirka%20Alana/th_sacred2ShirkaAlanac.jpg]<br>
| |
| − | Head North out of the village over the river, following the road Northeast (right) until you reach the High Elf Outpost; it will be on your left (West).<br>
| |
| − | [http://www.sacredwiki.org/images/Sacred_2/quests/Inquisitor%20Blue%20Quests/Shirka%20Alana/sacred2ShirkaAlanawt1.jpg http://www.sacredwiki.org/images/Sacred_2/quests/Inquisitor%20Blue%20Quests/Shirka%20Alana/th_sacred2ShirkaAlanawt1.jpg]<br>
| |
| − | When you get to the Outpost talk to the [[Sacred 2:Commander's Guard|Commander's Guard]]. He points you in the direction of [[Sacred 2:Shirka|Shirka Alana's]] camp to the Northeast of [[Sacred 2:Twainbrook|Twainbrook]].<br>
| |
| − | [http://www.sacredwiki.org/images/Sacred_2/quests/Inquisitor%20Blue%20Quests/Shirka%20Alana/sacred2ShirkaAlanad.jpg http://www.sacredwiki.org/images/Sacred_2/quests/Inquisitor%20Blue%20Quests/Shirka%20Alana/th_sacred2ShirkaAlanad.jpg]<br>
| |
| − | Follow the main road East over the river from the High Elf Outpost, then Northeast to the next bridge. From here you can either head North through [[Sacred 2:Twainbrook|Twainbrook]] up to the cemetery, East over the river and South to the camp, or you can head East over the river along the road until it turns South, taking the dirt track North at that point and over a smaller river, continuing North to the camp. Either way you will encounter a fair number of [[Sacred 2:Kobold|kobolds]], although the marginally longer route through [[Sacred 2:Twainbrook|Twainbrook]] probably has slightly fewer than the faster East/North route.<br>
| |
| − | [http://www.sacredwiki.org/images/Sacred_2/quests/Inquisitor%20Blue%20Quests/Shirka%20Alana/sacred2ShirkaAlanawt2.jpg http://www.sacredwiki.org/images/Sacred_2/quests/Inquisitor%20Blue%20Quests/Shirka%20Alana/th_sacred2ShirkaAlanawt2.jpg]<br>
| |
| − | As soon as you get near the target location you will discover that it’s not a target location but a target enemy. You need to kill all of [[Sacred 2:Alana's Brigands|Alana's Brigands]] – a task the local [[Sacred 2:Kobold|kobolds]] are likely to help you with. Any [[Sacred 2:Alana's Brigands|Brigands]] the [[Sacred 2:Kobold|kobolds]] do kill still count towards your task of eliminating the group, so one tactic is to stand back until one side or the other emerges victorious, and then mop up the winners.<br>
| |
| − | <br>
| |
| − | Once all the kobolds and brigands are dead, talk to [[Sacred 2:Shirka|Shirka Alana]] in the camp. She swears she’ll go straight and get a job in the city ([[Sacred 2:Thylysium|Thylysium]]).<br>
| |
| − | [http://www.sacredwiki.org/images/Sacred_2/quests/Inquisitor%20Blue%20Quests/Shirka%20Alana/sacred2ShirkaAlanae.jpg http://www.sacredwiki.org/images/Sacred_2/quests/Inquisitor%20Blue%20Quests/Shirka%20Alana/th_sacred2ShirkaAlanae.jpg]<br><br>
| |
| − | The next part of this quest takes place in [[Sacred 2:Thylysium|Thylysium]], though fortunately [[Sacred 2:Shirka|Shirka]] will make her own way there.<br>
| |
| − | From [[Sacred 2:Shirka|Shirka's]] camp head South to (or back to, depending which route you came) the main (paved) road and follow it South, then East and over the river. At the junction head right (South) up the hill and down the other side into [[Sacred 2:Thylysium|Thylysium]]. In the city you need to head to the Southwest quarter (the Docks) and the tavern there.<br>
| |
| − | [http://www.sacredwiki.org/images/Sacred_2/quests/Inquisitor%20Blue%20Quests/Shirka%20Alana/sacred2ShirkaAlanawt3.jpg http://www.sacredwiki.org/images/Sacred_2/quests/Inquisitor%20Blue%20Quests/Shirka%20Alana/th_sacred2ShirkaAlanawt3.jpg]<br>
| |
| − | As you get near to the correct location the quest will update, and you will find [[Sacred 2:Shirka|Shirka]] standing outside with a red question mark (?) over her head. Talk to [[Sacred 2:Shirka|Shirka]], then accompany her to the loan shark [[Sacred 2:Varnar|Varnar]]; this means a trip into the sewers – fortunately there’s an entrance nearby, just to the West.<br>
| |
| − | [http://www.sacredwiki.org/images/Sacred_2/quests/Inquisitor%20Blue%20Quests/Shirka%20Alana/sacred2ShirkaAlanaf.jpg http://www.sacredwiki.org/images/Sacred_2/quests/Inquisitor%20Blue%20Quests/Shirka%20Alana/th_sacred2ShirkaAlanaf.jpg] [http://www.sacredwiki.org/images/Sacred_2/quests/Inquisitor%20Blue%20Quests/Shirka%20Alana/sacred2ShirkaAlanawt4.jpg http://www.sacredwiki.org/images/Sacred_2/quests/Inquisitor%20Blue%20Quests/Shirka%20Alana/th_sacred2ShirkaAlanawt4.jpg]<br>
| |
| − | Head East through the sewers (see map). You will encounter mostly [[Sacred 2:Cellar Rat|rats]] and possibly a few [[Sacred 2:Kobold|kobolds]], so poison defence is a good idea. As you approach [[Sacred 2:Varnar|Varnar]] the quest will update.<br>
| |
| − | [http://www.sacredwiki.org/images/Sacred_2/quests/Inquisitor%20Blue%20Quests/Shirka%20Alana/sacred2ShirkaAlanawt5.jpg http://www.sacredwiki.org/images/Sacred_2/quests/Inquisitor%20Blue%20Quests/Shirka%20Alana/th_sacred2ShirkaAlanawt5.jpg]<br>
| |
| − | Talk to [[Sacred 2:Varnar|Varnar]] and he will ask you to assassinate a [[Sacred 2:Commander - Shirka Alana|High Elf Commander]] to ‘pay off’ [[Sacred 2:Shirka|Shirka's]] debts with him.<br>
| |
| − | [http://www.sacredwiki.org/images/Sacred_2/quests/Inquisitor%20Blue%20Quests/Shirka%20Alana/sacred2ShirkaAlanag.jpg http://www.sacredwiki.org/images/Sacred_2/quests/Inquisitor%20Blue%20Quests/Shirka%20Alana/th_sacred2ShirkaAlanag.jpg]<br>
| |
| − | Leave the sewers and head to the Army Camp in the South of the city.<br>
| |
| − | [http://www.sacredwiki.org/images/Sacred_2/quests/Inquisitor%20Blue%20Quests/Shirka%20Alana/sacred2ShirkaAlanawt6.jpg http://www.sacredwiki.org/images/Sacred_2/quests/Inquisitor%20Blue%20Quests/Shirka%20Alana/th_sacred2ShirkaAlanawt6.jpg]<br>
| |
| − | Locate the [[Sacred 2:Commander - Shirka Alana|Commander]] (he’s in the very Southern part of the camp) and talk to him, then kill him and return to [[Sacred 2:Varnar|Varnar]].<br>
| |
| − | [http://www.sacredwiki.org/images/Sacred_2/quests/Inquisitor%20Blue%20Quests/Shirka%20Alana/sacred2ShirkaAlanah.jpg http://www.sacredwiki.org/images/Sacred_2/quests/Inquisitor%20Blue%20Quests/Shirka%20Alana/th_sacred2ShirkaAlanah.jpg] [http://www.sacredwiki.org/images/Sacred_2/quests/Inquisitor%20Blue%20Quests/Shirka%20Alana/sacred2ShirkaAlanai.jpg http://www.sacredwiki.org/images/Sacred_2/quests/Inquisitor%20Blue%20Quests/Shirka%20Alana/th_sacred2ShirkaAlanai.jpg]<br><br>
| |
| − | Head out of the sewers with [[Sacred 2:Shirka|Shirka]], and then towards the Inquisition Headquarters in the Northeast part of the city.<br>
| |
| − | [http://www.sacredwiki.org/images/Sacred_2/quests/Inquisitor%20Blue%20Quests/Shirka%20Alana/sacred2ShirkaAlanawt7.jpg http://www.sacredwiki.org/images/Sacred_2/quests/Inquisitor%20Blue%20Quests/Shirka%20Alana/th_sacred2ShirkaAlanawt7.jpg]<br>
| |
| − | Near the Rune Master is a [[Sacred 2:Recruiting Officer|Recruiting Officer]] – talk to him to sign [[Sacred 2:Shirka|Shirka]] up.<br>
| |
| − | [http://www.sacredwiki.org/images/Sacred_2/quests/Inquisitor%20Blue%20Quests/Shirka%20Alana/sacred2ShirkaAlanaj.jpg http://www.sacredwiki.org/images/Sacred_2/quests/Inquisitor%20Blue%20Quests/Shirka%20Alana/th_sacred2ShirkaAlanaj.jpg]<br><br>
| |
| − | Unfortunately, if you think the quest’s over, think again. Head back to the docks where you’ll find a [[Sacred 2:Monk - Thylisium|Monk]] standing outside the Blacksmith’s building.<br>
| |
| − | [http://www.sacredwiki.org/images/Sacred_2/quests/Inquisitor%20Blue%20Quests/Shirka%20Alana/sacred2ShirkaAlanawt8.jpg http://www.sacredwiki.org/images/Sacred_2/quests/Inquisitor%20Blue%20Quests/Shirka%20Alana/th_sacred2ShirkaAlanawt8.jpg]<br>
| |
| − | Talk to the [[Sacred 2:Monk - Thylisium|Monk]] – he wants to blackmail you, but there’s a simple solution to that; kill him when he becomes hostile.<br>
| |
| − | [http://www.sacredwiki.org/images/Sacred_2/quests/Inquisitor%20Blue%20Quests/Shirka%20Alana/sacred2ShirkaAlanak.jpg http://www.sacredwiki.org/images/Sacred_2/quests/Inquisitor%20Blue%20Quests/Shirka%20Alana/th_sacred2ShirkaAlanak.jpg]<br>
| |
| − | Now you need to head to [[Sacred 2:Clearview|Clearview]] (Northeast of [[Sacred 2:Thylisium|Thylisium]]). Head North out of the city, following the main road to the junction. Turn right (East) and follow the road to the next main junction at the [[Sacred 2:Broken Lance Tavern|Broken Lance Tavern]]. Turn left (North) here and follow the main road up into [[Sacred 2:Clearview|Clearview]].<br>
| |
| − | [http://www.sacredwiki.org/images/Sacred_2/quests/Inquisitor%20Blue%20Quests/Shirka%20Alana/sacred2ShirkaAlanawt9.jpg http://www.sacredwiki.org/images/Sacred_2/quests/Inquisitor%20Blue%20Quests/Shirka%20Alana/th_sacred2ShirkaAlanawt9.jpg]<br>
| |
| − | Follow the road up towards the blacksmith. On the way you will find a house with five [[Sacred 2:Monk - Clearview|Monks]] in the vicinity (three outside, two inside). Talk to the [[Sacred 2:Monk - Clearview|Monk]] with the exclamation mark (!) over his head, then kill all five of the [[Sacred 2:Monk - Clearview|Monks]] when they become hostile. The quest will (finally) be complete when you kill the last [[Sacred 2:Monk - Clearview|Monk]].<br>
| |
| − | [http://www.sacredwiki.org/images/Sacred_2/quests/Inquisitor%20Blue%20Quests/Shirka%20Alana/sacred2ShirkaAlanal.jpg http://www.sacredwiki.org/images/Sacred_2/quests/Inquisitor%20Blue%20Quests/Shirka%20Alana/th_sacred2ShirkaAlanal.jpg]<br><br>
| |
| − | The next quest, [[Sacred 2:The Great Wall|The Great Wall]], begins on the road to the Wall, North of [[Sacred 2:Clearview|Clearview]].
| |
| | | | |
| | + | === [[Sacred 2:Sample Enemy|Sample Enemy]] === |
| | + | {{:Sacred 2:Sample Enemy}} |
| | | | |
| | + | == Hirelings and Escorts == |
| | + | REPLACE THE BELOW WITH THE NAMES OF ANY HIRELINGS OR ESCORTS THAT ARE INVOLVED IN THIS QUEST. BRIEFLY DESCRIBE THEIR INVOLVEMENT. HOW DO THE BEHAVE WHEN THEY ARE WITH YOU? wILL YOU FAIL THE QUEST IF THEY DIE? |
| | | | |
| | + | * [[Sacred 2:Warrior|Warrior]] - Hireling. Not Immortal. Tries to fight. If killed quest will fail. |
| | + | * [[Sacred 2:Child|Child]] - Escort. Immortal. Tries to escape the fight. |
| | | | |
| | | | |
| | == Logbook Entry == | | == Logbook Entry == |
| − | [http://www.sacredwiki.org/images/Sacred_2/quests/Inquisitor%20Blue%20Quests/Shirka%20Alana/S2LogShirkaAlanaa.jpg http://www.sacredwiki.org/images/Sacred_2/quests/Inquisitor%20Blue%20Quests/Shirka%20Alana/th_S2LogShirkaAlanaa.jpg] [http://www.sacredwiki.org/images/Sacred_2/quests/Inquisitor%20Blue%20Quests/Shirka%20Alana/S2LogShirkaAlanab.jpg http://www.sacredwiki.org/images/Sacred_2/quests/Inquisitor%20Blue%20Quests/Shirka%20Alana/th_S2LogShirkaAlanab.jpg] [http://www.sacredwiki.org/images/Sacred_2/quests/Inquisitor%20Blue%20Quests/Shirka%20Alana/S2LogShirkaAlanac.jpg http://www.sacredwiki.org/images/Sacred_2/quests/Inquisitor%20Blue%20Quests/Shirka%20Alana/th_S2LogShirkaAlanac.jpg] [http://www.sacredwiki.org/images/Sacred_2/quests/Inquisitor%20Blue%20Quests/Shirka%20Alana/S2LogShirkaAlanad.jpg http://www.sacredwiki.org/images/Sacred_2/quests/Inquisitor%20Blue%20Quests/Shirka%20Alana/th_S2LogShirkaAlanad.jpg]
| + | UPLOAD A PICTURE SHOWING THE LOGBOOK FOR THIS QUEST AND REPLACE THIS TEXT WITH A THUMBNAIL OF IT HERE. EXAMPLE: |
| − | | + | {| |
| | + | |{{S2frame|[[Image:Quest Name log1.jpg|300px]]|left}} |
| | + | |{{S2frame|[[Image:Quest Name log1.jpg|300px]]|left}} |
| | + | |} |
| | | | |
| | | | |
| | == Notes == | | == Notes == |
| − | * Note: From the various conversations and logbook text it seems likely that the [[Sacred 2:Inquisitor|Inquisitor]] is [[Sacred 2:Shirka|Shirka Alana's]] father
| + | TYPE IN ANY POSSIBLE BUGS, EXPLOITS, TRICKS, HINTS, SHORTCUTS ETC |
| | | | |
| | | | |
| | | | |
| | </div> | | </div> |
| − | | + | DECIDE WHICH OF THE FOLLOWING CATEGORY('S) APPLY TO THIS QUEST (LEAVE IN THE SACRED 2 QUEST CATEGORY) AND DELETE THOSE THAT DO NOT APPLY(AS WELL AS THIS COMMENT): |
| − | [[Category:Sacred 2 Class Quest|{{SUBPAGENAME}}]] | + | [[Category:Sacred 2 Quest|{{PAGENAME}}]] |
| − | [[Category:Sacred 2 Quest|{{SUBPAGENAME}}]] | + | [[Category:Sacred 2 Side Quest|{{PAGENAME}}]] |
| − | [[Category:Sacred 2 Tyr Lysia Quest|{{PAGENAME}}]] | + | [[Category:Sacred 2 Chain Quest]|{{PAGENAME}}]] |
| | + | [[Category:Sacred 2 Class Quest|{{PAGENAME}}]] |
| | + | [[Category:Sacred 2 Light Path Quest|{{PAGENAME}}]] |
| | + | [[Category:Sacred 2 Shadow Path Quest|{{PAGENAME}}]] |
| | + | [[Category:Sacred 2 Light Campaign Quest|{{PAGENAME}}]] |
| | + | [[Category:Sacred 2 Shadow Campaign Quest|{{PAGENAME}}]] |
| | + | [[Category:Sacred 2 CM Patch Quest|{{SUBPAGENAME}}]] |
