Difference between revisions of "Sacred 2:Tending to the Poor"
Jump to navigation
Jump to search
| (8 intermediate revisions by 4 users not shown) | |||
| Line 1: | Line 1: | ||
{{Languages}} | {{Languages}} | ||
| − | |||
| − | |||
| − | |||
| − | |||
<div class="plainlinks"> | <div class="plainlinks"> | ||
| − | {| | + | {|WIDTH="100%" |
| − | |WIDTH=" | + | |WIDTH="15%" VALIGN="TOP"|__TOC__ |
| − | |WIDTH=" | + | |WIDTH="35%" VALIGN="TOP"| |
* '''Quest Objective:''' Deliver gold to the poor | * '''Quest Objective:''' Deliver gold to the poor | ||
* '''Quest Difficulty:''' * | * '''Quest Difficulty:''' * | ||
| − | * '''Quest Giver:''' Viola DeElfici | + | * '''Quest Giver:''' [[Sacred 2:Viola DeElfici|Viola DeElfici]] |
| − | * '''Location(s):''' Khorum | + | * '''Location(s):''' Starts in [[Sacred 2:Khorum|Khorum]], also requires to travel around the [[Sacred 2:Bengaresh Desert|Bengaresh Desert]] |
| − | * '''Prerequisite Quest:''' Delivery | + | * '''Prerequisite Quest:''' [[Sacred 2:Delivery|Delivery]] |
| − | * '''Next Quest:''' | + | * '''Next Quest:''' None |
| − | * '''Reward:''' Good karma and | + | * '''Reward:''' Good karma and [[Sacred 2:Experience|Experience]]. |
| − | |WIDTH=" | + | |WIDTH="50%" VALIGN="TOP"| |
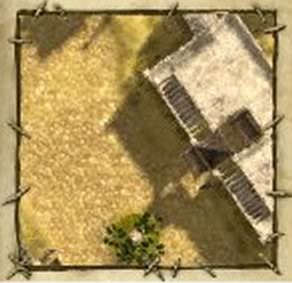
| − | + | {{S2frame|[http://www.sacredwiki.org/images/Light%20High%20Elf%20Character%20Quests/DeliveryLocation.jpg http://www.sacredwiki.org/images/Light%20High%20Elf%20Character%20Quests/th_DeliveryLocation.jpg][http://www.sacredwiki.org/images/Light%20High%20Elf%20Character%20Quests/DeliveryMap.jpg http://www.sacredwiki.org/images/Light%20High%20Elf%20Character%20Quests/th_DeliveryMap.jpg]|right|'''[[Sacred 2:Map of Ancaria|View the Ancaria Interactive Map]]'''}} | |
| − | |||
|} | |} | ||
| − | + | {|WIDTH="100%" | |
| + | |WIDTH="60%" VALIGN="TOP"| | ||
== Quick Walkthrough == | == Quick Walkthrough == | ||
| − | * Receive 1000 gold | + | * Receive 1000 gold from [[Sacred 2:Viola DeElfici|Viola DeElfici]] |
| − | * | + | * Talk to [[Sacred 2:Hashmat|Hashmat]] to give him 200 gold |
| + | * Talk to [[Sacred 2:Lahaf|Lahaf]] and give him 200 gold too | ||
| + | * Talk to [[Sacred 2:Orail Drekran|Orail Drekran]] and give him his share | ||
| + | * Talk to [[Sacred 2:Gulbasham|Gulbasham]] and give her 200 gold too | ||
| + | * Talk to [[Sacred 2:Seth|Seth]] to give away the last gold | ||
| + | * Return to [[Sacred 2:Khorum|Khorum]] and report to Viola | ||
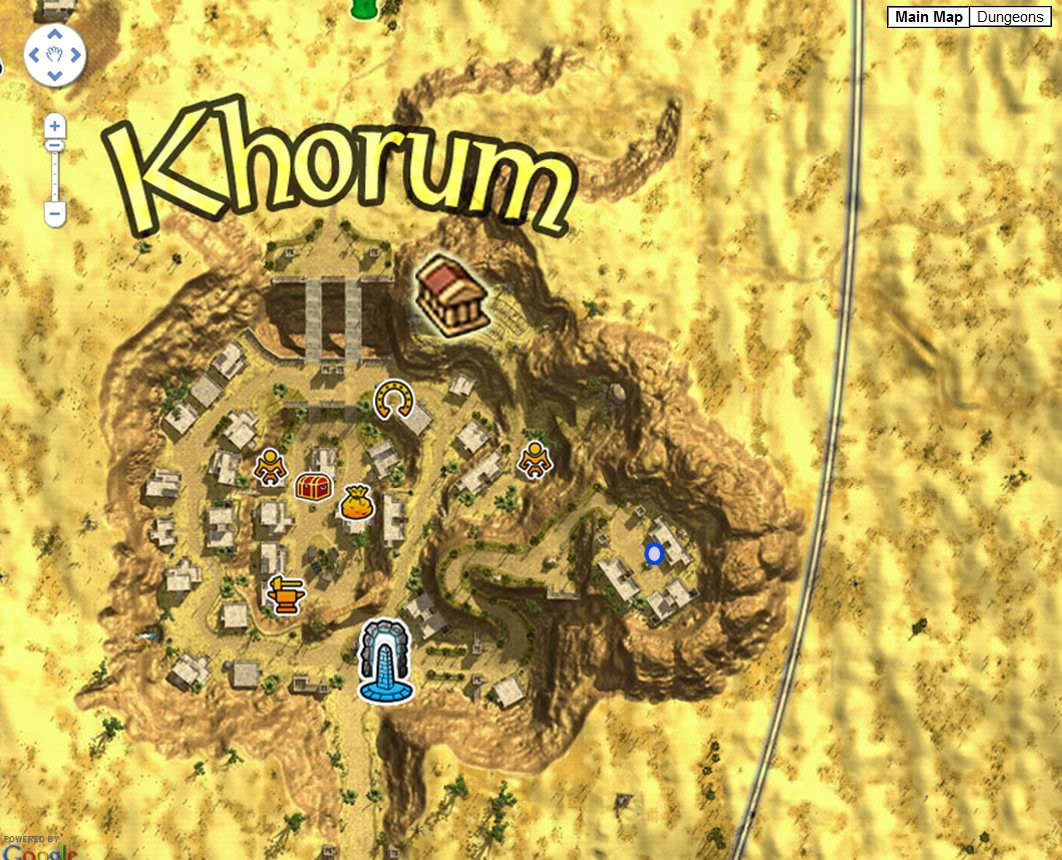
| + | |WIDTH="40%" VALIGN="TOP"|{{S2frame|[[Image:Quest_Location.jpg|500px]]}} | ||
| + | |} | ||
| + | == Detailed Walkthrough == | ||
| + | Given the DeElfici name is synonymous with the likes of Al Capone on Ancaria, it's not too shocking to find at least some good coming from the family tree. Even Al Capone did some charitable works in his day. | ||
| − | + | Viola wants you to travel around the desert and spread some of the family wealth to the 5 poorest in the region. | |
| − | |||
Fortunately, unlike the previous mission [[Sacred 2:Delivery|Delivery]], this one isn't timed. You have 5 stops to make and deliver 200 gold to each of the NPCs. The other bit of good luck, there aren't any persistent bandits out to rob you blind. Make your way to each of the quest compass locations and make a delivery. | Fortunately, unlike the previous mission [[Sacred 2:Delivery|Delivery]], this one isn't timed. You have 5 stops to make and deliver 200 gold to each of the NPCs. The other bit of good luck, there aren't any persistent bandits out to rob you blind. Make your way to each of the quest compass locations and make a delivery. | ||
| − | When you've finished off all 5 deliveries, return to Viola. | + | When you've finished off all 5 deliveries, return to Viola who will thank you for your efforts with Experience Points. |
| − | |||
| − | |||
== Logbook Entry == | == Logbook Entry == | ||
| − | + | {| | |
| − | + | |{{S2frame|[[Image:Tending to the poor log.jpg|300px]]|left}} | |
| − | + | |} | |
== Notes == | == Notes == | ||
| − | + | * This quest - and its prerequisite, [[Sacred 2:Delivery|Delivery]] - will only appear for the [[Sacred 2:High Elf|High Elf]] character. | |
| + | * This quest is only available in the Singleplayer Campaign. | ||
| + | * If you don't have the [[Sacred 2:Community Patch|Community Patch]] installed, this quest would appear on the regular Desert region page in the logbook. If you do, it would appear together with the blue chain quests on the Character Specific Quests page. | ||
| + | * The quest log for this mission is somewhat confusing. It reads "TyBosso was happy, too." Er.. But he's like quite deceased at this point in the game. | ||
| Line 47: | Line 52: | ||
</div> | </div> | ||
[[Category:Sacred 2 Side Quest|{{PAGENAME}}]] | [[Category:Sacred 2 Side Quest|{{PAGENAME}}]] | ||
| + | [[Category:Sacred 2 Quest|{{PAGENAME}}]] | ||
| + | [[Category:Sacred 2 Class Quest|{{PAGENAME}}]] | ||
| + | [[Category:Sacred 2 Bengaresh Desert Quest|{{PAGENAME}}]] | ||
Latest revision as of 21:21, 21 December 2011
|
| ||||||||||
Quick Walkthrough
|
| |||||||||

Detailed Walkthrough
Given the DeElfici name is synonymous with the likes of Al Capone on Ancaria, it's not too shocking to find at least some good coming from the family tree. Even Al Capone did some charitable works in his day.
Viola wants you to travel around the desert and spread some of the family wealth to the 5 poorest in the region.
Fortunately, unlike the previous mission Delivery, this one isn't timed. You have 5 stops to make and deliver 200 gold to each of the NPCs. The other bit of good luck, there aren't any persistent bandits out to rob you blind. Make your way to each of the quest compass locations and make a delivery.
When you've finished off all 5 deliveries, return to Viola who will thank you for your efforts with Experience Points.
Logbook Entry
| |||||||||

Notes
- This quest - and its prerequisite, Delivery - will only appear for the High Elf character.
- This quest is only available in the Singleplayer Campaign.
- If you don't have the Community Patch installed, this quest would appear on the regular Desert region page in the logbook. If you do, it would appear together with the blue chain quests on the Character Specific Quests page.
- The quest log for this mission is somewhat confusing. It reads "TyBosso was happy, too." Er.. But he's like quite deceased at this point in the game.