Difference between revisions of "Sacred 2:The Lost Amulets"
| Line 16: | Line 16: | ||
* '''Quest Objective:''' Retrieve the stolen amulets | * '''Quest Objective:''' Retrieve the stolen amulets | ||
* '''Quest Giver:''' [[Sacred 2:Mage School Graduate|Mage School Graduate]] | * '''Quest Giver:''' [[Sacred 2:Mage School Graduate|Mage School Graduate]] | ||
| − | * '''Location(s):'''The Monolith at the Brigand Camp | + | * '''Location(s):'''The Monolith at the [[Sacred 2:Brigand Camp 1 (Tyr Lysia)|Brigand Camp]] |
* '''Prerequisite Quest:''' None | * '''Prerequisite Quest:''' None | ||
* '''Next Quest:''' None | * '''Next Quest:''' None | ||
| Line 27: | Line 27: | ||
== Quick Walkthrough == | == Quick Walkthrough == | ||
| − | * Talk to the [[Sacred 2:Mage School Graduate|Mage School Graduate]], right next to the monolith at the Brigand | + | * Talk to the [[Sacred 2:Mage School Graduate|Mage School Graduate]], right next to the monolith at the [[Sacred 2:Brigand Camp 1 (Tyr Lysia)|Brigand Camp]]. |
| − | * Go to the quest location, and retrieve 3 amulets | + | * Go to the quest location, and retrieve the 3 amulets. |
| − | * Talk to [[Sacred 2:Nimantus the Lumberjack|Nimantus the Lumberjack]] in the Brigand | + | * Talk to [[Sacred 2:Nimantus the Lumberjack|Nimantus the Lumberjack]] in the [[Sacred 2:Brigand Camp 1 (Tyr Lysia)|Brigand Camp]], to complete the quest. |
| Line 35: | Line 35: | ||
== Detailed Walkthrough == | == Detailed Walkthrough == | ||
As for the location: | As for the location: | ||
| − | This is an easy find. Just go straight to the monolith at the Brigand Camp (see map above). Right next to that should be your questgiver, the [[Sacred 2:Mage School Graduate|Mage School Graduate]]. | + | |
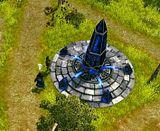
| + | This is an easy find. Just go straight to the monolith at the [[Sacred 2:Brigand Camp 1 (Tyr Lysia)|Brigand Camp]] (see map above). Right next to that should be your questgiver, the [[Sacred 2:Mage School Graduate|Mage School Graduate]]. | ||
[http://s141.photobucket.com/albums/r64/promatolya/The%20Lost%20Amulet%20S2Q/Questgiver.jpg http://i141.photobucket.com/albums/r64/promatolya/The%20Lost%20Amulet%20S2Q/th_Questgiver.jpg] | [http://s141.photobucket.com/albums/r64/promatolya/The%20Lost%20Amulet%20S2Q/Questgiver.jpg http://i141.photobucket.com/albums/r64/promatolya/The%20Lost%20Amulet%20S2Q/th_Questgiver.jpg] | ||
| Line 47: | Line 48: | ||
[http://s141.photobucket.com/albums/r64/promatolya/The%20Lost%20Amulet%20S2Q/Objective.jpg http://i141.photobucket.com/albums/r64/promatolya/The%20Lost%20Amulet%20S2Q/th_Objective.jpg] | [http://s141.photobucket.com/albums/r64/promatolya/The%20Lost%20Amulet%20S2Q/Objective.jpg http://i141.photobucket.com/albums/r64/promatolya/The%20Lost%20Amulet%20S2Q/th_Objective.jpg] | ||
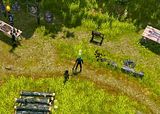
| − | After collecting all 3 (their precise location is indicated on the minimap), return to the monolith, but instead of talking to the | + | After collecting all 3 (their precise location is indicated on the minimap), return to the monolith, but instead of talking to the [[Sacred 2:Mage School Graduate|Mage School Graduate]], enter the [[Sacred 2:Brigand Camp 1 (Tyr Lysia)|Brigand Camp]]. In the camp you will find [[Sacred 2:Nimantus the Lumberjack|Nimantus the Lumberjack]], just next to the trader. |
| − | In the camp you will find [[Sacred 2:Nimantus the Lumberjack|Nimantus the Lumberjack]], just next to the trader. | ||
[http://s141.photobucket.com/albums/r64/promatolya/The%20Lost%20Amulet%20S2Q/endlocation.jpg http://i141.photobucket.com/albums/r64/promatolya/The%20Lost%20Amulet%20S2Q/th_endlocation.jpg] | [http://s141.photobucket.com/albums/r64/promatolya/The%20Lost%20Amulet%20S2Q/endlocation.jpg http://i141.photobucket.com/albums/r64/promatolya/The%20Lost%20Amulet%20S2Q/th_endlocation.jpg] | ||
| Line 62: | Line 62: | ||
== Notes == | == Notes == | ||
| − | Tip: This quest and [[Sacred 2:The Eaten Cow|The Eaten Cow]] are easy to do together, as the wolf you need to kill for [[Sacred 2:The Eaten Cow|The Eaten Cow]] spawns just to the | + | Tip: This quest and [[Sacred 2:The Eaten Cow|The Eaten Cow]] are easy to do together, as the wolf you need to kill for [[Sacred 2:The Eaten Cow|The Eaten Cow]] spawns just to the east of the [[Sacred 2:Brigand Camp 1 (Tyr Lysia)|Brigand Camp]]. |
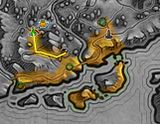
| − | Tip: If you picked up the [[Sacred 2:Hunting Highwaymen|Hunting Highwaymen]] quest at the Brigand Camp you might want to return to the camp by going | + | Tip: If you picked up the [[Sacred 2:Hunting Highwaymen|Hunting Highwaymen]] quest at the [[Sacred 2:Brigand Camp 1 (Tyr Lysia)|Brigand Camp]] you might want to return to the camp by going west and then north from the stone circle, as this will lead you through (more than!) the five bandits you need to kill. Alternatively, if you went south and east to the stone circle (as per the above walkthrough) and have the [[Sacred 2:The Eaten Cow|The Eaten Cow]] quest, you may wish to return to the camp by going north then west to complete that quest (see map below). |
[http://www.sacredwiki.org/images/Sacred_2/quests/Chapter01/The%20Lost%20Amulets/sacred2LostAmuletswt.jpg http://www.sacredwiki.org/images/Sacred_2/quests/Chapter01/The%20Lost%20Amulets/th_sacred2LostAmuletswt.jpg] | [http://www.sacredwiki.org/images/Sacred_2/quests/Chapter01/The%20Lost%20Amulets/sacred2LostAmuletswt.jpg http://www.sacredwiki.org/images/Sacred_2/quests/Chapter01/The%20Lost%20Amulets/th_sacred2LostAmuletswt.jpg] | ||
Revision as of 06:52, 4 January 2011
|
|
Quick Walkthrough
Detailed WalkthroughAs for the location: This is an easy find. Just go straight to the monolith at the Brigand Camp (see map above). Right next to that should be your questgiver, the Mage School Graduate.
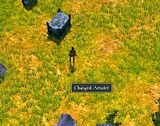
To get to where the amulets are, you're best off following he yellow line on the map above. In the grass, amoungst the stone boulders, are 3 amulets like these: After collecting all 3 (their precise location is indicated on the minimap), return to the monolith, but instead of talking to the Mage School Graduate, enter the Brigand Camp. In the camp you will find Nimantus the Lumberjack, just next to the trader. Talking to him will complete your quest, and juice up your wallet. Logbook Entry
NotesTip: This quest and The Eaten Cow are easy to do together, as the wolf you need to kill for The Eaten Cow spawns just to the east of the Brigand Camp. Tip: If you picked up the Hunting Highwaymen quest at the Brigand Camp you might want to return to the camp by going west and then north from the stone circle, as this will lead you through (more than!) the five bandits you need to kill. Alternatively, if you went south and east to the stone circle (as per the above walkthrough) and have the The Eaten Cow quest, you may wish to return to the camp by going north then west to complete that quest (see map below). Note: 'Brigand Camp' is a misnomer for this area; signposts refer to 'Lumberjack Camp', which makes far more sense given the presence of the lumberjack for this quest.
|
