Difference between revisions of "Sacred 2:The Lost Sword of Grammbrain the Mighty"
| Line 1: | Line 1: | ||
| − | |||
| − | |||
<div class="plainlinks"> | <div class="plainlinks"> | ||
{|WIDTH="100%" | {|WIDTH="100%" | ||
| Line 12: | Line 10: | ||
* '''Next Quest:''' None | * '''Next Quest:''' None | ||
* '''Reward:''' [[Sacred 2:Gold|Gold]] [[Sacred 2:Experience|Experience]] | * '''Reward:''' [[Sacred 2:Gold|Gold]] [[Sacred 2:Experience|Experience]] | ||
| − | |WIDTH="50%" VALIGN="TOP"| | + | |WIDTH="50%" VALIGN="TOP"| |
{{S2frame|[[Image:LostSwordOfGrammbrainTheMighty_UlofMap.jpg|250px]][[Image:LostSwordOfGrammbrainTheMighty_UlofTabMap.jpg|250px]]|right|'''[[Sacred 2:Map of Ancaria|View the Ancaria Interactive Map]]'''}} | {{S2frame|[[Image:LostSwordOfGrammbrainTheMighty_UlofMap.jpg|250px]][[Image:LostSwordOfGrammbrainTheMighty_UlofTabMap.jpg|250px]]|right|'''[[Sacred 2:Map of Ancaria|View the Ancaria Interactive Map]]'''}} | ||
| Line 31: | Line 29: | ||
Cross the bridge to the west side of the town and head south. On the southern edge of town, you will find the grave. | Cross the bridge to the west side of the town and head south. On the southern edge of town, you will find the grave. | ||
| − | + | {{S2frame|[[Image:LostSwordOfGrammbrainTheMighty_GraveMap.jpg|250px]][[Image:LostSwordOfGrammbrainTheMighty_GraveTabMap.jpg|250px]]|left]]}} | |
| − | + | <br clear="both" /> | |
| − | + | {{S2frame|[[Image:LostSwordOfGrammbrainTheMighty_Grave1Camera.jpg|400px]]|left}} | |
| − | |||
| − | |||
| − | |||
| − | |||
| − | {{S2frame|[[Image: | ||
<br clear="both" /> | <br clear="both" /> | ||
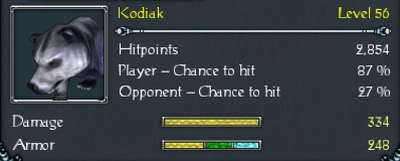
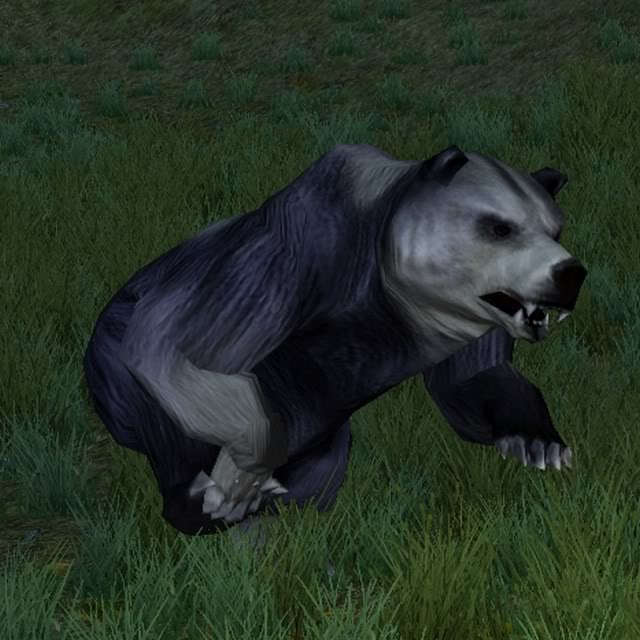
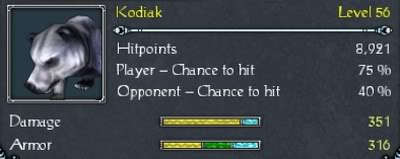
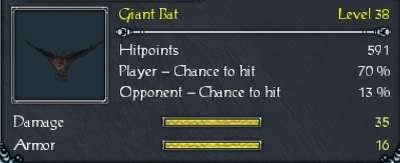
| − | + | Inside the cave, you will have to fight a number of Giant Bats and a Kodiak. In the back of the cave, you will find the grave of Grammbrain the Mighty. His "magic sword" turns out to be a rusty iron bar. | |
| − | {{S2frame|[[Image: | + | {{S2frame|[[Image:LostSwordOfGrammbrainTheMighty_Grave2Camera.jpg|400px]]|left}} |
<br clear="both" /> | <br clear="both" /> | ||
| − | + | Return to Ulof and give him the bad news in order to complete the quest. | |
| − | {{S2frame|[[Image: | + | {{S2frame|[[Image:LostSwordOfGrammbrainTheMighty_Ulof2Dialog.jpg|430px]]|left}} |
<br clear="both" /> | <br clear="both" /> | ||
| − | |||
| − | |||
| − | |||
| − | |||
| − | |||
| − | |||
| − | |||
| − | |||
| − | |||
== Quest Enemies == | == Quest Enemies == | ||
| − | |||
| − | |||
| − | |||
| − | |||
| − | == | + | === [[Sacred 2:Kodiak|Kodiak]] === |
| − | + | {{:Sacred 2:Kodiak}} | |
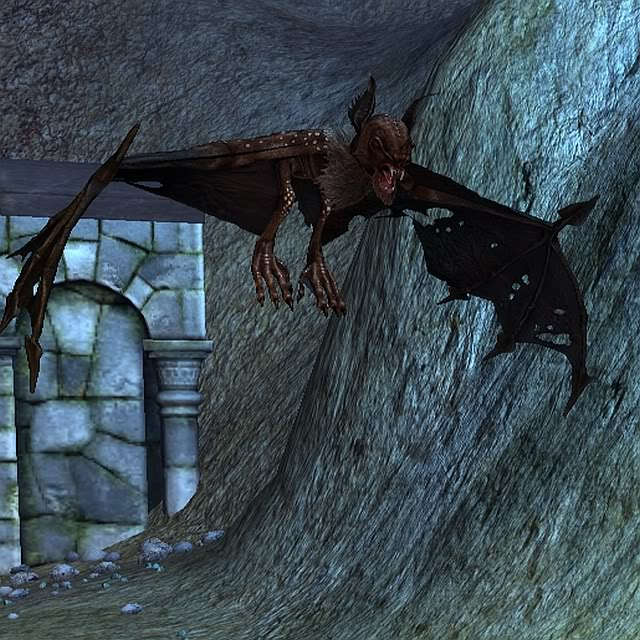
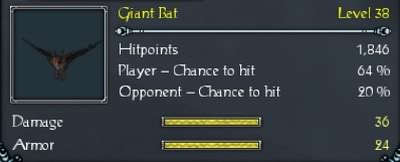
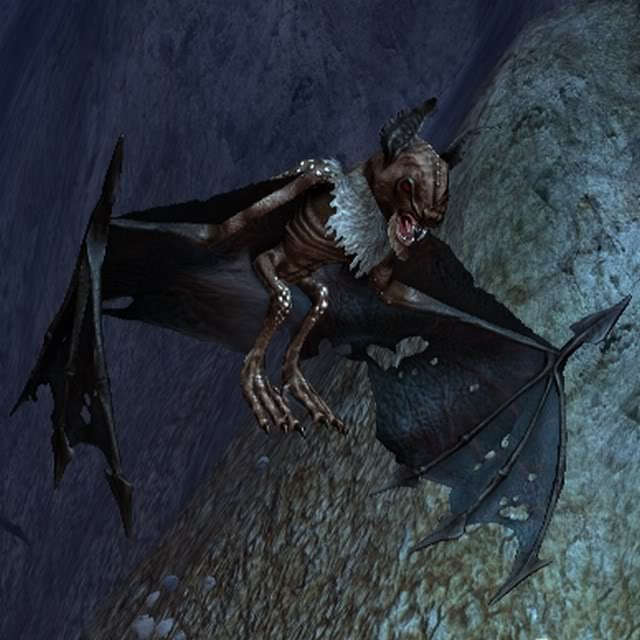
| − | + | === [[Sacred 2:Giant Bat|Giant Bat]] === | |
| − | + | {{:Sacred 2:Giant Bat}} | |
== Logbook Entry == | == Logbook Entry == | ||
| − | |||
{| | {| | ||
| − | |{{S2frame|[[Image: | + | |{{S2frame|[[Image:LostSwordOfGrammbrainTheMighty_Logbook.jpg|300px]]|left}} |
| − | |||
|} | |} | ||
== Notes == | == Notes == | ||
| − | + | * Console users may encounter a loop upon entering the cave. You will continually enter and exit the cave. If this happens, it may pause long enough outside the cave that you can call up the world map. This should either break the loop or allow you to teleport away. Reloading the game may help with this problem. | |
</div> | </div> | ||
| − | |||
[[Category:Sacred 2 Quest|{{PAGENAME}}]] | [[Category:Sacred 2 Quest|{{PAGENAME}}]] | ||
[[Category:Sacred 2 Side Quest|{{PAGENAME}}]] | [[Category:Sacred 2 Side Quest|{{PAGENAME}}]] | ||
| − | |||
| − | |||
| − | |||
| − | |||
| − | |||
| − | |||
| − | |||
Revision as of 15:18, 13 March 2011
|
| ||||||||||

Quick Walkthrough
|
| |||||||||
Detailed Walkthrough
Right near the eastern side of the bridge in Entruag, you will find a young Orc warrior named Ulof. Ulof will tell you that he has discovered the grave of a famous Orc warrior, Grammbrain the Mighty, and he will ask you to enter the grave and recover the warrior's magic sword.
|
| ||
Cross the bridge to the west side of the town and head south. On the southern edge of town, you will find the grave.
|
| ||
|
| ||
Inside the cave, you will have to fight a number of Giant Bats and a Kodiak. In the back of the cave, you will find the grave of Grammbrain the Mighty. His "magic sword" turns out to be a rusty iron bar.
|
| ||
Return to Ulof and give him the bad news in order to complete the quest.
|
| ||
Quest Enemies
Kodiak
|
|
Damage Types: Weakest Against: Region: Nor Plat | ||||||||||||||||||


|
|
Damage Types: Weakest Against: Region: Nor Plat | ||||||||||||||||||

Giant Bat
|
|
Damage Types: Weakest Against: Region: Tyr Lysia | ||||||||||||||||||

|
|
Damage Types: Weakest Against: Region: Tyr Lysia | ||||||||||||||||||
Logbook Entry
| |||||||||

Notes
- Console users may encounter a loop upon entering the cave. You will continually enter and exit the cave. If this happens, it may pause long enough outside the cave that you can call up the world map. This should either break the loop or allow you to teleport away. Reloading the game may help with this problem.