Difference between revisions of "Sacred 2:The Robbed Widow"
(New page: {{subst:Quest}}) |
|||
| Line 1: | Line 1: | ||
| − | |||
| − | |||
| − | |||
<div class="plainlinks"> | <div class="plainlinks"> | ||
{|WIDTH="100%" | {|WIDTH="100%" | ||
|WIDTH="15%" VALIGN="TOP"|__TOC__ | |WIDTH="15%" VALIGN="TOP"|__TOC__ | ||
|WIDTH="35%" VALIGN="TOP"| | |WIDTH="35%" VALIGN="TOP"| | ||
| − | * '''Quest Objective:''' | + | * '''Quest Objective:''' Bring the scoundrels that robbed the widow to justice |
| − | * '''Quest Difficulty:''' | + | * '''Quest Difficulty:''' 2 Stars |
| − | * '''Quest Giver:''' | + | * '''Quest Giver:''' [[Sacred 2:Hay Highbern|Hay Highbern]] |
| − | * '''Location(s):''' | + | * '''Location(s):''' [[Sacred 2:Artamark|Artamark]] Region, in [[Sacred 2:Valeview|Valeview]] |
| − | * '''Prerequisite Quest:''' | + | * '''Prerequisite Quest:''' None |
| − | * '''Next Quest:''' | + | * '''Next Quest:''' [[Sacred 2:Hunting Scoundrels|Hunting Scoundrels]] |
| − | * '''Reward:''' | + | * '''Reward:''' [[Sacred 2:Gold|Gold]], [[Sacred 2:Experience|Experience]] |
| − | |WIDTH="50%" VALIGN="TOP"| | + | |WIDTH="50%" VALIGN="TOP"| |
| − | {{S2frame|[[Image: | + | {{S2frame|[[Image:highbernmap.jpg|250px]][[Image:highberntab.jpg|250px]]|right|'''[[Sacred 2:Map of Ancaria|View the Ancaria Interactive Map]]'''}} |
|} | |} | ||
{|WIDTH="100%" | {|WIDTH="100%" | ||
|WIDTH="60%" VALIGN="TOP"| | |WIDTH="60%" VALIGN="TOP"| | ||
== Quick Walkthrough == | == Quick Walkthrough == | ||
| − | + | ||
| − | * | + | * Talk to [[Sacred 2:Hay Highbern|Hay Highbern]] to start the quest. |
| − | * | + | * Collect 3 stolen goods |
| − | * | + | * Defeat 3 Slave Outcasts ([[Sacred 2:Human Thief|Thieves]]) |
| − | |WIDTH="40%" VALIGN="TOP"|{{S2frame|[[Image: | + | * Pick up 2 bags of stolen loot |
| + | * Return to Hay Highbern | ||
| + | |WIDTH="40%" VALIGN="TOP"|{{S2frame|[[Image:highbernloc.jpg|500px]]}} | ||
|} | |} | ||
== Detailed Walkthrough == | == Detailed Walkthrough == | ||
| − | |||
| − | + | As you walk into Valeview you'll notice the village elder seems upset. [[Sacred 2:Hay Highbern|Hay Highbern]] tells you the Widow Nolte was robbed last night. He's worried that his small village is not as safe as it once was. | |
| − | + | {{S2frame|[[Image:highbernchat.jpg|430px]]|left}} | |
| + | <br clear="both" /> | ||
| − | |||
| − | |||
| + | They found some of the goods that were stolen just off a road leading East out of the village. The thieves must have dropped them in their haste to get away. He thinks they might have dropped more on their way to their hide-out but the villagers didn't dare follow the trail into the woods. Sure enough just outside of town you find the first one, a Precious Wooden Ship. Soon after you find two more along the way, an Engraved Goblet and a Signet Ring. The dropped goods led you right to the thieves' camp. | ||
| − | {{S2frame|[[Image: | + | {{S2frame|[[Image:stolen1.jpg|250px]][[Image:stolen2.jpg|250px]][[Image:stolen3.jpg|250px]]|left]]}} |
| − | |||
| − | + | {{S2frame|[[Image:thievesloc.jpg|400px]]|left}} | |
| − | {{S2frame|[[Image: | ||
<br clear="both" /> | <br clear="both" /> | ||
| + | There only 3 of them and you easily dispatch them. Searching the camp you find 2 bags of stolen goods. You grab all the items and head back to Hay Highbern to give him the good news. | ||
| − | + | {{S2frame|[[Image:stolen4.jpg|400px]]|left}} | |
| − | + | <br clear="both" /> | |
| − | [[Image: | ||
| − | + | Speaking to Hay Highbern ends [[Sacred 2: The Robbed Widow|The Robbed Widow]] quest. Speaking to Highbern again will start the 2nd part, [[Sacred 2:Hunting Scoundrels|Hunting Scoundrels]] | |
| − | {{S2frame|[[Image: | + | {{S2frame|[[Image:highbernchat2.jpg|430px]]|left}} |
<br clear="both" /> | <br clear="both" /> | ||
== Quest Enemies == | == Quest Enemies == | ||
| − | |||
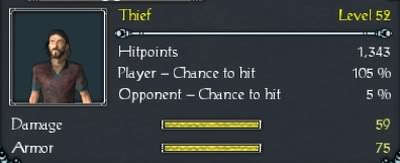
| − | + | == [[Sacred 2:Human Thief|Thief]] == | |
| − | {{:Sacred 2: | + | {{:Sacred 2:Human Thief}} |
| − | |||
| − | |||
| − | + | == Logbook Entry == | |
| − | |||
| − | |||
| − | |||
| − | |||
{| | {| | ||
| − | |{{S2frame|[[Image: | + | |{{S2frame|[[Image:robbedlog.jpg|300px]]|left}} |
| − | |||
|} | |} | ||
== Notes == | == Notes == | ||
| − | + | ||
</div> | </div> | ||
| − | + | ||
[[Category:Sacred 2 Quest|{{PAGENAME}}]] | [[Category:Sacred 2 Quest|{{PAGENAME}}]] | ||
| − | + | [[Category:Sacred 2 Chain Quest Part|{{PAGENAME}}]] | |
| − | [[Category:Sacred 2 Chain Quest | ||
| − | |||
| − | |||
| − | |||
| − | |||
| − | |||
| − | |||
Revision as of 14:04, 18 December 2011
|
| ||||||||||


Quick Walkthrough
|
| |||||||||

Detailed Walkthrough
As you walk into Valeview you'll notice the village elder seems upset. Hay Highbern tells you the Widow Nolte was robbed last night. He's worried that his small village is not as safe as it once was.
|
| ||
 |
||
They found some of the goods that were stolen just off a road leading East out of the village. The thieves must have dropped them in their haste to get away. He thinks they might have dropped more on their way to their hide-out but the villagers didn't dare follow the trail into the woods. Sure enough just outside of town you find the first one, a Precious Wooden Ship. Soon after you find two more along the way, an Engraved Goblet and a Signet Ring. The dropped goods led you right to the thieves' camp.
|
| ||
   |
||
|
| ||
 |
||
There only 3 of them and you easily dispatch them. Searching the camp you find 2 bags of stolen goods. You grab all the items and head back to Hay Highbern to give him the good news.
|
| ||
 |
||
Speaking to Hay Highbern ends The Robbed Widow quest. Speaking to Highbern again will start the 2nd part, Hunting Scoundrels
|
| ||
 |
||
Quest Enemies
Thief
|
|
Damage Types: Weakest Against: Quest:Greedy Scoundrels Quest Location: Griffinborough in Artamark | ||||||||||||||||||


Logbook Entry
| |||||||||
