Difference between revisions of "Sacred 2:The Totem Chain"
(New page: {{subst:Quest}}) |
|||
| (3 intermediate revisions by 3 users not shown) | |||
| Line 1: | Line 1: | ||
| − | |||
| − | |||
| − | |||
| − | |||
{|WIDTH="100%" | {|WIDTH="100%" | ||
|WIDTH="15%" VALIGN="TOP"|__TOC__ | |WIDTH="15%" VALIGN="TOP"|__TOC__ | ||
|WIDTH="35%" VALIGN="TOP"| | |WIDTH="35%" VALIGN="TOP"| | ||
| − | * '''Quest Objective:''' | + | * '''Quest Objective:''' Obtain Kobold entrails |
| − | * '''Quest Difficulty:''' | + | * '''Quest Difficulty:''' 3 stars |
| − | * '''Quest Giver:''' | + | * '''Quest Giver:''' [[Sacred 2:Knutsmilla|Knutsmilla]] |
| − | * '''Location(s):''' | + | * '''Location(s):''' [[Sacred 2:Nor Plat|Nor Plat]] northwest of [[Sacred 2:Sloptok|Sloptok]] |
| − | * '''Prerequisite Quest:''' | + | * '''Prerequisite Quest:''' None |
| − | * '''Next Quest:''' | + | * '''Next Quest:''' None |
| − | * '''Reward:''' | + | * '''Reward:''' [[Sacred 2:Gold|Gold]] [[Sacred 2:Experience|Experience]] |
| − | |WIDTH="50%" VALIGN="TOP"| | + | |WIDTH="50%" VALIGN="TOP"| |
| − | + | {{S2frame|[[Image:TotemChain_KnutsmillaMap.jpg|250px]][[Image:TotemChain_KnutsmillaTabMap.jpg|250px]]|right|'''[[Sacred 2:Map of Ancaria|View the Ancaria Interactive Map]]'''||516px}} | |
| − | {{S2frame|[[Image: | ||
|} | |} | ||
{|WIDTH="100%" | {|WIDTH="100%" | ||
|WIDTH="60%" VALIGN="TOP"| | |WIDTH="60%" VALIGN="TOP"| | ||
== Quick Walkthrough == | == Quick Walkthrough == | ||
| − | + | * Talk to Knutsmilla | |
| − | * | + | * Kill 9 Kobolds and collect their brains or guts |
| − | * | + | * Return to Knutsmilla and collect your reward |
| − | * | + | |WIDTH="40%" VALIGN="TOP"|{{S2frame|[[Image:TotemChain_KnutsmillaCamera.jpg|500px]]}} |
| − | |WIDTH="40%" VALIGN="TOP"|{{S2frame|[[Image: | ||
|} | |} | ||
== Detailed Walkthrough == | == Detailed Walkthrough == | ||
| − | + | You will find Knutsmilla in a homestead northwest of Sloptok. Just follow the road north out of Sloptok and take the first (and only) left. She will tell you that she accidentally burned her husband's necklace and is afraid he will turn her into a crow. She needs 6 Kobold brains and 3 guts in order to make a replacement. (I will never understand fashion...) | |
| − | + | {{S2 Dialogue|NPC NAME=Knutsmilla|PORTRAIT FILE NAME=dialog052.png|DIALOGUE=Bring me six Kobold heads and three Kobold guts! | |
| + | Oh I'm so clumsy! Just imagine, while I was cleaning I dropped my husband's favorite chain in the fire! If he comes home and notices what I've done, he'll turn me into a crow! That's what he did to his first wife! She's out there in the field pecking away at a cob of corn right now! I'd hate to know how many of the other crows in that field share her fate. I'll have to make him a new chain, but I need six Kobold brains and three Kobold guts to do it. Could you fetch the parts for me?}} | ||
| − | + | The first of the Kobolds may show up on your mini-map as soon as you take the quest. Head south from the homestead and circle north along the west side. Follow the quest marker until you have collected all of the pieces. Then return to Knutsmilla. | |
| − | {{ | + | {{S2 Dialogue|NPC NAME=Knutsmilla|PORTRAIT FILE NAME=dialog052.png|DIALOGUE=Did you find everything I need? Excellent! I shall start work on the chain at once. I want to have it finished before my husband returns. Ah yes, here is your reward.}} |
| − | |||
| − | |||
| − | |||
| − | |||
| − | |||
| − | |||
| − | |||
| − | |||
| − | |||
| − | |||
| − | |||
| − | |||
| − | |||
| − | |||
| − | |||
| − | |||
| − | |||
| − | |||
| − | |||
== Quest Enemies == | == Quest Enemies == | ||
| − | |||
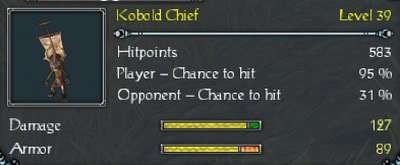
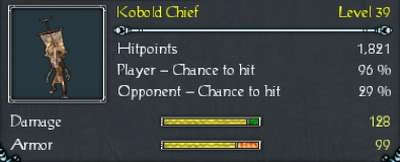
| − | === [[Sacred 2: | + | === [[Sacred 2:Kobold Chief|Kobold Chief]] === |
| − | {{:Sacred 2: | + | {{:Sacred 2:Kobold Chief}} |
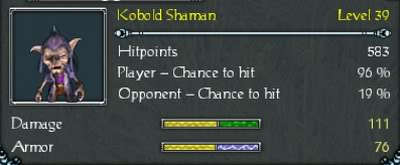
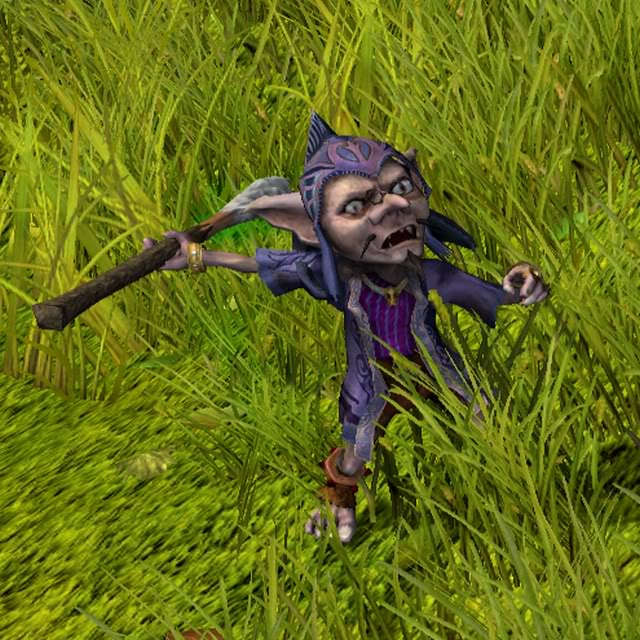
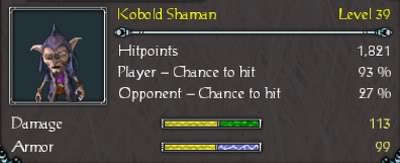
| − | == | + | === [[Sacred 2:Kobold Shaman|Kobold Shaman]] === |
| − | + | {{:Sacred 2:Kobold Shaman}} | |
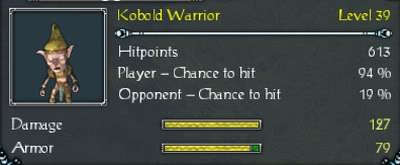
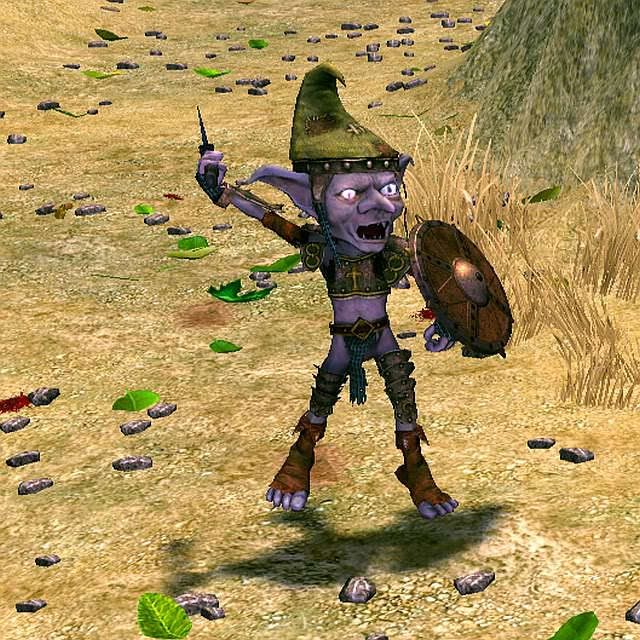
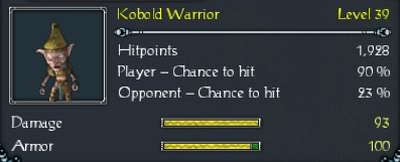
| − | + | === [[Sacred 2:Kobold Warrior|Kobold Warrior]] === | |
| − | + | {{:Sacred 2:Kobold Warrior}} | |
== Logbook Entry == | == Logbook Entry == | ||
| − | |||
{| | {| | ||
| − | |{{S2frame|[[Image: | + | |{{S2frame|[[Image:TotemChain_Logbook.jpg|300px]]|left}} |
| − | |||
|} | |} | ||
== Notes == | == Notes == | ||
| − | + | ||
</div> | </div> | ||
| − | |||
[[Category:Sacred 2 Quest|{{PAGENAME}}]] | [[Category:Sacred 2 Quest|{{PAGENAME}}]] | ||
[[Category:Sacred 2 Side Quest|{{PAGENAME}}]] | [[Category:Sacred 2 Side Quest|{{PAGENAME}}]] | ||
| − | [[Category:Sacred 2 | + | [[Category:Sacred 2 Nor Plat Quest|{{PAGENAME}}]] |
| − | |||
| − | |||
| − | |||
| − | |||
| − | |||
| − | |||
Latest revision as of 22:59, 10 November 2013
|
| ||||||||||


Quick Walkthrough
|
| |||||||||

Detailed Walkthrough
You will find Knutsmilla in a homestead northwest of Sloptok. Just follow the road north out of Sloptok and take the first (and only) left. She will tell you that she accidentally burned her husband's necklace and is afraid he will turn her into a crow. She needs 6 Kobold brains and 3 guts in order to make a replacement. (I will never understand fashion...)


Bring me six Kobold heads and three Kobold guts!
Oh I'm so clumsy! Just imagine, while I was cleaning I dropped my husband's favorite chain in the fire! If he comes home and notices what I've done, he'll turn me into a crow! That's what he did to his first wife! She's out there in the field pecking away at a cob of corn right now! I'd hate to know how many of the other crows in that field share her fate. I'll have to make him a new chain, but I need six Kobold brains and three Kobold guts to do it. Could you fetch the parts for me?
The first of the Kobolds may show up on your mini-map as soon as you take the quest. Head south from the homestead and circle north along the west side. Follow the quest marker until you have collected all of the pieces. Then return to Knutsmilla.
Did you find everything I need? Excellent! I shall start work on the chain at once. I want to have it finished before my husband returns. Ah yes, here is your reward.
Quest Enemies
Kobold Chief
|
|
Damage Types: Weakest Against: Region: Tyr Lysia | ||||||||||||||||||


|
|
Damage Types: Weakest Against: Region: Tyr Lysia | ||||||||||||||||||

Kobold Shaman
|
|
Damage Types: Weakest Against: Region: Tyr Lysia | ||||||||||||||||||

|
|
Damage Types: Weakest Against: Region: Tyr Lysia | ||||||||||||||||||

Kobold Warrior
|
|
Damage Types: Weakest Against: Region: Tyr Lysia | ||||||||||||||||||
|
|
Damage Types: Weakest Against: Region: Tyr Lysia | ||||||||||||||||||
Logbook Entry
| |||||||||
