Difference between revisions of "Sacred 2:Fan Art and Fiction"
Jump to navigation
Jump to search
m (re-uploaded to wikify images) |
(adjusted layout and code) |
||
| Line 10: | Line 10: | ||
|width="180px"|Shadow Warrior | |width="180px"|Shadow Warrior | ||
| − | + | {{S2frame|[[File:Shadow Warrior.JPG|160px]]|none||auto}} | |
|width="180px"|Seraphim | |width="180px"|Seraphim | ||
| − | + | {{S2frame|[[File:Seraphim.jpg|160px]]|none||auto}} | |
|} | |} | ||
| Line 24: | Line 24: | ||
|width="180px"|[[Sacred 2:This Book is Sacred|This Book is Sacred]] | |width="180px"|[[Sacred 2:This Book is Sacred|This Book is Sacred]] | ||
| − | + | {{S2frame|[[File:This Book is Sacred.jpg|160px]]|none||auto}} | |
|} | |} | ||
| Line 33: | Line 33: | ||
|width="180px"|Temple Guardian - Sketch 1 | |width="180px"|Temple Guardian - Sketch 1 | ||
| − | + | {{S2frame|[[Image:IMG_0379-1.jpg|160px]]|none||auto}} | |
|width="180px"|Temple Guardian - Sketch 2 | |width="180px"|Temple Guardian - Sketch 2 | ||
| − | + | {{S2frame|[[Image:IMG_0380-1.jpg|160px]]|none||auto}} | |
|width="180px"|Temple Guardian - Sketch 3 | |width="180px"|Temple Guardian - Sketch 3 | ||
| − | + | {{S2frame|[[Image:IMG_0383-1.jpg|160px]]|none||auto}} | |
|width="180px"|Temple Guardian - Sketch 4 | |width="180px"|Temple Guardian - Sketch 4 | ||
| − | + | {{S2frame|[[Image:IMG_0385-1.jpg|x160px]]|none||auto}} | |
|-valign="top" | |-valign="top" | ||
|width="180px"|Temple Guardian - Sketch 5 | |width="180px"|Temple Guardian - Sketch 5 | ||
| − | + | {{S2frame|[[Image:IMG_0415.jpg|x250px]]|none||auto}} | |
|width="180px"|Temple Guardian - Sketch 6 | |width="180px"|Temple Guardian - Sketch 6 | ||
| − | + | {{S2frame|[[Image:IMG_0412.jpg|160px]]|none||auto}} | |
|} | |} | ||
| Line 59: | Line 59: | ||
|width="180px"|Seraphim Sketch 1 | |width="180px"|Seraphim Sketch 1 | ||
| − | + | {{S2frame|[[File:Seraphim Sketch 1.jpg|160px]]|none||auto}} | |
|width="180px"|Seraphim Sketch 2 | |width="180px"|Seraphim Sketch 2 | ||
| − | + | {{S2frame|[[File:Seraphim Sketch 2.jpg|160px]]|none||auto}} | |
|} | |} | ||
| Line 72: | Line 72: | ||
|width="180px"|Dryad | |width="180px"|Dryad | ||
| − | + | {{S2frame|[[Image:telariArt1.jpg|160px]]|none||auto}} | |
|width="180px"|What I've Done | |width="180px"|What I've Done | ||
| − | + | {{S2frame|[[Image:telariArt2.jpg|160px]]|none||auto}} | |
|width="180px"|Seraphim | |width="180px"|Seraphim | ||
| − | + | {{S2frame|[[Image:telariArt3.jpg|160px]]|none||auto}} | |
|width="180px"|Longsword | |width="180px"|Longsword | ||
| − | + | {{S2frame|[[Image:telariArt4.jpg|160px]]|none||auto}} | |
|-valign="top" | |-valign="top" | ||
|width="180px"|Angry High Elf | |width="180px"|Angry High Elf | ||
| − | + | {{S2frame|[[Image:telariArt5.jpg|160px]]|none||auto}} | |
|width="180px"|Seraphim Sitting | |width="180px"|Seraphim Sitting | ||
| − | + | {{S2frame|[[Image:telariArt6.jpg|160px]]|none||auto}} | |
|width="180px"|Twin Sisters | |width="180px"|Twin Sisters | ||
| − | + | {{S2frame|[[Image:telariArt7.jpg|160px]]|none||auto}} | |
|width="180px"|Sera and Heart of Ancaria | |width="180px"|Sera and Heart of Ancaria | ||
| − | + | {{S2frame|[[Image:telariArt8.jpg|160px]]|none||auto}} | |
|-valign="top" | |-valign="top" | ||
|width="180px"|Dryad 2 | |width="180px"|Dryad 2 | ||
| − | + | {{S2frame|[[Image:telari1.jpg|160px]]|none||auto}} | |
|width="180px"|Barbarian Dryad | |width="180px"|Barbarian Dryad | ||
| − | + | {{S2frame|[[Image:barbariandryad.jpg|160px]]|none||auto}} | |
|width="180px"|High Elf and Nasty Little Imp | |width="180px"|High Elf and Nasty Little Imp | ||
| − | + | {{S2frame|[[Image:highelfandnastylittleimp.jpg|160px]]|none||auto}} | |
|width="180px"|Dryad chess | |width="180px"|Dryad chess | ||
| − | + | {{S2frame|[[Image:driadamarionetki.jpg|160px]]|none||auto}} | |
|-valign="top" | |-valign="top" | ||
| Line 115: | Line 115: | ||
|width="180px"|Shadow Warrior | |width="180px"|Shadow Warrior | ||
| − | + | {{S2frame|[[Image:shadowwarriorart.jpg|160px]]|none||auto}} | |
|width="180px"|Dwarven Beauty | |width="180px"|Dwarven Beauty | ||
| − | + | {{S2frame|[[Image:dwarvenlady.jpg|160px]]|none||auto}} | |
|width="180px"|DE & WE | |width="180px"|DE & WE | ||
| − | + | {{S2frame|[[Image:DEWE.jpg|160px]]|none||auto}} | |
|width="180px"|Temple Guardian | |width="180px"|Temple Guardian | ||
| − | + | {{S2frame|[[Image:tgart.jpg|160px]]|none||auto}} | |
|-valign="top" | |-valign="top" | ||
|width="180px"|Sera and Dragon | |width="180px"|Sera and Dragon | ||
| − | + | {{S2frame|[[Image:serasmok.jpg|160px]]|none||auto}} | |
|width="180px"|Wraith | |width="180px"|Wraith | ||
| − | + | {{S2frame|[[Image:upior3.jpg|160px]]|none||auto}} | |
|width="180px"|Phantom Seraphim | |width="180px"|Phantom Seraphim | ||
| − | + | {{S2frame|[[Image:upior.jpg|160px]]|none||auto}} | |
| Line 148: | Line 148: | ||
|width="180px"|Dryad and the Seraphim | |width="180px"|Dryad and the Seraphim | ||
| − | + | {{S2frame|[[Image:sacred2girls.jpg|200px]]|none||auto}} | |
|} | |} | ||
| Line 163: | Line 163: | ||
|width="180px"|1st Place Winner - Marschel | |width="180px"|1st Place Winner - Marschel | ||
| − | + | {{S2frame|[[File:Sacred2WallpaperContest2007Winner1.jpg|200px]]|none||auto}} | |
|width="180px"|2nd Place Winner - Kire | |width="180px"|2nd Place Winner - Kire | ||
| − | + | {{S2frame|[[File:Sacred2WallpaperContest2007Winner2.jpg|200px]]|none||auto}} | |
|width="180px"|3rd Place Winner - Kitiara | |width="180px"|3rd Place Winner - Kitiara | ||
| − | + | {{S2frame|[[File:Sacred2WallpaperContest2007Winner3.jpg|200px]]|none||auto}} | |
|-valign="top" | |-valign="top" | ||
| Line 179: | Line 179: | ||
== '''Schot''' == | == '''Schot''' == | ||
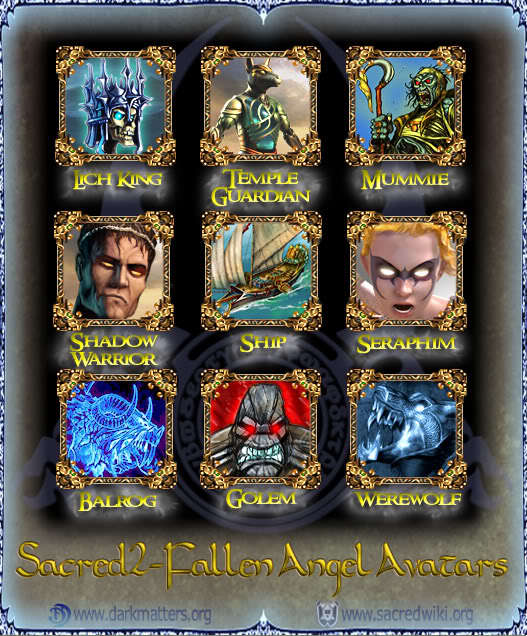
| − | ==Sacred 2 | + | ==Official Sacred 2 Forum Avatars== |
| − | [[File:Sacred2AvatarsPoster.jpg]] | + | [[File:Sacred2AvatarsPoster.jpg|center]] |
== Framed Avatars == | == Framed Avatars == | ||
| − | {|cellpadding=10 | + | {|cellpadding=10 style="margin:auto;" |
|- | |- | ||
| − | | [[File:LichKingAvatar.gif]]|| [[File:TGuardianAvatar.gif]]|| [[File:MummieAvatar.gif]] | + | | [[File:LichKingAvatar.gif|center]]|| [[File:TGuardianAvatar.gif|center]]|| [[File:MummieAvatar.gif|center]] |
|- | |- | ||
| − | | [[File:SWarriorAvatar.gif]]|| [[File:ShipAvatar.gif]]|| [[File:SeraphimAvatar.gif]] | + | | [[File:SWarriorAvatar.gif|center]]|| [[File:ShipAvatar.gif|center]]|| [[File:SeraphimAvatar.gif|center]] |
|- | |- | ||
| − | | [[File:BalrogAvatar.gif]]|| [[File:GolemAvatar.gif]]|| [[File:WerewolfAvatar.gif]] | + | | [[File:BalrogAvatar.gif|center]]|| [[File:GolemAvatar.gif|center]]|| [[File:WerewolfAvatar.gif|center]] |
|} | |} | ||
Revision as of 22:50, 28 October 2013
Sacred 2 original art work contributed by fans. Click on any picture to see the full-size version or go to Sacred 2 Fan Art and Fiction Forums where you may see and comment upon the original contribution.
Aegis
| Shadow Warrior
|
Seraphim
| ||||||||||||||||||


Dromin
| This Book is Sacred
| |||||||||

Kseniya Vogel
Temple Guardian - Sketch 1
|
Temple Guardian - Sketch 2
|
Temple Guardian - Sketch 3
|
Temple Guardian - Sketch 4
| ||||||||||||||||||||||||||||||||||||
Temple Guardian - Sketch 5
|
Temple Guardian - Sketch 6
| ||||||||||||||||||||||||||||||||||||||


r00ster
Seraphim Sketch 1
|
Seraphim Sketch 2
| ||||||||||||||||||


Telari
Dryad
|
What I've Done
|
Seraphim
|
Longsword
| ||||||||||||||||||||||||||||||||||||
Angry High Elf
|
Seraphim Sitting
|
Twin Sisters
|
Sera and Heart of Ancaria
| ||||||||||||||||||||||||||||||||||||
Dryad 2
|
Barbarian Dryad
|
High Elf and Nasty Little Imp
|
Dryad chess
| ||||||||||||||||||||||||||||||||||||
Shadow Warrior
|
Dwarven Beauty
|
DE & WE
|
Temple Guardian
| ||||||||||||||||||||||||||||||||||||
Sera and Dragon
|
Wraith
|
Phantom Seraphim
| |||||||||||||||||||||||||||||||||||||


Nervusbreakdown
| Dryad and the Seraphim
| |||||||||

Sacred 2 Wallpaper Contest 2007 Winners
| 1st Place Winner - Marschel
|
2nd Place Winner - Kire
|
3rd Place Winner - Kitiara
| |||||||||||||||||||||||||||


