Difference between revisions of "Sacred 2:Fan Scarves"
(New page: {{subst:Quest}}) |
|||
| Line 1: | Line 1: | ||
| − | |||
| − | |||
| − | |||
<div class="plainlinks"> | <div class="plainlinks"> | ||
{|WIDTH="100%" | {|WIDTH="100%" | ||
|WIDTH="15%" VALIGN="TOP"|__TOC__ | |WIDTH="15%" VALIGN="TOP"|__TOC__ | ||
|WIDTH="35%" VALIGN="TOP"| | |WIDTH="35%" VALIGN="TOP"| | ||
| − | * '''Quest Objective:''' | + | * '''Quest Objective:''' Obtain bolts of cloth from a shipwreck |
| − | * '''Quest Difficulty:''' | + | * '''Quest Difficulty:''' 2 stars |
| − | * '''Quest Giver:''' | + | * '''Quest Giver:''' [[Sacred 2:Toriak|Toriak]] |
| − | * '''Location(s):''' | + | * '''Location(s):''' [[Sacred 2:Tharak|Tharak]] within central [[Sacred 2:Nor Plat|Nor Plat]] |
| − | * '''Prerequisite Quest:''' | + | * '''Prerequisite Quest:''' None |
| − | * '''Next Quest:''' | + | * '''Next Quest:''' None |
| − | * '''Reward:''' | + | * '''Reward:''' [[Sacred 2:Experience|Experience]] |
| − | |WIDTH="50%" VALIGN="TOP"| | + | |WIDTH="50%" VALIGN="TOP"| |
| − | + | {{S2frame|[[Image:FanScarves_ToriakMap.jpg|250px]][[Image:FanScarves_ToriakTabMap.jpg|250px]]|right|'''[[Sacred 2:Map of Ancaria|View the Ancaria Interactive Map]]'''}} | |
| − | {{S2frame|[[Image: | ||
|} | |} | ||
{|WIDTH="100%" | {|WIDTH="100%" | ||
|WIDTH="60%" VALIGN="TOP"| | |WIDTH="60%" VALIGN="TOP"| | ||
== Quick Walkthrough == | == Quick Walkthrough == | ||
| − | + | * Talk to Toriak | |
| − | * | + | * Travel to the north coast of Nor Plat and collect the cloth |
| − | * | + | * Return to Toriak for your reward |
| − | * | + | |WIDTH="40%" VALIGN="TOP"|{{S2frame|[[Image:FanScarves_ToriakCamera.jpg|500px]]}} |
| − | |WIDTH="40%" VALIGN="TOP"|{{S2frame|[[Image: | ||
|} | |} | ||
== Detailed Walkthrough == | == Detailed Walkthrough == | ||
| − | + | On the north end of Tharak, you will find a seamster named Toriak, near the statue to Andreas Mueller. He will tell you that he wants to make some scarves to sell at an upcoming sporting event but is out of cloth. A human ship carrying cloth ran aground on the north coast. There were no survivors and he wants you to salvage him some cloth from the wreck. | |
| + | {{S2frame|[[Image:FanScarves_Toriak1Dialog.jpg|430px]]|left}} | ||
| + | <br clear="both" /> | ||
| − | + | Head north-northeast out of Tharak until you hit the coast. | |
| + | {{S2frame|[[Image:FanScarves_Wreck1Map.jpg|250px]][[Image:FanScarves_Wreck1TabMap.jpg|250px]]|left]]}} | ||
| + | <br clear="both" /> | ||
| − | + | You will have to check several spots in order to find the cloth. | |
| − | + | {{S2frame|[[Image:FanScarves_Wreck1Dialog.jpg|430px]]|left}} | |
| − | + | <br clear="both" /> | |
| − | {{S2frame|[[Image: | + | {{S2frame|[[Image:FanScarves_Wreck2Dialog.jpg|430px]]|left}} |
| + | <br clear="both" /> | ||
| + | {{S2frame|[[Image:FanScarves_Wreck3Dialog.jpg|430px]]|left}} | ||
<br clear="both" /> | <br clear="both" /> | ||
| − | + | {{S2frame|[[Image:FanScarves_Wreck2Map.jpg|250px]][[Image:FanScarves_Wreck2TabMap.jpg|250px]]|left]]}} | |
| − | |||
| − | {{S2frame|[[Image: | ||
<br clear="both" /> | <br clear="both" /> | ||
| − | + | {{S2frame|[[Image:FanScarves_WreckCamera.jpg|400px]]|left}} | |
| − | |||
| − | {{S2frame|[[Image: | ||
<br clear="both" /> | <br clear="both" /> | ||
| − | + | After collecting the cloth, return to Toriak in Tharak to collect your reward. | |
| − | + | {{S2frame|[[Image:FanScarves_Toriak2Dialog.jpg|430px]]|left}} | |
| − | |||
| − | |||
| − | |||
| − | |||
| − | |||
| − | {{S2frame|[[Image: | ||
<br clear="both" /> | <br clear="both" /> | ||
== Quest Enemies == | == Quest Enemies == | ||
| − | |||
| − | |||
| − | |||
| − | |||
| − | |||
| − | |||
| − | |||
| − | + | === [[Sacred 2:Armed Orc Warrior|Armerd Orc Warrior]] === | |
| − | + | {{:Sacred 2:Armed Orc Warrior}} | |
| + | === [[Sacred 2:Goblin Warrior|Goblin Warrior]] === | ||
| + | {{:Sacred 2:Goblin Warrior}} | ||
| + | === [[Sacred 2:Ogre Warrior|Ogre Warrior]] === | ||
| + | {{:Sacred 2:Ogre Warrior}} | ||
== Logbook Entry == | == Logbook Entry == | ||
| − | |||
{| | {| | ||
| − | |{{S2frame|[[Image: | + | |{{S2frame|[[Image:FanScarves_Logbook.jpg|300px]]|left}} |
| − | |||
|} | |} | ||
== Notes == | == Notes == | ||
| − | + | This quest was originally bugged, and is still bugged on the consoles, but may have been fixed in a PC patch. If you opened the crates out of order, it would break the quest. For this reason, you are advised to open the crates in order. | |
</div> | </div> | ||
| − | |||
[[Category:Sacred 2 Quest|{{PAGENAME}}]] | [[Category:Sacred 2 Quest|{{PAGENAME}}]] | ||
[[Category:Sacred 2 Side Quest|{{PAGENAME}}]] | [[Category:Sacred 2 Side Quest|{{PAGENAME}}]] | ||
| − | |||
| − | |||
| − | |||
| − | |||
| − | |||
| − | |||
| − | |||
Revision as of 01:14, 16 March 2011
|
| ||||||||||


Quick Walkthrough
|
| |||||||||

Detailed Walkthrough
On the north end of Tharak, you will find a seamster named Toriak, near the statue to Andreas Mueller. He will tell you that he wants to make some scarves to sell at an upcoming sporting event but is out of cloth. A human ship carrying cloth ran aground on the north coast. There were no survivors and he wants you to salvage him some cloth from the wreck.
|
| ||
 |
||
Head north-northeast out of Tharak until you hit the coast.
|
| ||
You will have to check several spots in order to find the cloth.
|
| ||
 |
||
|
| ||
 |
||
|
| ||
 |
||
|
| ||
|
| ||
 |
||
After collecting the cloth, return to Toriak in Tharak to collect your reward.
|
| ||
 |
||
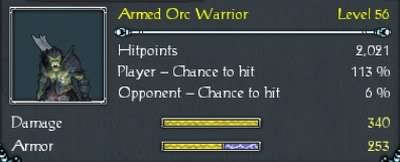
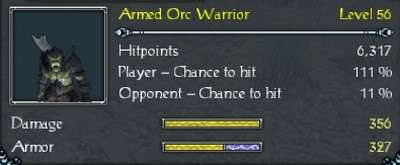
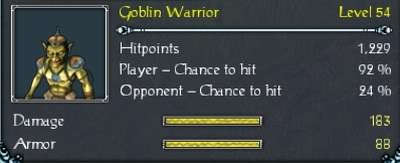
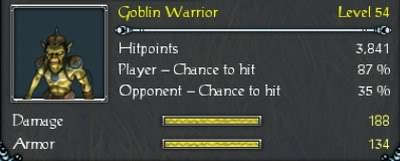
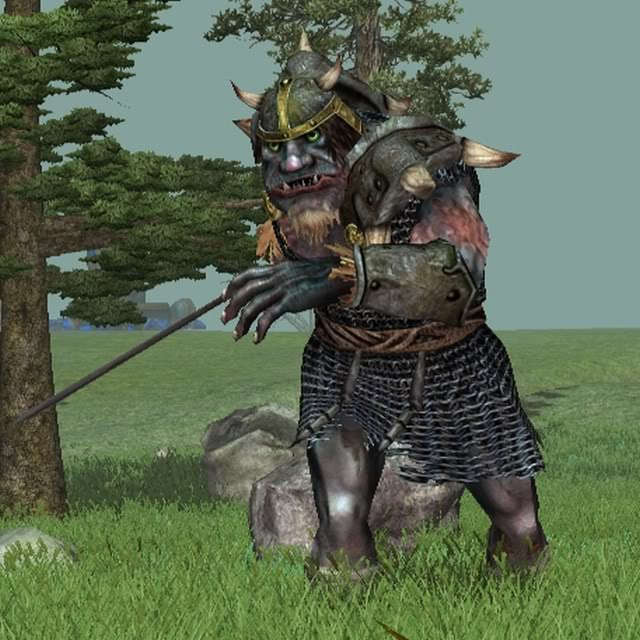
Quest Enemies
Armerd Orc Warrior
|
|
Damage Types: Weakest Against: Region: Nor Plat | ||||||||||||||||||


|
|
Damage Types: Weakest Against: Region: Nor Plat | ||||||||||||||||||

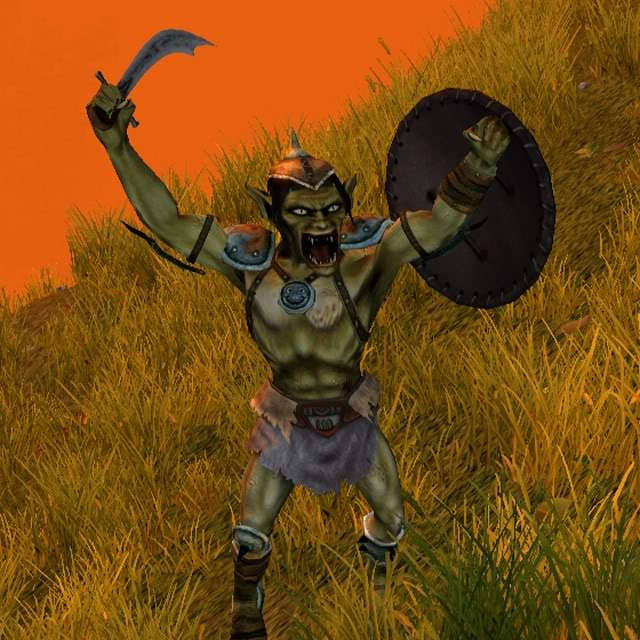
Goblin Warrior
|
|
Damage Types: Weakest Against: Region: Nor Plat | ||||||||||||||||||


|
|
Damage Types: Weakest Against: Region: Nor Plat | ||||||||||||||||||
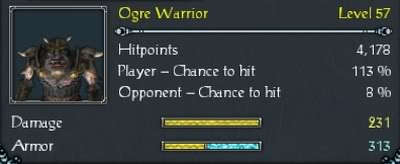
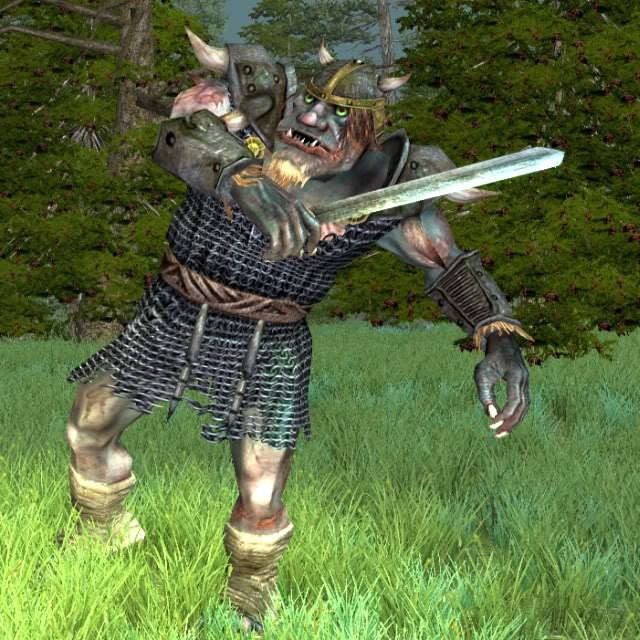
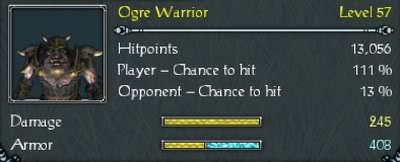
Ogre Warrior
|
|
Damage Types: Weakest Against: Region: Nor Plat | ||||||||||||||||||
|
|
Damage Types: Weakest Against: Region: Nor Plat | ||||||||||||||||||
Logbook Entry
| |||||||||

Notes
This quest was originally bugged, and is still bugged on the consoles, but may have been fixed in a PC patch. If you opened the crates out of order, it would break the quest. For this reason, you are advised to open the crates in order.