Difference between revisions of "Sacred 2:Throne of Conflict"
| Line 39: | Line 39: | ||
You encounter a Tribal Leader, who won't let you pass until you fight with Lizardman Companion. Let's see what the Companion thinks about it. | You encounter a Tribal Leader, who won't let you pass until you fight with Lizardman Companion. Let's see what the Companion thinks about it. | ||
| − | [ | + | {{S2frame|[[Image:trbal_leader_quest1.jpg|400px]]|left}} |
| − | + | <br clear="both" /> | |
| + | {{S2frame|[[Image:trbal_leader_quest2.jpg|400px]]|left}} | ||
| + | <br clear="both" /> | ||
Lizardman Companion refuses to fight you, but the Tribal Leader is pleased to see such a display of loyalty. You are free to go. The Companion decides to leave you and joins the warrior clan. | Lizardman Companion refuses to fight you, but the Tribal Leader is pleased to see such a display of loyalty. You are free to go. The Companion decides to leave you and joins the warrior clan. | ||
| − | [ | + | {{S2frame|[[Image:trbal_leader_quest3.jpg|400px]]|left}} |
| − | + | <br clear="both" /> | |
| + | {{S2frame|[[Image:trbal_leader_quest4.jpg|400px]]|left}} | ||
| + | <br clear="both" /> | ||
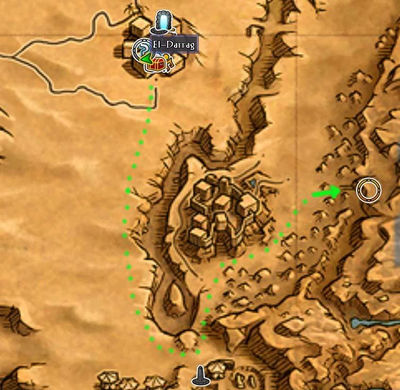
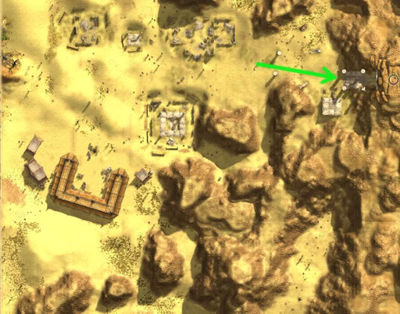
Proceed south to the El-Darrag oasis. There you will be told about the political situation of the desert tribes. You need to find the scroll of Devil's Fire and bring it to the dead King's brother, so that the Prince won't be able to use it for general evil purposes. (Note: The cave is often marked incorrectly, check the following map for the correct cave.) | Proceed south to the El-Darrag oasis. There you will be told about the political situation of the desert tribes. You need to find the scroll of Devil's Fire and bring it to the dead King's brother, so that the Prince won't be able to use it for general evil purposes. (Note: The cave is often marked incorrectly, check the following map for the correct cave.) | ||
| − | [ | + | {{S2frame|[[Image:king_quest1.jpg|400px]]|left}} |
| − | + | <br clear="both" /> | |
| + | {{S2frame|[[Image:devilfire_map1.jpg|400px]]|left}} | ||
| + | <br clear="both" /> | ||
| + | {{S2frame|[[Image:devilfire_map2.jpg|400px]]|left}} | ||
| + | <br clear="both" /> | ||
Once you retrieve the scroll, meet the King's Brother in Khorum. He assures you that he will not use the scroll, and asks you to bring him an alchemist that can read it. | Once you retrieve the scroll, meet the King's Brother in Khorum. He assures you that he will not use the scroll, and asks you to bring him an alchemist that can read it. | ||
| − | [ | + | {{S2frame|[[Image:king_quest2.jpg|400px]]|left}} |
| − | + | <br clear="both" /> | |
| + | {{S2frame|[[Image:king_quest3.jpg|400px]]|left}} | ||
| + | <br clear="both" /> | ||
Find the alchemist and escort him to the palace. Assim gladly follows you, but on your way to the palace you meet Prince's Envoy that wants you to turn over the alchemist. Since accepting is literally not an option, you are forced to kill the Envoy. | Find the alchemist and escort him to the palace. Assim gladly follows you, but on your way to the palace you meet Prince's Envoy that wants you to turn over the alchemist. Since accepting is literally not an option, you are forced to kill the Envoy. | ||
| − | [ | + | {{S2frame|[[Image:king_quest4.jpg|400px]]|left}} |
| + | <br clear="both" /> | ||
| + | {{S2frame|[[Image:king_quest5.jpg|400px]]|left}} | ||
| + | <br clear="both" /> | ||
| + | {{S2frame|[[Image:king_quest6.jpg|400px]]|left}} | ||
| + | <br clear="both" /> | ||
| + | The rest of the journey will be safe and quiet (especially if you use the portal to Khorum). Al Sadim is anxious to hear [[Sacred 2:Demise of a Scorpion|what the alchemist can say about the scroll]]. | ||
| − | + | {{S2frame|[[Image:king_quest7.jpg|400px]]|left}} | |
| + | <br clear="both" /> | ||
| − | |||
| + | == Logbook Entry == | ||
| − | + | {| | |
| − | + | |{{S2frame|[[Image:throne_of_conflict_log1.jpg|300px]]|left}} | |
| − | [ | + | |{{S2frame|[[Image:throne_of_conflict_log2.jpg|300px]]|left}} |
| + | |{{S2frame|[[Image:throne_of_conflict_log3.jpg|300px]]|left}} | ||
| + | |} | ||
Revision as of 02:16, 11 September 2013
|
|
Quick Walkthrough
Detailed WalkthroughYou encounter a Tribal Leader, who won't let you pass until you fight with Lizardman Companion. Let's see what the Companion thinks about it.
Lizardman Companion refuses to fight you, but the Tribal Leader is pleased to see such a display of loyalty. You are free to go. The Companion decides to leave you and joins the warrior clan.
Proceed south to the El-Darrag oasis. There you will be told about the political situation of the desert tribes. You need to find the scroll of Devil's Fire and bring it to the dead King's brother, so that the Prince won't be able to use it for general evil purposes. (Note: The cave is often marked incorrectly, check the following map for the correct cave.)
Once you retrieve the scroll, meet the King's Brother in Khorum. He assures you that he will not use the scroll, and asks you to bring him an alchemist that can read it.
Find the alchemist and escort him to the palace. Assim gladly follows you, but on your way to the palace you meet Prince's Envoy that wants you to turn over the alchemist. Since accepting is literally not an option, you are forced to kill the Envoy.
The rest of the journey will be safe and quiet (especially if you use the portal to Khorum). Al Sadim is anxious to hear what the alchemist can say about the scroll.
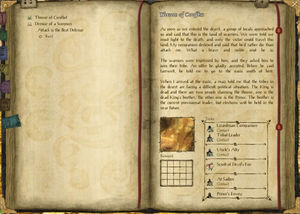
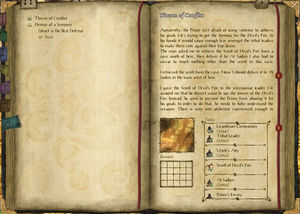
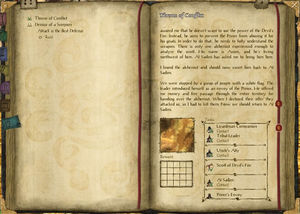
Logbook Entry
Notes |
||||||||||||||||||||||||||||||||||||||||||||||||||||||||||||||||||||||||||||||||||||||||||||||||||||||||||||||||||||||||||||||||||||||||||||||||||||||
