Difference between revisions of "Sacred 2:The Merchants' Expedition"
(Created page with "{{subst:Quest}}") |
|||
| Line 6: | Line 6: | ||
|WIDTH="15%" VALIGN="TOP"|__TOC__ | |WIDTH="15%" VALIGN="TOP"|__TOC__ | ||
|WIDTH="35%" VALIGN="TOP"| | |WIDTH="35%" VALIGN="TOP"| | ||
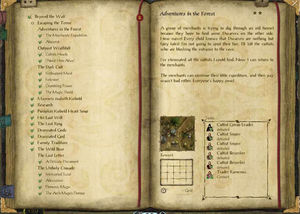
| − | * '''Quest Objective:''' | + | * '''Quest Objective:''' Help the merchants' with their endeavor. |
| − | * '''Quest Difficulty:''' | + | * '''Quest Difficulty:''' 2 Stars |
| − | * '''Quest Giver:''' | + | * '''Quest Giver:''' [[Sacred 2:Trader Ramenos|Trader Ramenos]] |
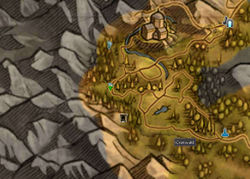
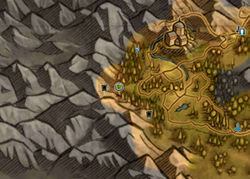
| − | * '''Location(s):''' | + | * '''Location(s):''' [[Sacred 2:Artamark|Artamark]] region, in [[Sacred 2:Grunwald|Grunwald]] |
| − | * '''Prerequisite Quest:''' | + | * '''Prerequisite Quest:''' n/a |
| − | * '''Next Quest:''' | + | * '''Next Quest:''' [[Sacred 2:Abscond|Abscond]] |
| − | * '''Reward:''' | + | * '''Reward:''' [[Sacred 2:Gold|Gold]] [[Sacred 2:Experience|Experience]] |
| − | |WIDTH="50%" VALIGN="TOP"| | + | |WIDTH="50%" VALIGN="TOP"| |
| − | {{S2frame|[[Image: | + | {{S2frame|[[Image:adventuremap.jpg|250px]][[Image:adventuretab.jpg|250px]]|right|'''[[Sacred 2:Map of Ancaria|View the Ancaria Interactive Map]]'''}} |
|} | |} | ||
{|WIDTH="100%" | {|WIDTH="100%" | ||
|WIDTH="60%" VALIGN="TOP"| | |WIDTH="60%" VALIGN="TOP"| | ||
== Quick Walkthrough == | == Quick Walkthrough == | ||
| − | + | ||
| − | * | + | * Talk to [[Sacred 2:Trader Ramenos|Trader Ramenos]] |
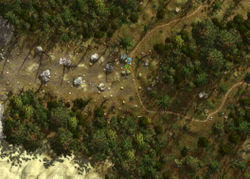
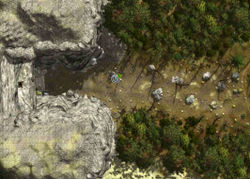
| − | * | + | * Head towards cave entrance |
| − | * | + | * Talk to [[Sacred 2:Cultist Group Leader|Cultist Group Leader]] |
| − | |WIDTH="40%" VALIGN="TOP"|{{S2frame|[[Image: | + | * Defeat the [[Sacred 2:Cultist Group Leader|Cultist Group Leader]], 2 [[Sacred 2:Cultist Beserker|Cultist Beserkers]] and 2 [[Sacred 2:Cultist Sniper|Cultist Snipers]] |
| + | * Return and talk to Trader Ramenos | ||
| + | |WIDTH="40%" VALIGN="TOP"|{{S2frame|[[Image:adventureloc.jpg|500px]]}} | ||
|} | |} | ||
== Detailed Walkthrough == | == Detailed Walkthrough == | ||
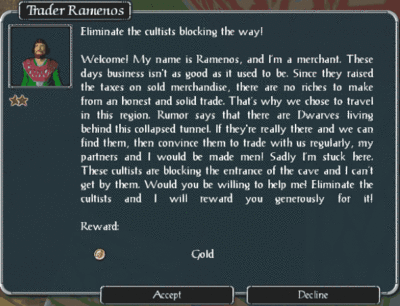
| − | + | Ramenos is a trader who's fortunes haven't been great lately. Taxes have been raised to a point to where he's willing to look for unconventional means of profit. He's heard that a nearby collapsed tunnel leads to the land of Dwarves. If he can get through this tunnel and trade with them he will be rich. Unfortunately some cultists are in the way and he asks you to clear them out. | |
| − | + | {{S2frame|[[Image:ramenoschat.gif|400px]]|left}} | |
| + | <br clear="both" /> | ||
| + | Dwarves? Nothing but a fairy tale. But you decide to let the merchants have their dreams and head out towards the cave to see what is going on with the cultists. | ||
| − | |||
| − | {{S2frame|[[Image: | + | {{S2frame|[[Image:groupleadermap.jpg|250px]][[Image:groupleadertab.jpg|250px]]|left]]}} |
<br clear="both" /> | <br clear="both" /> | ||
| − | {{S2frame|[[Image: | + | {{S2frame|[[Image:groupleaderloc.jpg|400px]]|left}} |
<br clear="both" /> | <br clear="both" /> | ||
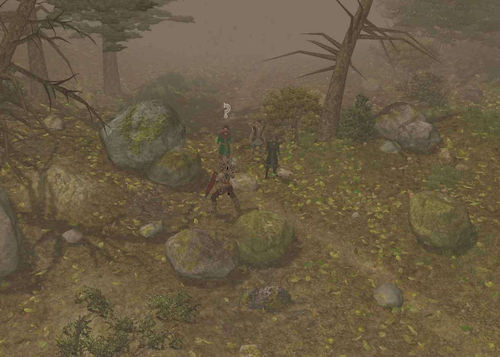
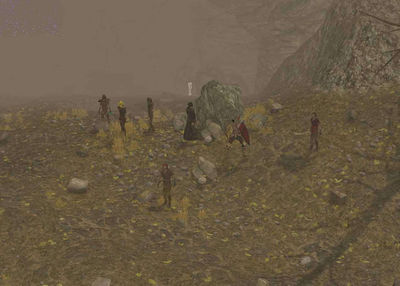
| − | + | Sure enough there are cultists blocking the entrance. You decide to talk to the leader but he's obviously not in the mood to chat | |
| − | {{S2frame|[[Image: | + | |
| + | {{S2frame|[[Image:groupleaderchat.gif|400px]]|left}} | ||
<br clear="both" /> | <br clear="both" /> | ||
| + | You easily dispatch the Group Leader and his underlings. Sacrifices? really?. Now that the deed is done you head back to the merchant. | ||
| − | |||
| − | [[Image: | + | {{S2frame|[[Image:ramenoschat2.gif|400px]]|left}} |
| + | <br clear="both" /> | ||
| − | + | He rewards you for your efforts. Talk to him again to begin the second part of this chain quest, [[Sacred 2:Abscond|Abscond]]. | |
| − | |||
| − | |||
== Quest Enemies == | == Quest Enemies == | ||
| − | |||
| − | |||
| − | |||
| − | |||
| − | |||
| − | + | ||
| − | |||
== Logbook Entry == | == Logbook Entry == | ||
| − | + | ||
{| | {| | ||
| − | |{{S2frame|[[Image: | + | |{{S2frame|[[Image:merc-expeditionlog.jpg|300px]]|left}} |
| − | |||
|} | |} | ||
== Notes == | == Notes == | ||
| − | + | ||
| Line 86: | Line 82: | ||
[[Category:Sacred 2 Quest|{{PAGENAME}}]] | [[Category:Sacred 2 Quest|{{PAGENAME}}]] | ||
[[Category:Sacred 2 Side Quest|{{PAGENAME}}]] | [[Category:Sacred 2 Side Quest|{{PAGENAME}}]] | ||
| − | [[Category:Sacred 2 Chain Quest]|{{PAGENAME}}]] | + | [[Category:Sacred 2 Chain Quest Part]|{{PAGENAME}}]] |
| − | [[Category:Sacred 2 | + | [[Category:Sacred 2 Artamark Quest|{{SUBPAGENAME}}]] |
| − | |||
| − | |||
| − | |||
| − | |||
| − | |||
Revision as of 21:12, 6 October 2013
|
| ||||||||||
Quick Walkthrough
|
| |||||||||
Detailed Walkthrough
Ramenos is a trader who's fortunes haven't been great lately. Taxes have been raised to a point to where he's willing to look for unconventional means of profit. He's heard that a nearby collapsed tunnel leads to the land of Dwarves. If he can get through this tunnel and trade with them he will be rich. Unfortunately some cultists are in the way and he asks you to clear them out.
|
| ||
Dwarves? Nothing but a fairy tale. But you decide to let the merchants have their dreams and head out towards the cave to see what is going on with the cultists.
|
| ||
|
| ||
Sure enough there are cultists blocking the entrance. You decide to talk to the leader but he's obviously not in the mood to chat
|
| ||
You easily dispatch the Group Leader and his underlings. Sacrifices? really?. Now that the deed is done you head back to the merchant.
|
| ||
He rewards you for your efforts. Talk to him again to begin the second part of this chain quest, Abscond.
Quest Enemies
Logbook Entry
| |||||||||
Notes
DECIDE WHICH OF THE FOLLOWING CATEGORY('S) APPLY TO THIS QUEST (LEAVE IN THE SACRED 2 QUEST CATEGORY) AND DELETE THOSE THAT DO NOT APPLY(AS WELL AS THIS COMMENT): [[Category:Sacred 2 Chain Quest Part]|The Merchants' Expedition]]
