Difference between revisions of "Sacred 2:Whoops"
Silver_fox (talk | contribs) |
|||
| (6 intermediate revisions by one other user not shown) | |||
| Line 1: | Line 1: | ||
{{Languages}} | {{Languages}} | ||
| − | |||
| − | |||
<div class="plainlinks"> | <div class="plainlinks"> | ||
| − | {| | + | {|WIDTH="100%" |
| − | |WIDTH=" | + | |WIDTH="15%" VALIGN="TOP"|__TOC__ |
|WIDTH="35%" VALIGN="TOP"| | |WIDTH="35%" VALIGN="TOP"| | ||
* '''Quest Objective:''' Find and rescue the missing [[Sacred 2:Alethea|Seraphim Alethea]] | * '''Quest Objective:''' Find and rescue the missing [[Sacred 2:Alethea|Seraphim Alethea]] | ||
| − | * '''Quest Difficulty:''' 2 stars | + | * '''Quest Difficulty:''' 2 stars (Not Rated with the [[Sacred 2:Community Patch|Community Patch]]) |
* '''Quest Giver:''' [[Sacred 2:Andra|Andra]] | * '''Quest Giver:''' [[Sacred 2:Andra|Andra]] | ||
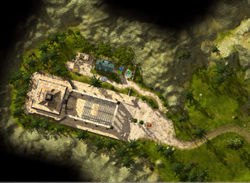
* '''Location(s):''' [[Sacred 2:Noriath Temple|Noriath Temple]] | * '''Location(s):''' [[Sacred 2:Noriath Temple|Noriath Temple]] | ||
| Line 15: | Line 13: | ||
* '''Next Quest:''' None | * '''Next Quest:''' None | ||
* '''Reward:''' [[Sacred 2:Gold|Gold]], [[Sacred 2:Experience|Experience]] | * '''Reward:''' [[Sacred 2:Gold|Gold]], [[Sacred 2:Experience|Experience]] | ||
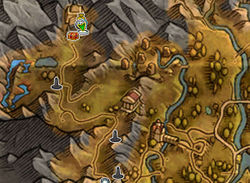
| − | |WIDTH=" | + | |WIDTH="50%" VALIGN="TOP"| {{S2frame|[[Image:Whoops map.jpg|250px]][[Image:Andra minimap.jpg|250px]]|right|'''[[Sacred 2:Map of Ancaria|View the Ancaria Interactive Map]]'''}} |
|} | |} | ||
| − | + | {|WIDTH="100%" | |
| + | |WIDTH="60%" VALIGN="TOP"| | ||
== Quick Walkthrough == | == Quick Walkthrough == | ||
| − | * Talk to [[Sacred 2:Andra|Andra]] | + | * Talk to the nun called [[Sacred 2:Andra|Andra]] in [[Sacred 2:Noriath Temple|Noriath Temple]] |
| − | * | + | * Walk to a little cave in the mountains |
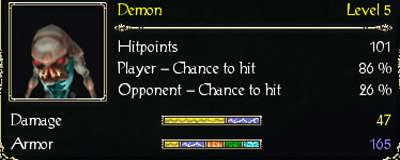
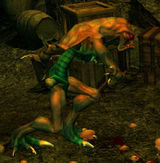
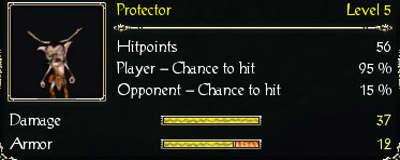
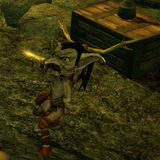
| − | * Kill 4 Creatures: a [[Sacred 2:Demon - Whoops|Demon]] and its [[Sacred 2:Protector - Whoops|Protectors]] | + | * Walk inside the cave and talk to the Seraphim [[Sacred 2:Alethea|Alethea]] |
| − | * | + | * Kill 4 Creatures: a [[Sacred 2:Demon - Whoops|Demon]] and its [[Sacred 2:Protector - Whoops|Protectors]] |
| + | * Return to Alethea and inform her that she is free now. This ends the quest. | ||
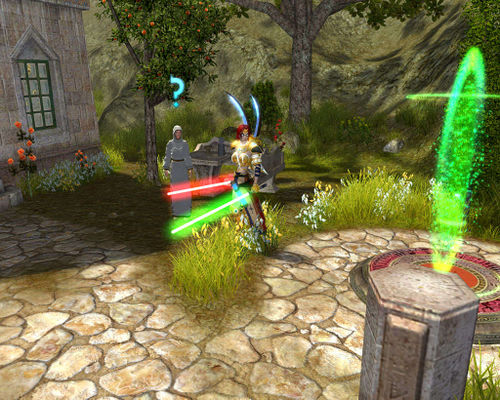
| + | * If you have the [[Sacred 2:Community Patch|Community Patch v110]] installed, the quest marker would remain on the map and point to one more thing you can do with this quest - it would point back to Noriath Temple where you can meet Alethea again. | ||
| + | |WIDTH="40%" VALIGN="TOP"|{{S2frame|[[Image:Whoops camera1.jpg|500px]]}} | ||
| + | |} | ||
== Detailed Walkthrough == | == Detailed Walkthrough == | ||
| − | + | One of the nuns of the Noriath Temple is worried with something. She seems to be waiting for someone... special. If your character is a [[Sacred 2:Seraphim|Seraphim]] than she's waiting for you. Her name is [[Sacred 2:Andra|Andra]] and she has a task that can be given only to a winged warrior. Talk to her to learn the detailes. <br> | |
| − | [ | + | [[Image:Whoops dialog1.jpg]]<br> |
| − | + | Now it's clear why she was waiting for a Seraphim - the task involves one of your sisters. The Seraphim called [[Sacred 2:Alethea|Alethea]] has gone missing and now it's you duty to investigate her disappearance.<br> | |
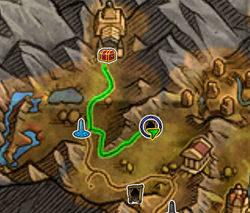
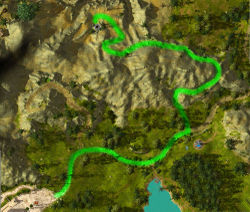
| − | + | So you leave the monastery gates and need to follow quite a long road. The path you should take is marked on the map below. <br> | |
| − | [ | + | {{S2frame|[[Image:Whoops walk worldmap.jpg|250px]][[Image:Whoops walk map.jpg|250px]]|left}} |
| − | + | <br clear="both" /> | |
| − | + | First you should head south until you reach the Resurrection Monolith. Then you should turn east, keeping south of the few trees. Follow the track around the mountainside to reach an isolated cave entrance.<br> | |
| − | + | {{S2frame|[[Image:Whoops camera2.jpg|400px]]|left}} | |
| − | [ | + | <br clear="both" /> |
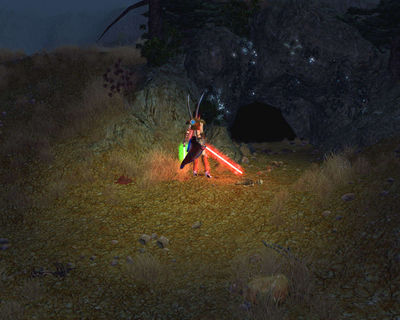
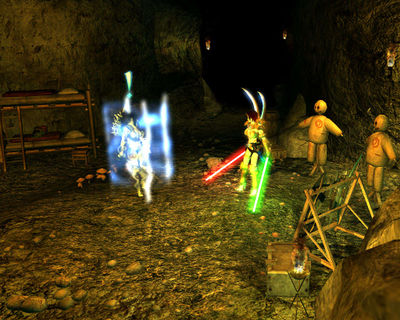
| − | + | The traces leaded you to this cave in the land inhabited by many [[Sacred 2:Kobold|Kobolds]]. So you walk inside to see what these nasty little creatures are cooking there. After you've worked your way through a few Kobolds, you find the missing Seraphim. [[Sacred 2:Alethea|Alethea]] is held captive in a glowing energy 'cage' of some sort. <br> | |
| − | + | {{S2frame|[[Image:Whoops camera3.jpg|400px]]|left}} | |
| − | + | <br clear="both" /> | |
| − | + | Talk to her to learn if she knows how to destroy this cage.<br> | |
| − | + | [[Image:Whoops dialog2.jpg]]<br> | |
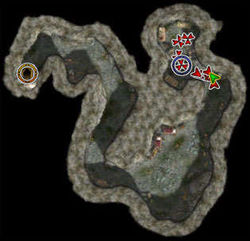
| − | + | Now when you know that the cage is maintained by creatures in the cave, then head further into the cave to find them. <br> | |
| − | + | {{S2frame|[[Image:Whoops map2.jpg|250px]]|left}} | |
| + | <br clear="both" /> | ||
| + | No wonder that these creatures managed to build an energy cage - one of them is a [[Sacred 2:Demon - Whoops|Demon]] and the other three are its minions, the [[Sacred 2:Protector - Whoops|Kobold Protectors]]. Now when they're gone, Alethea can free herself. You should return to her and tell her the news.<br> | ||
| + | [[Image:Whoops dialog3.jpg]]<br> | ||
| + | The glowing cage is gone and the Seraphim is free. She can now get herself out, so she says goodbye and gives you the reward. | ||
| + | == Quest Enemies == | ||
| + | === [[Sacred 2:Demon - Whoops|Demon]] === | ||
| + | {{:Sacred 2:Demon - Whoops}} | ||
| + | === [[Sacred 2:Protector - Whoops|Protectors]] === | ||
| + | {{:Sacred 2:Protector - Whoops}} | ||
== Logbook Entry == | == Logbook Entry == | ||
| − | [ | + | {{S2frame|[[Image:Whoops log.jpg|300px]]|left}} |
| − | + | <br clear="both" /> | |
| − | |||
| − | |||
| − | |||
== Notes == | == Notes == | ||
| − | * | + | * This is the Chapter 1 / High Elf region Seraphim class quest (''not'' the 'blue' quest chain) |
| − | * If you have a [ | + | * If you have a [[Sacred 2:Community Patch|Community Patch]] installed, you would also get a [[Sacred 2:Lightsabers|lightsaber]] as a reward for this quest. |
* After you have completed this quest, you could find [[Sacred 2:Alethea|Alethea]] in the [[Sacred 2:Noriath Temple|Noriath Temple]], right next to its entrance. | * After you have completed this quest, you could find [[Sacred 2:Alethea|Alethea]] in the [[Sacred 2:Noriath Temple|Noriath Temple]], right next to its entrance. | ||
| − | + | * This quest is a refernece to Sacred 1. In the first game you could find a Seraphim held captive in an energy cage inside the cave near [[Sacred:Bellevue|Bellevue]]. You could free her by killing the evil mage who maintained the cage. This hidden quest is known as [[Sacred:Seraphim Rescue|Seraphim Rescue]]. | |
| − | |||
| − | |||
</div> | </div> | ||
[[Category:Sacred 2 Class Quest|{{SUBPAGENAME}}]] | [[Category:Sacred 2 Class Quest|{{SUBPAGENAME}}]] | ||
[[Category:Sacred 2 Quest|{{SUBPAGENAME}}]] | [[Category:Sacred 2 Quest|{{SUBPAGENAME}}]] | ||
| + | [[Category:Sacred 2 Tyr Lysia Quest|{{PAGENAME}}]] | ||
Latest revision as of 22:28, 21 December 2011
|
| ||||||||||
Quick Walkthrough
|
| |||||||||
Detailed Walkthrough
One of the nuns of the Noriath Temple is worried with something. She seems to be waiting for someone... special. If your character is a Seraphim than she's waiting for you. Her name is Andra and she has a task that can be given only to a winged warrior. Talk to her to learn the detailes.
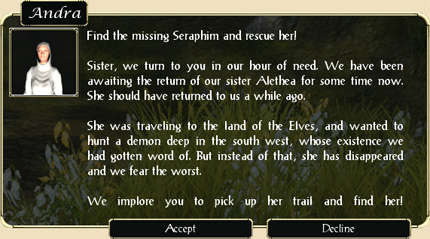
Now it's clear why she was waiting for a Seraphim - the task involves one of your sisters. The Seraphim called Alethea has gone missing and now it's you duty to investigate her disappearance.
So you leave the monastery gates and need to follow quite a long road. The path you should take is marked on the map below.
|
| ||
First you should head south until you reach the Resurrection Monolith. Then you should turn east, keeping south of the few trees. Follow the track around the mountainside to reach an isolated cave entrance.
|
| ||
The traces leaded you to this cave in the land inhabited by many Kobolds. So you walk inside to see what these nasty little creatures are cooking there. After you've worked your way through a few Kobolds, you find the missing Seraphim. Alethea is held captive in a glowing energy 'cage' of some sort.
|
| ||
Talk to her to learn if she knows how to destroy this cage.

Now when you know that the cage is maintained by creatures in the cave, then head further into the cave to find them.
|
| ||
No wonder that these creatures managed to build an energy cage - one of them is a Demon and the other three are its minions, the Kobold Protectors. Now when they're gone, Alethea can free herself. You should return to her and tell her the news.

The glowing cage is gone and the Seraphim is free. She can now get herself out, so she says goodbye and gives you the reward.
Quest Enemies
Demon
|
|
Damage Types: Weakest Against: Quest:Whoops Quest Location: Noriath Temple in Tyr Lysia | ||||||||||||||||||
Protectors
|
|
Damage Types: Weakest Against: Quest:Whoops Quest Location: Noriath Temple in Tyr Lysia | ||||||||||||||||||
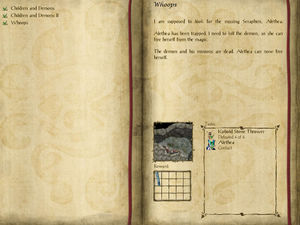
Logbook Entry
|
| ||
Notes
- This is the Chapter 1 / High Elf region Seraphim class quest (not the 'blue' quest chain)
- If you have a Community Patch installed, you would also get a lightsaber as a reward for this quest.
- After you have completed this quest, you could find Alethea in the Noriath Temple, right next to its entrance.
- This quest is a refernece to Sacred 1. In the first game you could find a Seraphim held captive in an energy cage inside the cave near Bellevue. You could free her by killing the evil mage who maintained the cage. This hidden quest is known as Seraphim Rescue.
