Difference between revisions of "Sacred 2:The Lost Crypt"
Jump to navigation
Jump to search
m (Initial commit) |
|||
| (4 intermediate revisions by 2 users not shown) | |||
| Line 1: | Line 1: | ||
| − | |||
| − | |||
| − | |||
<div class="plainlinks"> | <div class="plainlinks"> | ||
| Line 7: | Line 4: | ||
|WIDTH="15%" VALIGN="TOP"|__TOC__ | |WIDTH="15%" VALIGN="TOP"|__TOC__ | ||
|WIDTH="35%" VALIGN="TOP"| | |WIDTH="35%" VALIGN="TOP"| | ||
| − | * '''Quest Objective:''' | + | * '''Quest Objective:''' Help the zombies defeat the demons holding the [[Sacred 2:Lost Crypt|Lost Crypt]] |
| − | * '''Quest Difficulty:''' | + | * '''Quest Difficulty:''' 1-4 stars |
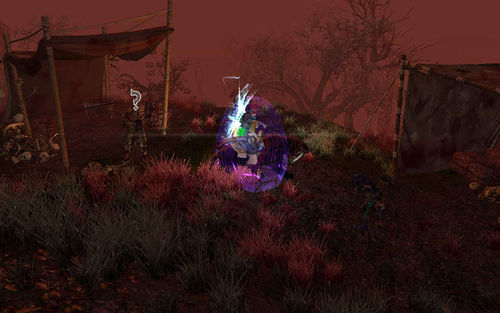
| − | * '''Quest Giver:''' [[Sacred 2: | + | * '''Quest Giver:''' [[Sacred 2:Officer Bramus|Officer Bramus]] |
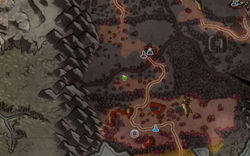
| − | * '''Location(s):''' [[Sacred 2: | + | * '''Location(s):''' [[Sacred 2:Zombie Camp|Zombie Camp]] within the [[Sacred 2:Cursed Forest|Cursed Forest]] |
| − | * '''Prerequisite Quest:''' | + | * '''Prerequisite Quest:''' None |
| − | * '''Next Quest:''' | + | * '''Next Quest:''' None |
| − | * '''Reward:''' [[Sacred 2:Gold|Gold]] [[Sacred 2:Experience|Experience]] | + | * '''Reward:''' [[Sacred 2:Gold|Gold]] [[Sacred 2:Experience|Experience]] |
| − | |WIDTH="50%" VALIGN="TOP"| | + | |WIDTH="50%" VALIGN="TOP"|{{S2frame|[[Image:BrainsFallen_BramusMap.jpg|250px]][[Image:BrainsFallen_BramusTabMap.jpg|250px]]|right|'''[[Sacred 2:Map of Ancaria|View the Ancaria Interactive Map]]'''}} |
| − | |||
| − | {{S2frame|[[Image: | ||
|} | |} | ||
| − | {{S2frame|[[Image: | + | {{S2frame|[[Image:BrainsFallen_BramusCamera.jpg|500px]]}} |
== Quest Parts == | == Quest Parts == | ||
| − | This is the name for the | + | This is the name for the 5-part 'chain-quest' starting in the [[Sacred 2:Zombie Camp|Zombie Camp]]. |
| + | |||
| + | The five quests in this chain are: | ||
| − | + | #[[Sacred 2:Brains of the Fallen|Brains of the Fallen]] | |
| + | #[[Sacred 2:Scouts|Scouts]] | ||
| + | #[[Sacred 2:Break the Spell of Protection|Break the Spell of Protection]] | ||
| + | #[[Sacred 2:Unclean Totems|Unclean Totems]] | ||
| + | #[[Sacred 2:Death of a Demon|Death of a Demon]] | ||
| − | + | In order to start your journey towards completing this multi-part quest, you will have to talk to [[Sacred 2:Officer Bramus|Officer Bramus]]. The detailed information on this string of quests starts [[Sacred 2:Brains of the Fallen|HERE]] | |
| − | |||
| − | |||
| − | |||
| − | + | == Quick Walkthrough == | |
| + | === 1. [[Sacred 2:Brains of the Fallen|Brains of the Fallen]] === | ||
| + | * Talk to Officer Bramus | ||
| + | * Collect the brains of five fallen zombies | ||
| + | * Return the brains to [[Sacred 2:Mage Galdar|Mage Galdar]] | ||
| − | |||
| − | |||
| + | === 2. [[Sacred 2:Scouts|Scouts]] === | ||
| + | * Talk to Officer Bramus | ||
| + | * Discover that the crypt door is locked | ||
| + | * Return to Officer Bramus | ||
| − | |||
| − | + | === 3. [[Sacred 2:Break the Spell of Protection|Break the Spell of Protection]] === | |
| − | |||
| − | |||
| + | * Talk to Mage Galdar | ||
| + | * Kill a [[Sacred 2:Harbinger of Death|Harbinger of Death]] and collect a lock of hair | ||
| + | * Kill four [[Sacred 2:Servant of the Harbingers of Death|Servants of the Harbingers of Death]] and collect their humerus bones | ||
| + | * Return to Mage Galdar the hair and bones | ||
| − | |||
| − | + | === 4. [[Sacred 2:Unclean Totems|Unclean Totems]] === | |
| − | |||
| − | |||
| + | * Talk to Mage Galdar | ||
| + | * Use the bone harp to gain entry into the Lost Crypt | ||
| + | * Activate the totems to open the inner sanctuary | ||
| − | |||
| − | + | === 5. [[Sacred 2:Death of a Demon|Death of a Demon]] === | |
| − | |||
| − | |||
| + | * Kill the demon | ||
| + | * Return to [[Sacred 2:Officer Bramus|Officer Bramus]] for your reward | ||
== Notes == | == Notes == | ||
| − | |||
| − | |||
| − | |||
| − | [[Category:Sacred 2 Quest]][[Category:Sacred 2 Chain Quest]] | + | [[Category:Sacred 2 Quest|{{PAGENAME}}]][[Category:Sacred 2 Chain Quest|{{PAGENAME}}]] |
| + | [[Category:Sacred 2 Cursed Forest Quest|{{PAGENAME}}]] | ||
| + | [[Category:Sacred 2 Cursed Forest Quest|{{PAGENAME}}]] | ||
Latest revision as of 21:50, 21 December 2011
|
| ||||||||||
|
| ||
Quest Parts
This is the name for the 5-part 'chain-quest' starting in the Zombie Camp.
The five quests in this chain are:
In order to start your journey towards completing this multi-part quest, you will have to talk to Officer Bramus. The detailed information on this string of quests starts HERE
Quick Walkthrough
1. Brains of the Fallen
- Talk to Officer Bramus
- Collect the brains of five fallen zombies
- Return the brains to Mage Galdar
2. Scouts
- Talk to Officer Bramus
- Discover that the crypt door is locked
- Return to Officer Bramus
3. Break the Spell of Protection
- Talk to Mage Galdar
- Kill a Harbinger of Death and collect a lock of hair
- Kill four Servants of the Harbingers of Death and collect their humerus bones
- Return to Mage Galdar the hair and bones
4. Unclean Totems
- Talk to Mage Galdar
- Use the bone harp to gain entry into the Lost Crypt
- Activate the totems to open the inner sanctuary
5. Death of a Demon
- Kill the demon
- Return to Officer Bramus for your reward


