Difference between revisions of "Sacred 2:Waking the Dead"
| Line 40: | Line 40: | ||
== Detailed Walkthrough == | == Detailed Walkthrough == | ||
| − | Head through the cave and meet up with [[Sacred 2:James Orkus - NPC|James Orkus]] again. he doesn't know what happened with the Seraphim but whatever happened wasn't good. He's seen more and more undead crawling out of their graves. It's almost like the boundary between the living and dead is coming down. He doesn't know what to do but he's sure one of the dragons will have the knowledge you need. | + | Head through the cave and meet up with [[Sacred 2:James Orkus - NPC|James Orkus]] again. he doesn't know what happened with the Seraphim but whatever happened wasn't good. He's seen more and more undead crawling out of their graves. It's almost like the boundary between the living and dead is coming down. He doesn't know what to do but he's sure one of the dragons will have the knowledge you need. |
| − | |||
| − | {{S2frame|[[Image: | + | {{S2frame|[[Image:orkus2chat.jpg|430px]]|left}} |
<br clear="both" /> | <br clear="both" /> | ||
| + | You head roughly north and find the old and wise dragon Loromir within his lair. Your presence invokes an ancient memory of the old war when the Seraphim were on the brink of annihilation. He recognizes the object you now carry. He reacts badly saying to get it away from him. It reeks of an unhealthy aura and has been corrupted. You must exorcise the demons from the blade before the wall that bars the undead is breached. He explains that in order to cleanse the blade you will need 10 swamp herbs, 10 undead hearts and the Rose of the Wind. You will need to cleanse the blade in the flames but that isn't enough, you will also need to communicate with the dead. | ||
| − | {{S2frame|[[Image: | + | {{S2frame|[[Image:loromirmap.jpg|250px]][[Image:loromirtab.jpg|250px]]|left]]}} |
<br clear="both" /> | <br clear="both" /> | ||
| − | {{S2frame|[[Image: | + | |
| + | {{S2frame|[[Image:loromirloc.jpg|400px]]|left}} | ||
| + | <br clear="both" /> | ||
| + | |||
| + | |||
| + | {{S2frame|[[Image:loromirchat.jpg|430px]]|left}} | ||
<br clear="both" /> | <br clear="both" /> | ||
| + | |||
| + | {{S2frame|[[Image:loromirchat2.jpg|430px]]|left}} | ||
| + | <br clear="both" /> | ||
| + | At this point James says he must leave you to report back to his homeland. He's sure your travels will lead you into the desert and he hopes to meet up with you again there. | ||
| − | {{S2frame|[[Image: | + | {{S2frame|[[Image:orkus2chat2.jpg|430px]]|left}} |
<br clear="both" /> | <br clear="both" /> | ||
| + | |||
| + | Navigate your way through the cave complex to find the portal that will send you to the [[Sacred 2:The Swamp|The Swamp]] region. You arrive in the northern part of the Swamp. A short walk south past the ruins of [[Sacred 2:Ruins of Gazath|Ruins of Gazath]] you will find the swamp herbs you need. | ||
| + | |||
| + | {{S2frame|[[Image:herbsmap.jpg|250px]][[Image:herbstab.jpg|250px]]|left]]}} | ||
| + | <br clear="both" /> | ||
| + | |||
| + | Collect 10 and head towards [[Sacred 2:Sethiaz|Sethiaz]]. Here you will find the undead creatures you need to kill to find the undead hearts. Keep killing them til you have 10 and then you can head to [[Sacred 2:Khorum|Khorum]] in the [[Sacred 2:Bengaresh Desert|Bengaresh Desert]]. Once in Khorum speak to [[Sacred 2:Alchemist Cassandra|Alchemist Cassandra]]. | ||
| + | |||
| + | |||
| + | {{S2frame|[[Image:set mmap.jpg|250px]][[Image:set tmap.jpg|250px]]|left]]}} | ||
| + | <br clear="both" /> | ||
| + | |||
| + | |||
| + | She doesn't have any Rose of the Wind (you didn't think it would be that easy - did you?) The only time she's ever heard about it is from her grandfather's stories. She does remember a map he left marked with a rose. maybe that is where you should go? She never has since that area is crawling with enemies. She'll give you the map, but only if you help her first. She ordered some good awhile ago but they never arrived because it was involved in some sort of accident. If you recover the goods she'll give you the map. | ||
| + | |||
| + | {{S2frame|[[Image:cassandramap.jpg|250px]][[Image:cassandratab.jpg|250px]]|left]]}} | ||
| + | <br clear="both" /> | ||
| + | |||
| + | {{S2frame|[[Image:cassandraloc.jpg|400px]]|left}} | ||
| + | <br clear="both" /> | ||
| + | |||
| + | |||
| + | {{S2frame|[[Image:cassandrachat.jpg|430px]]|left}} | ||
| + | <br clear="both" /> | ||
| + | |||
| + | Head out the northern entrance of the city and head northwest. Luckily the caravan isn't far away. It is however crawling with [[Sacred 2:Cursed Priest|Cursed Priests]] and [[Sacred 2:Mummy|Mummies]]. Kill them all off and collect all the goods. | ||
| + | |||
| + | {{S2frame|[[Image:cursedmap.jpg|250px]][[Image:cursedtab.jpg|250px]]|left]]}} | ||
| + | <br clear="both" /> | ||
| + | |||
| + | {{S2frame|[[Image:cursedloc.jpg|400px]]|left}} | ||
| + | <br clear="both" /> | ||
| + | |||
| + | |||
| + | Return to Cassandra and you'll get the map. The map show the location along the southern border of the desert. | ||
| + | |||
| + | {{S2frame|[[Image:cassandrachat2.jpg|430px]]|left}} | ||
| + | <br clear="both" /> | ||
| + | |||
| + | Head to the [[Sacred 2:Twitty Tister|Twitty Tister]]. You'll find the rose tucked behind the building. Kill the few undead hanging around, get the rose and head off to [[Sacred 2:Rajab|Rajab]]. | ||
| + | |||
| + | |||
| + | {{S2frame|[[Image:rosewindmap.jpg|250px]][[Image:rosewindtab.jpg|250px]]|left]]}} | ||
| + | <br clear="both" /> | ||
| + | |||
| + | {{S2frame|[[Image:rosewindloc.jpg|400px]]|left}} | ||
| + | <br clear="both" /> | ||
| + | |||
| + | You go to the forge and cleanse the blade at the forge. A [[Sacred 2:Resurrected Corpse - NPC|Resurrected Corpse]] appears but you're able to convince him that the living and the dead should not co-mingle. When you exit the town [[Sacred 2:James Orkus|James Orkus]]. | ||
| + | |||
| + | |||
| + | {{S2frame|[[Image:forgemap.jpg|250px]][[Image:forgetab.jpg|250px]]|left]]}} | ||
| + | <br clear="both" /> | ||
| + | |||
| + | {{S2frame|[[Image:forgeloc.jpg|400px]]|left}} | ||
| + | <br clear="both" /> | ||
| + | |||
| + | |||
| + | He wants the blade huh? Well I never really trusted the guy so I don't mind having a reason to kill him. Once dead you find an '''Orcish Document''' and a '''Medallion of the Dead'''. You read the letter. Seems his mission was to find the artifact and kill the free undead. Well I know now how he found me so easily now. Reading more, you know the letter was from a cleric from the seal on the letter, but you can't figure out exactly who it is. The Temple has been trying to lure Orcs into their service for awhile now but you never thought the Orcs would create their own secret service. Looks like they've hired this orc to get the artifacts back from me. Probably won't be the last attempt either. Well nothing to do but move on. | ||
| + | |||
| + | {{S2frame|[[Image:orkus3map.jpg|250px]][[Image:orkus3tab.jpg|250px]]|left]]}} | ||
| + | <br clear="both" /> | ||
| + | |||
| + | {{S2frame|[[Image:orkus3loc.jpg|400px]]|left}} | ||
| + | <br clear="both" /> | ||
| + | |||
| + | Hmmm this Medallion seems to be pulling me toward a remote location. Since I have no better idea of where to go, I'll let the medallion lead my feet. The medallion leads you through the Jungle right to the docks at [[Sacred 2:Na'Fian|Na'Fian]]. You take the boat over to [[Sacred 2:Aerendyr|Aerendyr]] in [[Sacred 2:Dyr Lain|Dyr Lain]]. Yes, the pull is definitely stronger here. It leads you along the southern shoreline to a cave on the northwest edge of the island. Be warned the cave entrance is right next to the [[Sacred 2:Forest Guardian|Forest Guardian]]! Enter the cave to continue this chain quest in the 8th and final part, [[Sacred 2:The End of Life|The End of Life]]. | ||
| + | |||
| + | {{S2frame|[[Image:dyrlaincavemap.jpg|250px]][[Image:dyrlaincavetab.jpg|250px]]|left]]}} | ||
| + | <br clear="both" /> | ||
| + | |||
| + | {{S2frame|[[Image:dyrlaincaveloc.jpg|400px]]|left}} | ||
| + | <br clear="both" /> | ||
| + | |||
== Quest Enemies == | == Quest Enemies == | ||
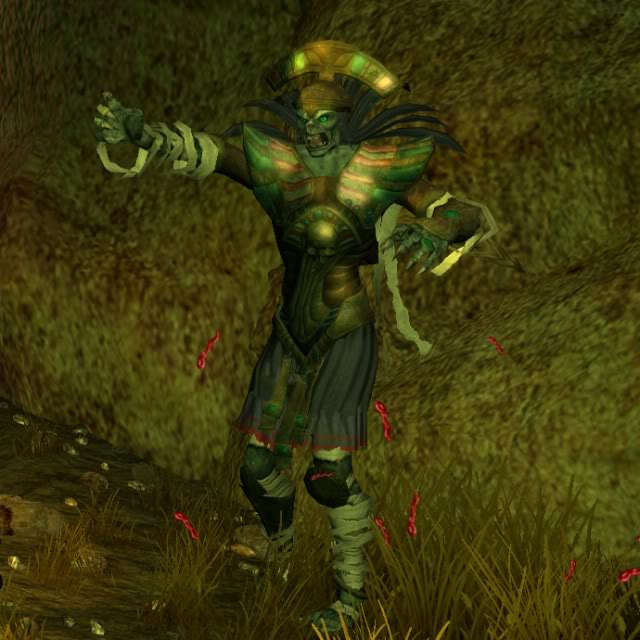
| − | === [[Sacred 2: | + | == [[Sacred 2:Mummy|Mummy]] == |
| − | {{:Sacred 2: | + | {{:Sacred 2:Mummy}} |
| + | |||
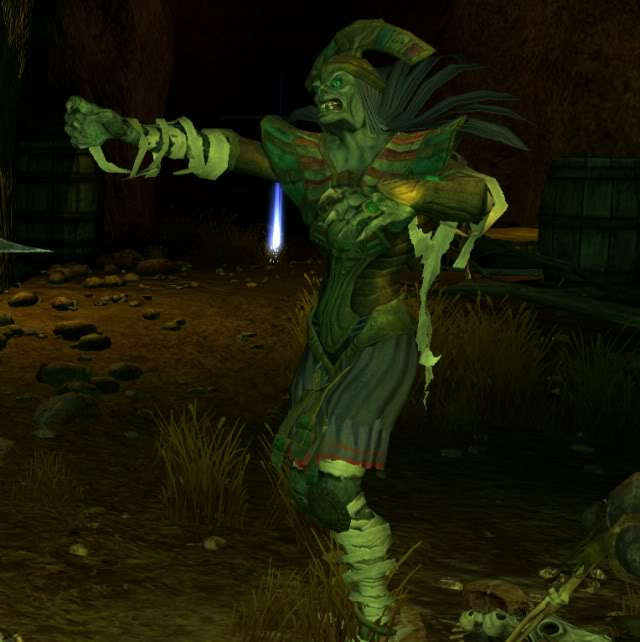
| + | == [[Sacred 2:Cursed Priest|Cursed Priest]] == | ||
| + | {{:Sacred 2:Cursed Priest}} | ||
| + | |||
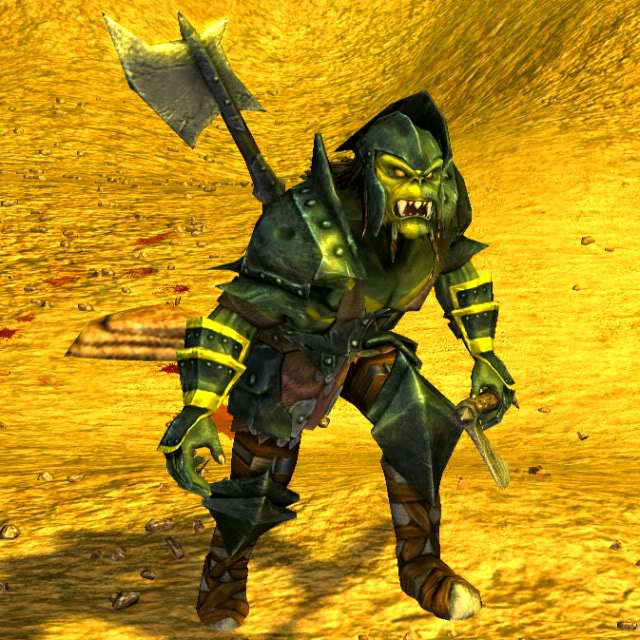
| + | == [[Sacred 2:James Orkus|James Orkus]] == | ||
| + | {{:Sacred 2:James Orkus}} | ||
== Hirelings and Escorts == | == Hirelings and Escorts == | ||
| − | * [[Sacred 2: | + | * [[Sacred 2:James Orkus|James Orkus]] - Escort. Immortal. |
| Line 73: | Line 162: | ||
{| | {| | ||
| − | |{{S2frame|[[Image: | + | |{{S2frame|[[Image:wakingdeadlog1.jpg|300px]]|left}} |
| − | |{{S2frame|[[Image: | + | |{{S2frame|[[Image:wakingdeadlog2.jpg|300px]]|left}} |
| + | |{{S2frame|[[Image:wakingdeadlog3.jpg|300px]]|left}} | ||
| + | |{{S2frame|[[Image:wakingdeadlog4.jpg|300px]]|left}} | ||
|} | |} | ||
| Line 90: | Line 181: | ||
[[Category:Sacred 2 Artamark Quest|{{PAGENAME}}]] | [[Category:Sacred 2 Artamark Quest|{{PAGENAME}}]] | ||
[[Category:Sacred 2 The Dragon Sea Islands Quest|{{PAGENAME}}]] | [[Category:Sacred 2 The Dragon Sea Islands Quest|{{PAGENAME}}]] | ||
| − | |||
| − | |||
| − | |||
Revision as of 04:24, 27 December 2011
|
| ||||||||||


Quick Walkthrough
|
| |||||||||

Detailed Walkthrough
Head through the cave and meet up with James Orkus again. he doesn't know what happened with the Seraphim but whatever happened wasn't good. He's seen more and more undead crawling out of their graves. It's almost like the boundary between the living and dead is coming down. He doesn't know what to do but he's sure one of the dragons will have the knowledge you need.
|
| ||
 |
||
You head roughly north and find the old and wise dragon Loromir within his lair. Your presence invokes an ancient memory of the old war when the Seraphim were on the brink of annihilation. He recognizes the object you now carry. He reacts badly saying to get it away from him. It reeks of an unhealthy aura and has been corrupted. You must exorcise the demons from the blade before the wall that bars the undead is breached. He explains that in order to cleanse the blade you will need 10 swamp herbs, 10 undead hearts and the Rose of the Wind. You will need to cleanse the blade in the flames but that isn't enough, you will also need to communicate with the dead.
|
| ||
  |
||
|
| ||
 |
||
|
| ||
 |
||
|
| ||
 |
||
At this point James says he must leave you to report back to his homeland. He's sure your travels will lead you into the desert and he hopes to meet up with you again there.
|
| ||
 |
||
Navigate your way through the cave complex to find the portal that will send you to the The Swamp region. You arrive in the northern part of the Swamp. A short walk south past the ruins of Ruins of Gazath you will find the swamp herbs you need.
|
| ||
  |
||
Collect 10 and head towards Sethiaz. Here you will find the undead creatures you need to kill to find the undead hearts. Keep killing them til you have 10 and then you can head to Khorum in the Bengaresh Desert. Once in Khorum speak to Alchemist Cassandra.
|
| ||
  |
||
She doesn't have any Rose of the Wind (you didn't think it would be that easy - did you?) The only time she's ever heard about it is from her grandfather's stories. She does remember a map he left marked with a rose. maybe that is where you should go? She never has since that area is crawling with enemies. She'll give you the map, but only if you help her first. She ordered some good awhile ago but they never arrived because it was involved in some sort of accident. If you recover the goods she'll give you the map.
|
| ||
  |
||
|
| ||
 |
||
|
| ||
 |
||
Head out the northern entrance of the city and head northwest. Luckily the caravan isn't far away. It is however crawling with Cursed Priests and Mummies. Kill them all off and collect all the goods.
|
| ||
  |
||
|
| ||
 |
||
Return to Cassandra and you'll get the map. The map show the location along the southern border of the desert.
|
| ||
 |
||
Head to the Twitty Tister. You'll find the rose tucked behind the building. Kill the few undead hanging around, get the rose and head off to Rajab.
|
| ||
  |
||
|
| ||
 |
||
You go to the forge and cleanse the blade at the forge. A Resurrected Corpse appears but you're able to convince him that the living and the dead should not co-mingle. When you exit the town James Orkus.
|
| ||
  |
||
|
| ||
 |
||
He wants the blade huh? Well I never really trusted the guy so I don't mind having a reason to kill him. Once dead you find an Orcish Document and a Medallion of the Dead. You read the letter. Seems his mission was to find the artifact and kill the free undead. Well I know now how he found me so easily now. Reading more, you know the letter was from a cleric from the seal on the letter, but you can't figure out exactly who it is. The Temple has been trying to lure Orcs into their service for awhile now but you never thought the Orcs would create their own secret service. Looks like they've hired this orc to get the artifacts back from me. Probably won't be the last attempt either. Well nothing to do but move on.
|
| ||
  |
||
|
| ||
 |
||
Hmmm this Medallion seems to be pulling me toward a remote location. Since I have no better idea of where to go, I'll let the medallion lead my feet. The medallion leads you through the Jungle right to the docks at Na'Fian. You take the boat over to Aerendyr in Dyr Lain. Yes, the pull is definitely stronger here. It leads you along the southern shoreline to a cave on the northwest edge of the island. Be warned the cave entrance is right next to the Forest Guardian! Enter the cave to continue this chain quest in the 8th and final part, The End of Life.
|
| ||
  |
||
|
| ||
 |
||
Quest Enemies
Mummy
|
|
Damage Types: Weakest Against: Region: | ||||||||||||||||||


|
|
Damage Types: Weakest Against: Region: | ||||||||||||||||||
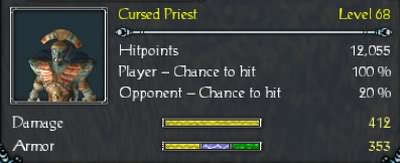
Cursed Priest
|
|
Damage Types: Weakest Against: Quest:Throne of Conflict Quest Location: Khorum in Bengaresh Desert | ||||||||||||||||||
|
|
Damage Types: Weakest Against: Quest:Throne of Conflict Quest Location: Khorum in Bengaresh Desert | ||||||||||||||||||
James Orkus
|
|
Damage Types: Weakest Against: Quest:Waking the Dead Quest Location: Rajab in Bengaresh Desert | ||||||||||||||||||
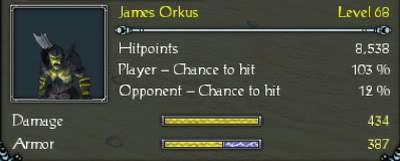

Hirelings and Escorts
- James Orkus - Escort. Immortal.
Logbook Entry
|
|
|
| ||||||||||||||||||||||||||||||||||||


