Difference between revisions of "Sacred 2:Burn Skeletons Burn!"
| (9 intermediate revisions by 4 users not shown) | |||
| Line 1: | Line 1: | ||
{{Languages}} | {{Languages}} | ||
| + | <div class="plainlinks"> | ||
| − | {| | + | {|WIDTH="100%" |
| − | + | |WIDTH="15%" VALIGN="TOP"|__TOC__ | |
| − | + | |WIDTH="35%" VALIGN="TOP"| | |
| − | |||
| − | |||
| − | |||
| − | |||
| − | |||
| − | |||
| − | |||
| − | |||
| − | |||
| − | |||
| − | |||
| − | |WIDTH=" | ||
| − | |WIDTH=" | ||
* '''Quest Objective:''' Learn the secret of the Kobolds' burning weapons | * '''Quest Objective:''' Learn the secret of the Kobolds' burning weapons | ||
* '''Quest Difficulty:''' 2 stars | * '''Quest Difficulty:''' 2 stars | ||
| Line 24: | Line 12: | ||
* '''Next Quest:''' None | * '''Next Quest:''' None | ||
* '''Reward:''' [[Sacred 2:Gold|Gold]] | * '''Reward:''' [[Sacred 2:Gold|Gold]] | ||
| − | |WIDTH=" | + | |WIDTH="50%" VALIGN="TOP"| |
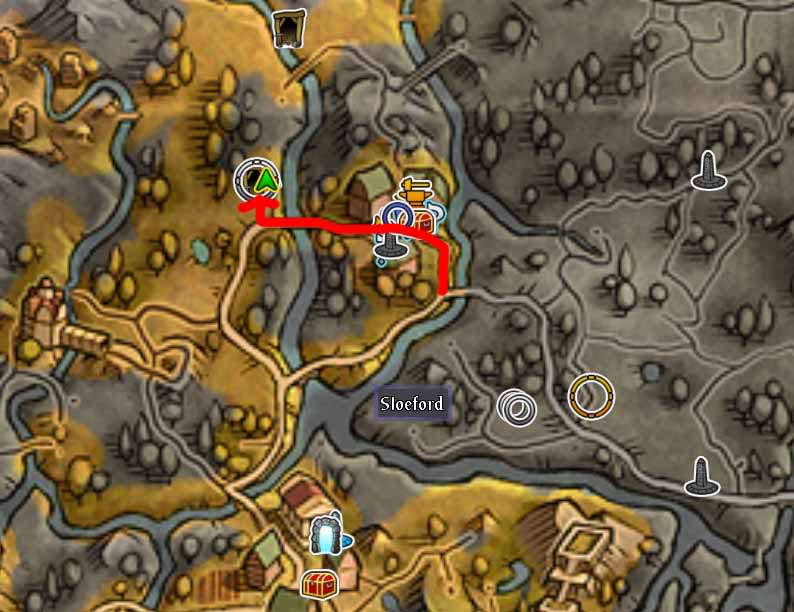
| − | + | {{S2frame|[[Image:Burn skeletons worldmap.jpg|250px]][[Image:Burn skeletons map.jpg|250px]]|right|'''[[Sacred 2:Map of Ancaria|View the Ancaria Interactive Map]]'''}} | |
| − | [ | ||
|} | |} | ||
| − | + | {|WIDTH="100%" | |
| + | |WIDTH="60%" VALIGN="TOP"| | ||
== Quick Walkthrough == | == Quick Walkthrough == | ||
* Talk to [[Sacred 2:Sergeant Henear|Sergeant Henear]]. | * Talk to [[Sacred 2:Sergeant Henear|Sergeant Henear]]. | ||
* Locate the wine cellar and go inside. | * Locate the wine cellar and go inside. | ||
| − | * Kill the three [[Sacred 2:Undead | + | * Kill the three [[Sacred 2:Undead Legionnaire|Undead Legionnaires]] and the [[Sacred 2:Spider|Spiders]]. |
| − | * Talk to [[Sacred 2:Itzibi|Itzibi]]. | + | * Talk to [[Sacred 2:Itzibi|Itzibi]] to hear his offer. |
| − | * | + | * No matter, what you've chosen, now you have to kill [[Sacred 2:Itzibi|Itzibi]]. |
* Talk to [[Sacred 2:Sergeant Henear|Sergeant Henear]]. | * Talk to [[Sacred 2:Sergeant Henear|Sergeant Henear]]. | ||
| + | |WIDTH="40%" VALIGN="TOP"|{{S2frame|[[Image:Burn skeletons camera1.jpg|500px]]}} | ||
| + | |} | ||
| + | == Detailed Walkthrough == | ||
| + | Talk to [[Sacred 2:Sergeant Henear|Sergeant Henear]] to learn of the strange, burning weapons he's seen the [[Sacred 2:Kobold|Kobolds]] using rather effectively against the [[Sacred 2:Undead|Undead]]. | ||
| + | {{S2 Dialogue|NPC NAME=Sereant Henear|PORTRAIT FILE NAME=Dialog151.png|DIALOGUE=Get the secret of the Kobold's fireamrs!<br /><br /> | ||
| + | Stop! Don't you know there are myriads of undead lurking on the other side of this bridge! They are different from the Kobolds, not as chaotic and cowardly. A patrol just reported a large group of them marching through the lands in units of three, but they seem to be sensitive to fire. I saw a group of Kobolds carrying firearms a few days ago. It's unbelievable how fast those little pests defeated the undead. I think they are somewhere in a cave to the west. If you could worm the secret out of them, I’d be very grateful.}} | ||
| − | |||
| − | |||
| − | |||
| − | |||
| − | |||
Follow the road north from the Sergeant, west through Twainbrook and over the river. On the other side of the bridge follow the small track that branches north until you reach a mill with a nearby wine cellar. | Follow the road north from the Sergeant, west through Twainbrook and over the river. On the other side of the bridge follow the small track that branches north until you reach a mill with a nearby wine cellar. | ||
| − | + | ||
[http://www.sacredwiki.org/images/Sacred_2/quests/Chapter01/Tutorial%20Damage%20Types%20aka%20Burn%20Skeletons%20Burn/sacred2TutorialDamageTypeswt.jpg http://www.sacredwiki.org/images/Sacred_2/quests/Chapter01/Tutorial%20Damage%20Types%20aka%20Burn%20Skeletons%20Burn/th_sacred2TutorialDamageTypeswt.jpg] | [http://www.sacredwiki.org/images/Sacred_2/quests/Chapter01/Tutorial%20Damage%20Types%20aka%20Burn%20Skeletons%20Burn/sacred2TutorialDamageTypeswt.jpg http://www.sacredwiki.org/images/Sacred_2/quests/Chapter01/Tutorial%20Damage%20Types%20aka%20Burn%20Skeletons%20Burn/th_sacred2TutorialDamageTypeswt.jpg] | ||
| − | + | ||
| − | The quest updates to indicate you should go into the cellar. It's worth equipping a fire-damage weapon if you have one, and any poison armour you have. You will need to fight some [[Sacred 2:Undead|Undead]], so a [[Sacred 2:Potions|Potion of Undead Death]] may also come in handy. When you're ready, go down into the cellar and defeat the 3 [[Sacred 2:Undead | + | The quest updates to indicate you should go into the cellar. It's worth equipping a fire-damage weapon if you have one, and any poison armour you have. You will need to fight some [[Sacred 2:Undead|Undead]], so a [[Sacred 2:Potions|Potion of Undead Death]] may also come in handy. When you're ready, go down into the cellar and defeat the 3 [[Sacred 2:Undead Legionnaire|Undead Legionnaires]] that are attacking a Kobold. Watch out for the [[Sacred 2:Spider|Spiders]] that are also down there. Talk to the Kobold and it will drop a Chunk of Lava. |
| − | + | ||
| − | + | {{S2 Dialogue|NPC NAME=Itzibi|PORTRAIT FILE NAME=dialog0260.png|DIALOGUE=Ah you saved me. Here take this, it makes weapons burn! All you need to do is find an able blacksmith. Now leave or else I'll kill you!}} | |
| − | + | ||
Although you seem to have a choice between letting [[Sacred 2:Itzibi|Itzibi]] live or die, if you choose to let him live you receive the following message as you approach the cellar exit. | Although you seem to have a choice between letting [[Sacred 2:Itzibi|Itzibi]] live or die, if you choose to let him live you receive the following message as you approach the cellar exit. | ||
| − | + | ||
| − | + | {{S2 Dialogue|NPC NAME=The Player|PORTRAIT FILE NAME=Seraphim-dialog.png|DIALOGUE=I bet the little traitor of a Kobold will try stabbing me in the back! Just watch!}} | |
| − | + | ||
| − | [[Sacred 2:Itzibi|Itzibi]] will then be hostile, although depending on the difference between his level and your level, he may just wander around without attacking you, so you can still leave without killing him. | + | [[Sacred 2:Itzibi|Itzibi]] will then be hostile, although depending on the difference between his level and your level, he may just wander around without attacking you, so you can still leave without killing him. |
If you chose to kill [[Sacred 2:Itzibi|Itzibi]] you can leave the wine cellar without any messages.<br><br> | If you chose to kill [[Sacred 2:Itzibi|Itzibi]] you can leave the wine cellar without any messages.<br><br> | ||
Return to [[Sacred 2:Sergeant Henear|Sergeant Henear]] for your reward. | Return to [[Sacred 2:Sergeant Henear|Sergeant Henear]] for your reward. | ||
| − | |||
| − | |||
| + | {{S2 Dialogue|NPC NAME=Sergeant Henear|PORTRAIT FILE NAME=Dialog151.png|DIALOGUE=What? All they used were lava rocks? That's nothing special and definitely not a novelty. Never mind, it should be enough for you. Go see the blacksmith, he'll be able to connect your weapon with the lava rock. | ||
| + | Here take this as a reward for freeing us of that nuisance. Leave me alone, I have to go on my watch. | ||
| + | }} | ||
| + | |||
| + | == Quest Enemies == | ||
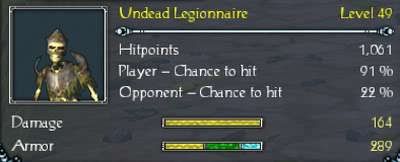
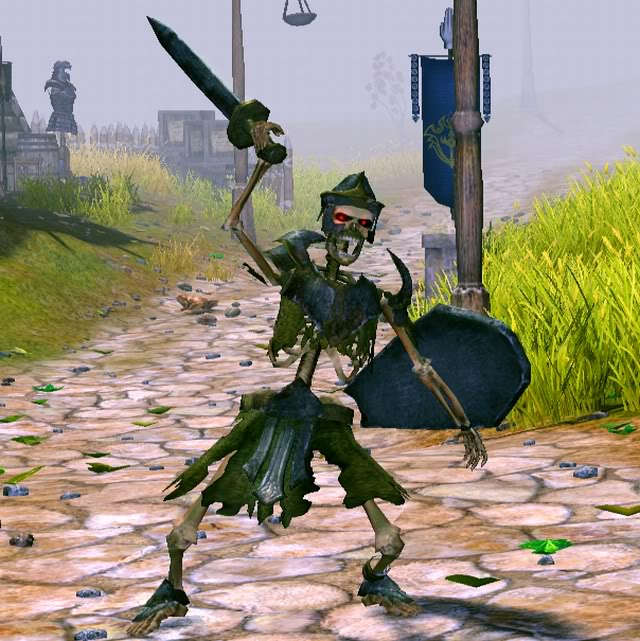
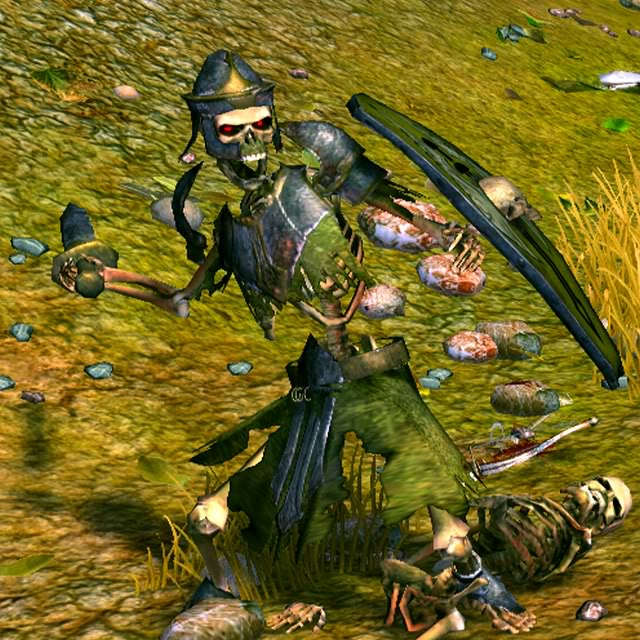
| + | ===[[Sacred 2:Undead Legionnaire|Undead Legionnaire]]=== | ||
| + | {{:Sacred 2:Undead Legionnaire}} | ||
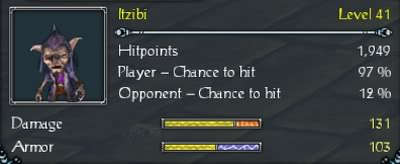
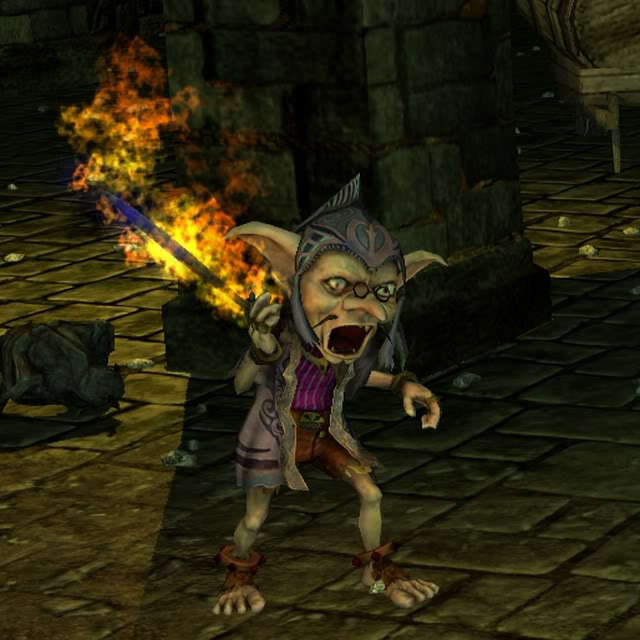
| + | ===[[Sacred 2:Itzibi|Itzibi]]=== | ||
| + | {{:Sacred 2:Itzibi}} | ||
== Logbook Entry == | == Logbook Entry == | ||
| − | [ | + | {| |
| − | + | |{{S2frame|[[Image:Burn skeletons log1.jpg|300px]]|left}} | |
| − | + | |{{S2frame|[[Image:Burn skeletons log2.jpg|300px]]|left}} | |
| + | |} | ||
== Notes == | == Notes == | ||
| − | * | + | * The [[Sacred 2:Community Patch|Community Patch]] groups this quest together with the other Tutorials into a chain called [[Sacred 2:The Hitchhiker's Guide to Ancaria|The Hitchhiker's Guide to Ancaria]]. |
| − | * | + | * The [[Sacred 2:Chunk of Lava|Chunk of Lava]] that [[Sacred 2:Itzibi|Itzibi]] drops is not actually required for the quest and behaves like other loot; it will be released and then destroyed after a certain period of time. |
| − | + | * Part of the quest [[Sacred 2:Let's Have a Drink!|Let's Have a Drink!]] also takes place in this wine cellar, making it easy to do the two quests together. | |
| − | |||
| Line 82: | Line 78: | ||
[[Category:Sacred 2 Side Quest|{{SUBPAGENAME}}]] | [[Category:Sacred 2 Side Quest|{{SUBPAGENAME}}]] | ||
| − | |||
[[Category:Sacred 2 Quest|{{SUBPAGENAME}}]] | [[Category:Sacred 2 Quest|{{SUBPAGENAME}}]] | ||
| + | [[Category:Sacred 2 Tyr Lysia Quest|{{PAGENAME}}]] | ||
Latest revision as of 06:33, 7 November 2013
|
| ||||||||||


Quick Walkthrough
|
| |||||||||

Detailed Walkthrough
Talk to Sergeant Henear to learn of the strange, burning weapons he's seen the Kobolds using rather effectively against the Undead.


Get the secret of the Kobold's fireamrs!
Stop! Don't you know there are myriads of undead lurking on the other side of this bridge! They are different from the Kobolds, not as chaotic and cowardly. A patrol just reported a large group of them marching through the lands in units of three, but they seem to be sensitive to fire. I saw a group of Kobolds carrying firearms a few days ago. It's unbelievable how fast those little pests defeated the undead. I think they are somewhere in a cave to the west. If you could worm the secret out of them, I’d be very grateful.
Follow the road north from the Sergeant, west through Twainbrook and over the river. On the other side of the bridge follow the small track that branches north until you reach a mill with a nearby wine cellar.
The quest updates to indicate you should go into the cellar. It's worth equipping a fire-damage weapon if you have one, and any poison armour you have. You will need to fight some Undead, so a Potion of Undead Death may also come in handy. When you're ready, go down into the cellar and defeat the 3 Undead Legionnaires that are attacking a Kobold. Watch out for the Spiders that are also down there. Talk to the Kobold and it will drop a Chunk of Lava.


Ah you saved me. Here take this, it makes weapons burn! All you need to do is find an able blacksmith. Now leave or else I'll kill you!
Although you seem to have a choice between letting Itzibi live or die, if you choose to let him live you receive the following message as you approach the cellar exit.


Itzibi will then be hostile, although depending on the difference between his level and your level, he may just wander around without attacking you, so you can still leave without killing him.
If you chose to kill Itzibi you can leave the wine cellar without any messages.
Return to Sergeant Henear for your reward.
What? All they used were lava rocks? That's nothing special and definitely not a novelty. Never mind, it should be enough for you. Go see the blacksmith, he'll be able to connect your weapon with the lava rock.
Here take this as a reward for freeing us of that nuisance. Leave me alone, I have to go on my watch.
Quest Enemies
Undead Legionnaire
|
|
Damage Types: Weakest Against: Region: Tyr Lysia | ||||||||||||||||||


|
|
Damage Types: Weakest Against: Region: Tyr Lysia | ||||||||||||||||||

Itzibi
|
|
Damage Types: Weakest Against: Quest:Tutorial Damage Types Quest Location: Twainbrook in Tyr Lysia | ||||||||||||||||||


Logbook Entry
|
| ||||||||||||||||||


Notes
- The Community Patch groups this quest together with the other Tutorials into a chain called The Hitchhiker's Guide to Ancaria.
- The Chunk of Lava that Itzibi drops is not actually required for the quest and behaves like other loot; it will be released and then destroyed after a certain period of time.
- Part of the quest Let's Have a Drink! also takes place in this wine cellar, making it easy to do the two quests together.