Difference between revisions of "Sacred 2:Blacksmith Quest"
m (New page: {{subst:Quest}}) |
|||
| Line 1: | Line 1: | ||
| − | |||
| − | |||
| − | |||
<div class="plainlinks"> | <div class="plainlinks"> | ||
{|WIDTH="100%" | {|WIDTH="100%" | ||
|WIDTH="15%" VALIGN="TOP"|__TOC__ | |WIDTH="15%" VALIGN="TOP"|__TOC__ | ||
|WIDTH="35%" VALIGN="TOP"| | |WIDTH="35%" VALIGN="TOP"| | ||
| − | * '''Quest Objective:''' | + | * '''Quest Objective:''' Deliver some horseshoes for the blacksmith |
| − | * '''Quest Difficulty:''' | + | * '''Quest Difficulty:''' 2 stars |
| − | * '''Quest Giver:''' | + | * '''Quest Giver:''' [[Sacred 2:Blacksmith_Juri|Blacksmith Juri]] |
| − | * '''Location(s):''' | + | * '''Location(s):''' [[Sacred 2:Griffinborough|Griffinborough]] and [[Sacred 2:Skook's Corner|Skook's Corner]] within [[Sacred 2:Artamark|Artamark]] |
| − | * '''Prerequisite Quest:''' | + | * '''Prerequisite Quest:''' None |
| − | * '''Next Quest:''' | + | * '''Next Quest:''' None |
| − | * '''Reward:''' | + | * '''Reward:''' [[Sacred 2:Gold|Gold]] [[Sacred 2:Experience|Experience]] |
| − | |WIDTH="50%" VALIGN="TOP"| | + | |WIDTH="50%" VALIGN="TOP"| |
| − | + | {{S2frame|[[Image:BlacksmithQuest_JuriMap.jpg|250px]][[Image:BlacksmithQuest_JuriTabMap.jpg|250px]]|right|'''[[Sacred 2:Map of Ancaria|View the Ancaria Interactive Map]]'''}} | |
| − | {{S2frame|[[Image: | ||
|} | |} | ||
{|WIDTH="100%" | {|WIDTH="100%" | ||
|WIDTH="60%" VALIGN="TOP"| | |WIDTH="60%" VALIGN="TOP"| | ||
== Quick Walkthrough == | == Quick Walkthrough == | ||
| − | + | * Talk to Blacksmith Juri | |
| − | * | + | * Travel to the Horse Trader near Skook's Corner |
| − | * | + | * Return to Blacksmith Juri for your reward |
| − | * | + | |WIDTH="40%" VALIGN="TOP"|{{S2frame|[[Image:BlacksmithQuest_JuriCamera.jpg|500px]]}} |
| − | |WIDTH="40%" VALIGN="TOP"|{{S2frame|[[Image: | ||
|} | |} | ||
== Detailed Walkthrough == | == Detailed Walkthrough == | ||
| − | + | You will find Blacksmith Juri in the center of Griffinborough, next to the NPC blacksmith. He will explain to you that he has a shipment of horseshoes to deliver but does not have the time. He would like you to make the delivery for him. | |
| + | {{S2frame|[[Image:BlacksmithQuest_Juri1Dialog.jpg|430px]]|left}} | ||
| + | <br clear="both" /> | ||
| − | + | The delivery goes to the Horse Trader located just southeast of Skook's Corner. Head north out of Griffinborough and follow the road towards Skook's Corner. This will take you right to the Horse Trader. The delivery is for [[Sacred 2:Horse_Trader_Birek|Horse Trader Birek]]. | |
| − | + | {{S2frame|[[Image:BlacksmithQuest_BirekMap.jpg|250px]][[Image:BlacksmithQuest_BirekTabMap.jpg|250px]]|left]]}} | |
| − | + | <br clear="both" /> | |
| − | + | {{S2frame|[[Image:BlacksmithQuest_BirekCamera.jpg|400px]]|left}} | |
| − | |||
| − | {{S2frame|[[Image: | ||
<br clear="both" /> | <br clear="both" /> | ||
| − | + | {{S2frame|[[Image:BlacksmithQuest_BirekDialog.jpg|430px]]|left}} | |
| − | |||
| − | {{S2frame|[[Image: | ||
<br clear="both" /> | <br clear="both" /> | ||
| − | + | After making the delivery, return to Griffinborough and talk to Blacksmith Juri to complete the quest and collect the reward. | |
| − | {{S2frame|[[Image: | + | {{S2frame|[[Image:BlacksmithQuest_Juri2Dialog.jpg|430px]]|left}} |
<br clear="both" /> | <br clear="both" /> | ||
| − | |||
| − | |||
| − | |||
| − | |||
| − | |||
| − | |||
| − | |||
| − | |||
| − | |||
== Quest Enemies == | == Quest Enemies == | ||
| − | |||
| − | |||
| − | |||
| − | |||
| − | |||
| − | |||
| − | |||
| − | + | === [[Sacred 2:Werewolf|Werewolf]] === | |
| − | + | {{:Sacred 2:Werewolf}} | |
== Logbook Entry == | == Logbook Entry == | ||
| − | |||
{| | {| | ||
| − | |{{S2frame|[[Image: | + | |{{S2frame|[[Image:BlacksmithQuest_Logbook.jpg|300px]]|left}} |
| − | |||
|} | |} | ||
== Notes == | == Notes == | ||
| − | + | ||
</div> | </div> | ||
| − | |||
[[Category:Sacred 2 Quest|{{PAGENAME}}]] | [[Category:Sacred 2 Quest|{{PAGENAME}}]] | ||
[[Category:Sacred 2 Side Quest|{{PAGENAME}}]] | [[Category:Sacred 2 Side Quest|{{PAGENAME}}]] | ||
| − | |||
| − | |||
| − | |||
| − | |||
| − | |||
| − | |||
| − | |||
Revision as of 01:24, 18 March 2011
|
| ||||||||||
Quick Walkthrough
|
| |||||||||

Detailed Walkthrough
You will find Blacksmith Juri in the center of Griffinborough, next to the NPC blacksmith. He will explain to you that he has a shipment of horseshoes to deliver but does not have the time. He would like you to make the delivery for him.
|
| ||
The delivery goes to the Horse Trader located just southeast of Skook's Corner. Head north out of Griffinborough and follow the road towards Skook's Corner. This will take you right to the Horse Trader. The delivery is for Horse Trader Birek.
|
| ||

|
| ||
 |
||
|
| ||
After making the delivery, return to Griffinborough and talk to Blacksmith Juri to complete the quest and collect the reward.
|
| ||
Quest Enemies
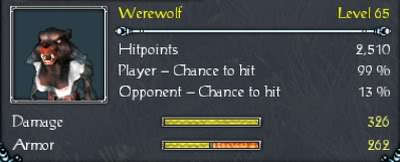
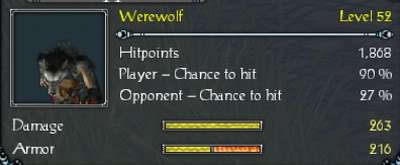
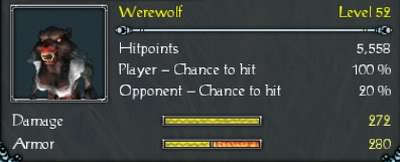
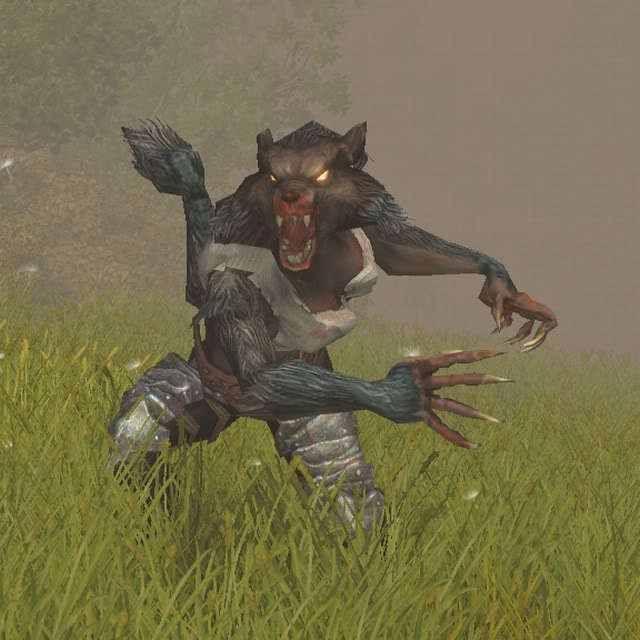
Werewolf
|
|
Damage Types: Weakest Against: Region: Artamark | ||||||||||||||||||


|
|
Damage Types: Weakest Against: Region: Artamark | ||||||||||||||||||

|
|
Damage Types: Weakest Against: Region: Artamark | ||||||||||||||||||
Logbook Entry
| |||||||||
