Difference between revisions of "Sacred 2:Shirka and Keytan"
(New page: {{subst:Quest}}) |
|||
| (One intermediate revision by one other user not shown) | |||
| Line 1: | Line 1: | ||
| − | |||
| − | |||
| − | |||
<div class="plainlinks"> | <div class="plainlinks"> | ||
{|WIDTH="100%" | {|WIDTH="100%" | ||
|WIDTH="15%" VALIGN="TOP"|__TOC__ | |WIDTH="15%" VALIGN="TOP"|__TOC__ | ||
|WIDTH="35%" VALIGN="TOP"| | |WIDTH="35%" VALIGN="TOP"| | ||
| − | * '''Quest Objective:''' | + | * '''Quest Objective:''' Escort Shirka to desert and confront her and Semil |
| − | * '''Quest Difficulty:''' | + | * '''Quest Difficulty:''' No difficulty given for this quest |
| − | * '''Quest Giver:''' | + | * '''Quest Giver:''' [[Sacred 2:Shirka Alana - NPC|Shirka Alana]] |
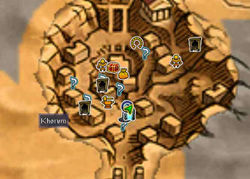
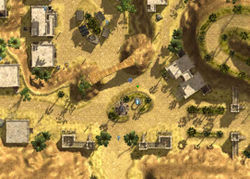
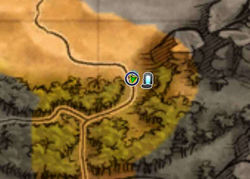
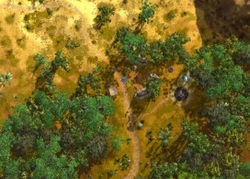
| − | * '''Location(s):''' | + | * '''Location(s):''' [[Sacred 2:Bengaresh Desert|Bengaresh Desert]], in [[Sacred 2:Khorum|Khorum]] |
| − | * '''Prerequisite Quest:''' | + | * '''Prerequisite Quest:''' [[Sacred 2:Shirka with the Dragons|Shirka with the Dragons]] |
| − | * '''Next Quest:''' | + | * '''Next Quest:''' [[Sacred 2:In the Badlands|In the Badlands]] |
| − | * '''Reward:''' | + | * '''Reward:''' [[Sacred 2:Experience|Experience]] |
| − | + | * '''Main Quest Page:''' [[Sacred 2:Inquisitor Class Chain Quest|Inquisitor Class Chain Quest]] | |
| − | {{S2frame|[[Image: | + | |WIDTH="50%" VALIGN="TOP"| |
| + | {{S2frame|[[Image:shirkeymap2.jpg|250px]][[Image:shirkeytab.jpg|250px]]|right|'''[[Sacred 2:Map of Ancaria|View the Ancaria Interactive Map]]'''}} | ||
|} | |} | ||
{|WIDTH="100%" | {|WIDTH="100%" | ||
|WIDTH="60%" VALIGN="TOP"| | |WIDTH="60%" VALIGN="TOP"| | ||
| + | |||
== Quick Walkthrough == | == Quick Walkthrough == | ||
| − | + | * Travel to [[Sacred 2:Khorum|Khorum]] | |
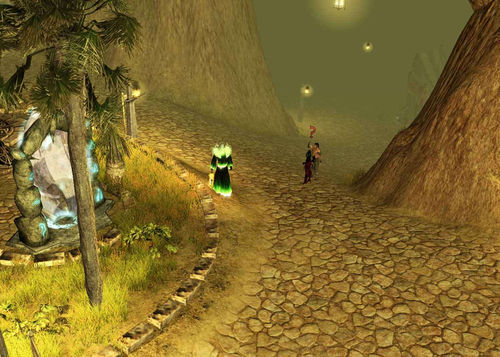
| − | * | + | * Speak to Shirka near portal |
| − | * | + | * Escort her to [[Sacred 2:Archaeologist Camp|Archaeologist Camp]] |
| − | * | + | * Talk to Semil |
| − | |WIDTH="40%" VALIGN="TOP"|{{S2frame|[[Image: | + | * Talk to Shirka |
| + | * Fight and subdue both of them | ||
| + | * Speak to Shirka again | ||
| + | * Travel to the [[Sacred 2:Wastelands Coast|Wastelands Coast]] | ||
| + | |WIDTH="40%" VALIGN="TOP"|{{S2frame|[[Image:shirkeyloc.jpg|500px]]}} | ||
|} | |} | ||
== Detailed Walkthrough == | == Detailed Walkthrough == | ||
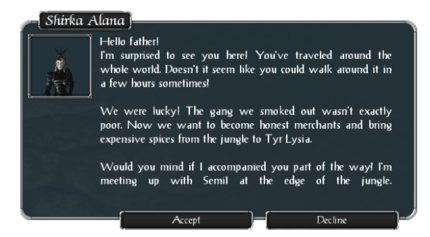
| − | + | You head into Khorum on Inquisition business and see none other than Shirka near the portal. She was able to find [[Sacred 2:Seargent Keytan|Semil]] since you last saw her. She said after they met up they killed a robber gang and took all their gold. They weren't exactly poor and now they have enough to set up their own spice business. Semil has take care of a few things and then he's going to meet her in [[Sacred 2:The Jungle|The Jungle]]. Since you're also going that way she asks if she could accompany you on the trip there. | |
| − | + | [[Image:shirka10chat.png|430px]] | |
| + | You can either '''Accept''' or '''Decline''' to escort her | ||
| + | * If you Accept - You escort her to The Jungle | ||
| + | * If you decline - You go to The Jungle alone and the quest will mark as failed in the logbook. (She is immortal so there's no reason not to escort her) | ||
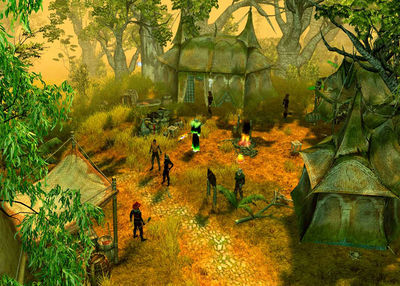
| − | + | As you travel to the jungle you talk about your life and the Inquisition. You tell her a little about the plans the Inquisition has and how you're involved. You think maybe she'll even join the cause. You travel to the [[Sacred 2:Archaeologist Camp|Archaeologist Camp]] and find Semil waiting for you. | |
| − | {{S2frame|[[Image: | + | {{S2frame|[[Image:semiljunglemap.jpg|250px]][[Image:semiljungletab.jpg|250px]]|left]]}} |
<br clear="both" /> | <br clear="both" /> | ||
| − | {{S2frame|[[Image: | + | {{S2frame|[[Image:semiljunlgeloc.jpg|400px]]|left}} |
<br clear="both" /> | <br clear="both" /> | ||
| − | + | [[Image:semiljunglechat.png|430px]] | |
| − | |||
| − | |||
| + | There you discover that Shirka and Semil are actually spies for the Elven Secret Service trying to uncover the Inquisition operations. They actually got caught robbing someone and agreed to be spies to save themselves from the gallows. And now they know I'm behind all the Inquisition conspiracies and want to kill me! | ||
| − | + | [[Image:shirka11chat.png|430px]] | |
| − | + | After finding and getting to know your daughter you can't bring yourself to kill her. So you subdue the both of them. She says you should have killed them as they will try with all their might to thwart your plans. You curse yourself for being weak and showing mercy. You know nothing can get in the way of the Inquisition. You vow never to be distracted again. | |
| − | + | [[Image:shirka12chat.png|430px]] | |
| − | + | You leave them and continue your journey to the [[Sacred 2:Wastelands|Wastelands]]. This end part 6 of the chain quest. The final quest awaits you in the Wastelands. | |
| − | |||
| − | |||
| − | |||
| − | |||
| − | |||
| − | |||
== Hirelings and Escorts == | == Hirelings and Escorts == | ||
| − | |||
| − | * [[Sacred 2: | + | * [[Sacred 2:Shirka Alana - NPC|Shirka Alana]] - Escort. Immortal. |
| − | |||
== Logbook Entry == | == Logbook Entry == | ||
| − | + | ||
{| | {| | ||
| − | |{{S2frame|[[Image: | + | |{{S2frame|[[Image:shirkeylog1.jpg|300px]]|left}} |
| − | |{{S2frame|[[Image: | + | |{{S2frame|[[Image:shirkeylog2.jpg|300px]]|left}} |
|} | |} | ||
== Notes == | == Notes == | ||
| − | |||
| − | |||
</div> | </div> | ||
| − | |||
[[Category:Sacred 2 Quest|{{PAGENAME}}]] | [[Category:Sacred 2 Quest|{{PAGENAME}}]] | ||
| − | + | [[Category:Sacred 2 Chain Quest Part|{{PAGENAME}}]] | |
| − | [[Category:Sacred 2 Chain Quest | + | [[Category:Sacred 2 Class Quest|{{PAGENAME}}]] |
| − | [[Category:Sacred 2 Class | ||
| − | |||
[[Category:Sacred 2 Shadow Path Quest|{{PAGENAME}}]] | [[Category:Sacred 2 Shadow Path Quest|{{PAGENAME}}]] | ||
| − | [[Category:Sacred 2 | + | [[Category:Sacred 2 Bengaresh Desert Quest|{{PAGENAME}}]] |
| − | |||
| − | |||
Latest revision as of 02:51, 26 September 2013
|
| ||||||||||
Quick Walkthrough
|
| |||||||||
Detailed Walkthrough
You head into Khorum on Inquisition business and see none other than Shirka near the portal. She was able to find Semil since you last saw her. She said after they met up they killed a robber gang and took all their gold. They weren't exactly poor and now they have enough to set up their own spice business. Semil has take care of a few things and then he's going to meet her in The Jungle. Since you're also going that way she asks if she could accompany you on the trip there.
You can either Accept or Decline to escort her
- If you Accept - You escort her to The Jungle
- If you decline - You go to The Jungle alone and the quest will mark as failed in the logbook. (She is immortal so there's no reason not to escort her)
As you travel to the jungle you talk about your life and the Inquisition. You tell her a little about the plans the Inquisition has and how you're involved. You think maybe she'll even join the cause. You travel to the Archaeologist Camp and find Semil waiting for you.
|
| ||
|
| ||
There you discover that Shirka and Semil are actually spies for the Elven Secret Service trying to uncover the Inquisition operations. They actually got caught robbing someone and agreed to be spies to save themselves from the gallows. And now they know I'm behind all the Inquisition conspiracies and want to kill me!
After finding and getting to know your daughter you can't bring yourself to kill her. So you subdue the both of them. She says you should have killed them as they will try with all their might to thwart your plans. You curse yourself for being weak and showing mercy. You know nothing can get in the way of the Inquisition. You vow never to be distracted again.
You leave them and continue your journey to the Wastelands. This end part 6 of the chain quest. The final quest awaits you in the Wastelands.
Hirelings and Escorts
- Shirka Alana - Escort. Immortal.
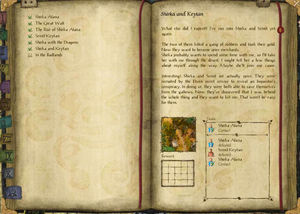
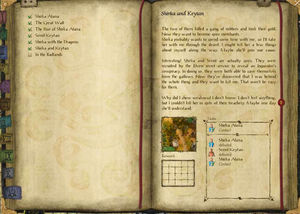
Logbook Entry
|
| ||||||||||||||||||
