Difference between revisions of "Sacred 2:The Legendary Pirate Treasure"
| Line 18: | Line 18: | ||
* '''Quest Difficulty:''' *** | * '''Quest Difficulty:''' *** | ||
* '''Quest Giver:''' The rock? | * '''Quest Giver:''' The rock? | ||
| − | * '''Location(s):''' | + | * '''Location(s):''' [[Sacred 2:Golden Coast|Golden Coast]] through a cave and a small portal in [[Sacred 2:Copper Peaks|Copper Peaks]]. |
* '''Prerequisite Quest:''' n/a | * '''Prerequisite Quest:''' n/a | ||
* '''Next Quest:''' n/a | * '''Next Quest:''' n/a | ||
| Line 26: | Line 26: | ||
== Quick Walkthrough == | == Quick Walkthrough == | ||
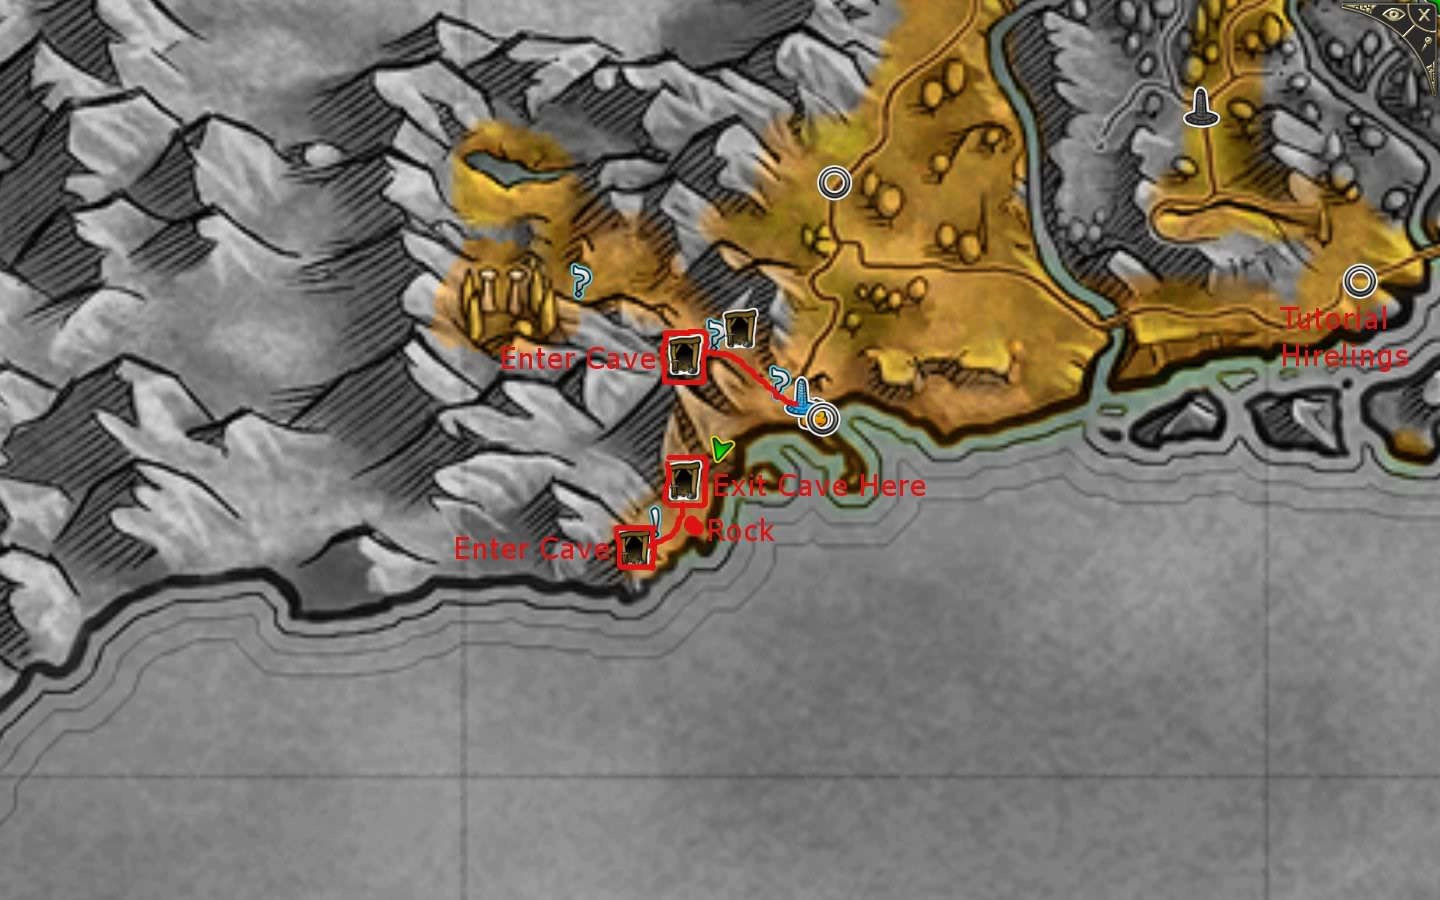
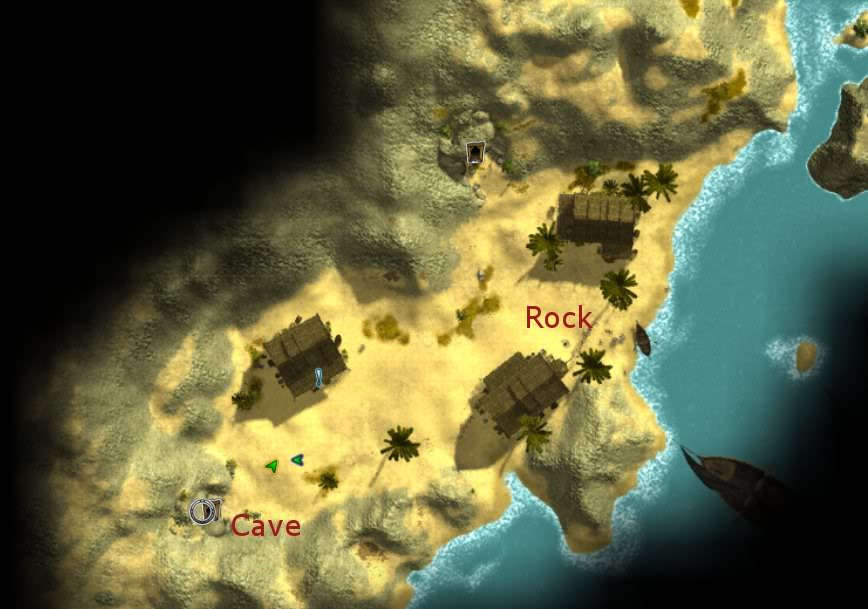
| − | * Enter cave on the left on the path to the Seraphim | + | * Enter the cave on the left on the path to the [[Sacred 2:Seraphim Valley|Seraphim Valley]] and [[Sacred 2:Forgotten Gardens|Forgotten Gardens]] just northwest of the Resurrection Monolith in the [[Sacred 2:Golden Coast|Golden Coast]]. |
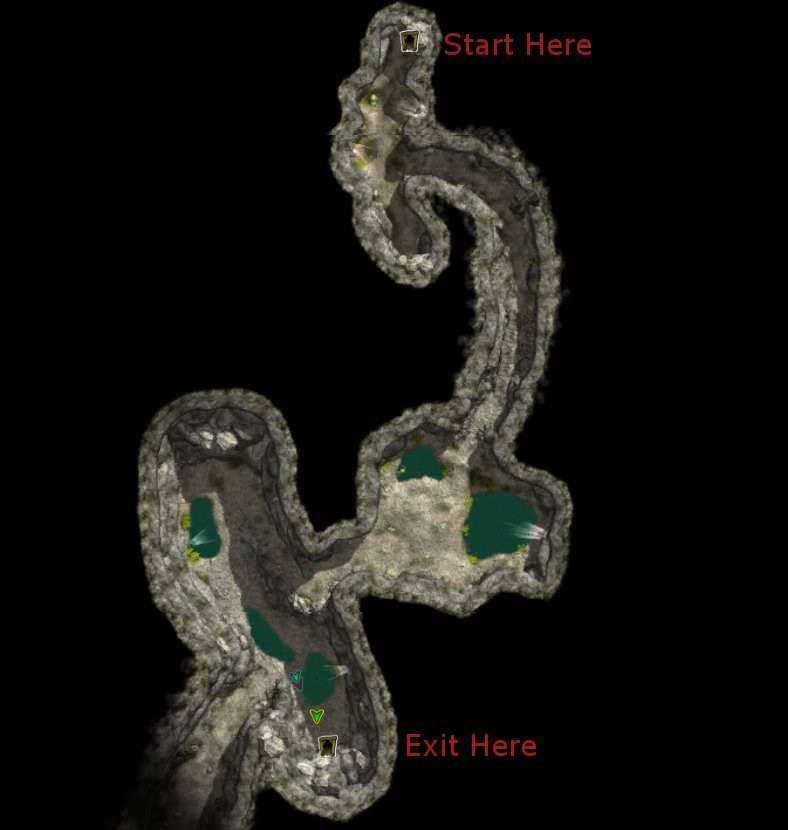
| − | * Make your way through to the cave with the green mist on the ground | + | * Make your way through to the part of the cave with the green mist on the ground. |
| − | * Go out through the cave entrance | + | * Go out through the cave entrance in that room. |
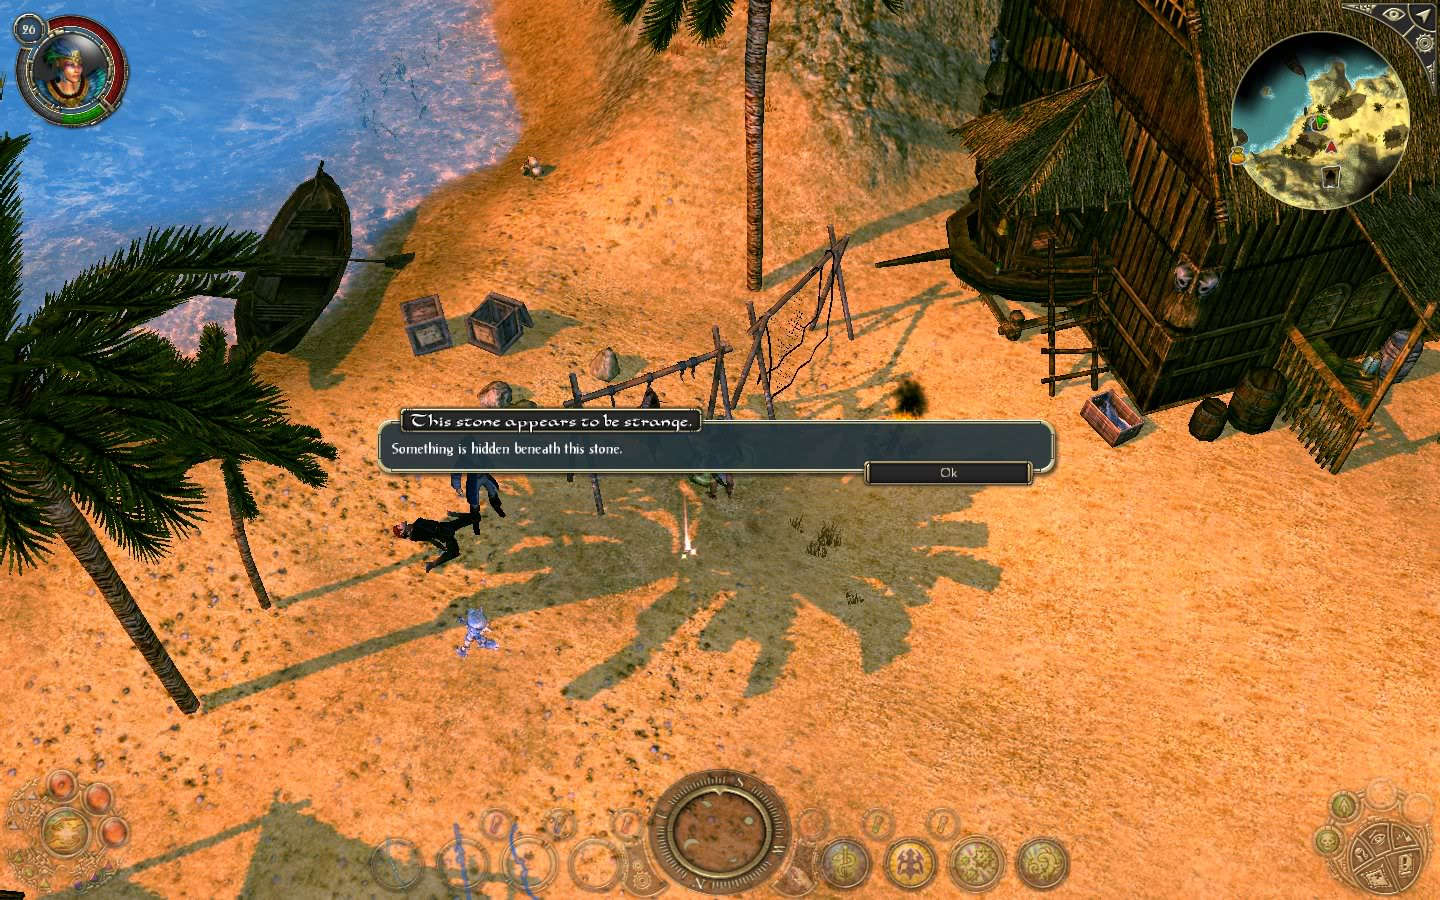
| − | * Find the fish hanging near the fire | + | * Find the fish hanging near the fire. |
| − | * Click on the rock under the fish | + | * Click on the rock under the fish. |
| − | * Enter cave entrance to the west of the fish | + | * Enter cave entrance to the west of the fish. |
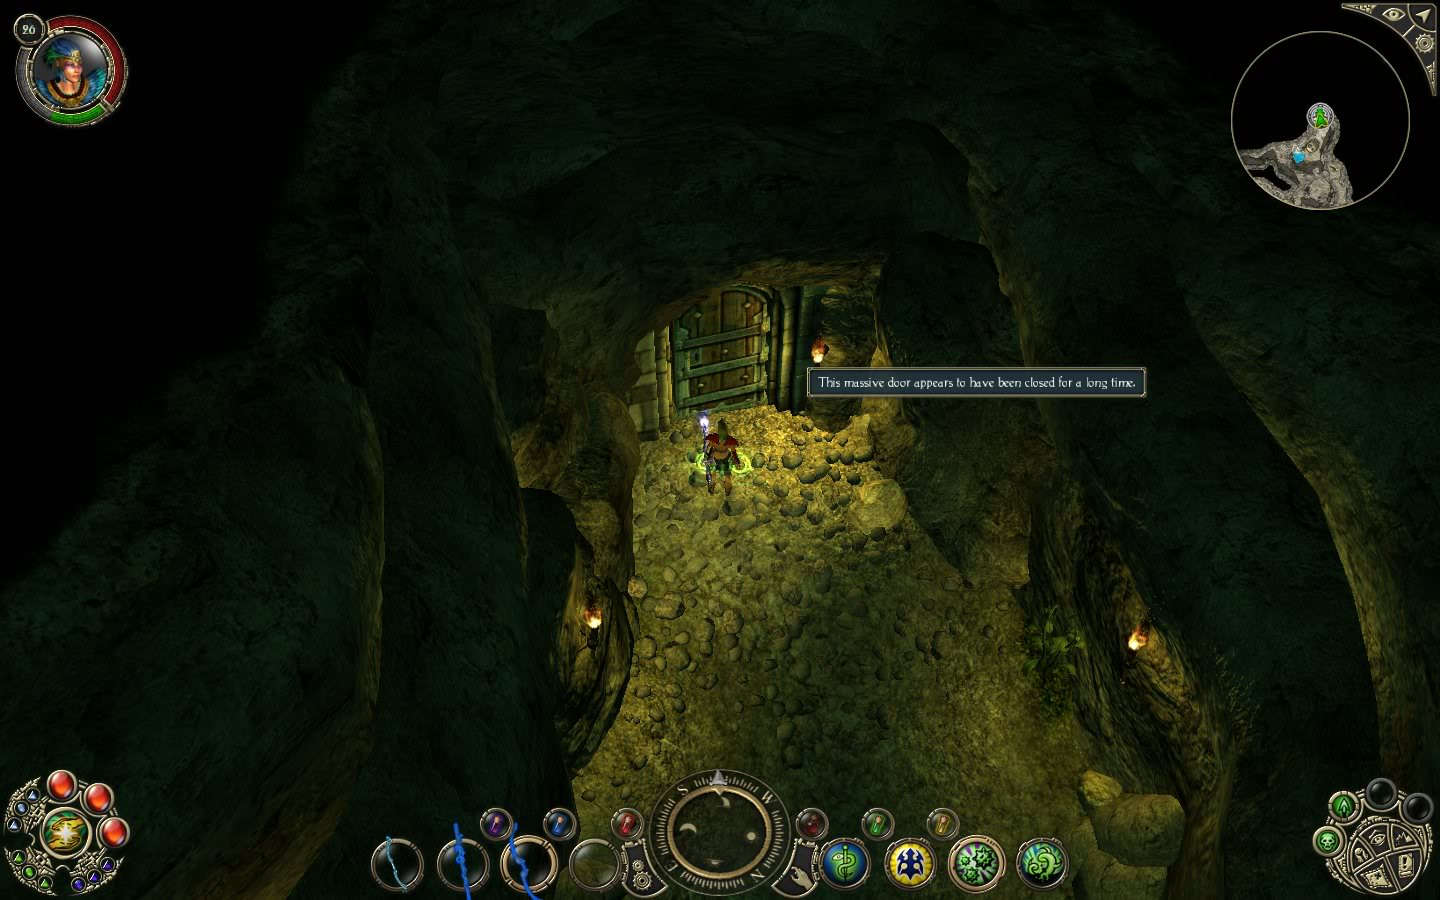
| − | * Look for locked door | + | * Look for locked door. It is just past [[Sacred 2:Bloodtongue|Bloodtongue]] if you have the [[Sacred 2:Bloodmouth Must Die|Bloodmouth Must Die]] part of the [[Sacred 2:Captain Bloodtongue|Captain Bloodtongue]] chain quest active. |
| + | * Go through the small portal behind that door. | ||
* Follow the path to the right until you see the next door | * Follow the path to the right until you see the next door | ||
* Kill the pirates and enjoy the loot | * Kill the pirates and enjoy the loot | ||
| Line 39: | Line 40: | ||
== Detailed Walkthrough == | == Detailed Walkthrough == | ||
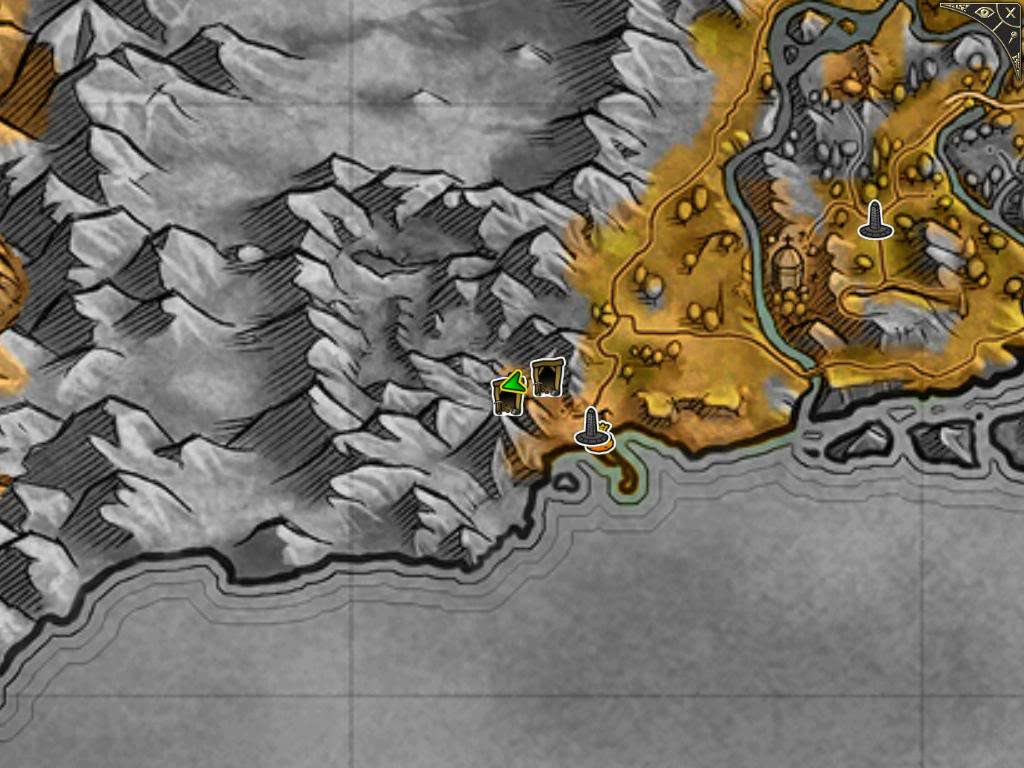
| − | Travel to the Golden Coast by following the road for the [[Sacred 2:Tutorial Hirelings|Tutorial Hirelings]] quest. In the southwestern most corner of Tyr | + | Travel to the [[Sacred 2:Golden Coast|Golden Coast]] by following the road for the [[Sacred 2:Tutorial Hirelings|Tutorial Hirelings]] quest. In the southwestern most corner of [[Sacred 2:Tyr Lysia|Tyr Lysia]], you'll find a resurrection monolith and a small camp with a merchant. There are two high elves there with other quests - but that's another story. Head north and slighty west of the Resurrection Monolith and you should see a high elf that has a quest for you. He wants you to kill the kobolds running around in the canyon behind him. Just beyond him, there's a soldier standing on the side of the path with yet another quest. He wants you to go in and find one of his soldiers who is hiding in the cave. Take this quest, go in, find the soldier who is keeping an eye on the pirates. Go back out, talk to the first soldier and take on the 3rd part of that quest - to kill [[Sacred 2:Captain Bloodtongue|Captain Bloodtongue]]. Might as well kill multiple birds with one shot. |
{| | {| | ||
| Line 74: | Line 75: | ||
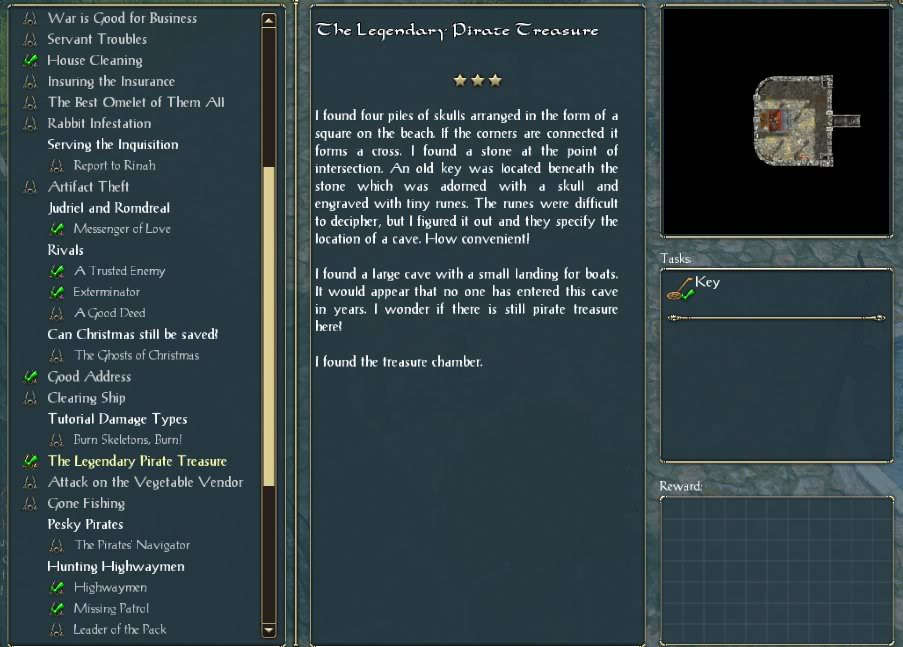
| − | Make your way around the harbor by going north. Kill off any pirates and giant bats. You will see another door on the side of the cavern wall. Click on it and go inside. When you get there, you | + | Make your way around the harbor by going north. Kill off any pirates and giant bats. You will see another door on the side of the cavern wall. Click on it and go inside. When you get there, enter the middle of the room and head to the back until you get a Quest Complete message and the screen flash. You should also get a message pop up and say that "I'm in the pirate's treasure chamber!" You will find a pirate captain and four of his henchmen. Kill them and loot the chamber at will. Quest Complete! |
{| | {| | ||
| Line 89: | Line 90: | ||
== Notes == | == Notes == | ||
* Dryads can skip the initial first cave by walking up to the mountain and activating Forest Flight | * Dryads can skip the initial first cave by walking up to the mountain and activating Forest Flight | ||
| − | * It's generally easiest to do this quest while doing the Captain Bloodtongue quests. | + | * It's generally easiest to do this quest while doing the [[Sacred 2:Captain Bloodtongue|Captain Bloodtongue]] quests. |
Revision as of 03:53, 6 January 2011
|
|
Quick Walkthrough
Detailed WalkthroughTravel to the Golden Coast by following the road for the Tutorial Hirelings quest. In the southwestern most corner of Tyr Lysia, you'll find a resurrection monolith and a small camp with a merchant. There are two high elves there with other quests - but that's another story. Head north and slighty west of the Resurrection Monolith and you should see a high elf that has a quest for you. He wants you to kill the kobolds running around in the canyon behind him. Just beyond him, there's a soldier standing on the side of the path with yet another quest. He wants you to go in and find one of his soldiers who is hiding in the cave. Take this quest, go in, find the soldier who is keeping an eye on the pirates. Go back out, talk to the first soldier and take on the 3rd part of that quest - to kill Captain Bloodtongue. Might as well kill multiple birds with one shot.
Logbook Entry
Notes
|
||||||||||||||||||||||||||||||||||||||||||||||||||||||||||||||||||||||||||||||||||||||||||||||||||||