Difference between revisions of "Sacred 2:Cut Off"
Silver_fox (talk | contribs) (Added more images to see how long this page would become) |
Silver_fox (talk | contribs) (Started writing the Detailed Walkthrough) |
||
| Line 9: | Line 9: | ||
* '''Location(s):''' Small fort near the lake northeast of [[Sacred 2:Derelict Manor|Derelict Manor]] | * '''Location(s):''' Small fort near the lake northeast of [[Sacred 2:Derelict Manor|Derelict Manor]] | ||
* '''Prerequisite Quest:''' None | * '''Prerequisite Quest:''' None | ||
| − | * '''Next Quest:''' | + | * '''Next Quest:''' Successful completion of this quest allows you to accept [[Sacred 2:Talisman|Talisman]] or [[Sacred 2:One Last Plea|One Last Plea]] |
* '''Reward:''' [[Sacred 2:Experience|Experience]] | * '''Reward:''' [[Sacred 2:Experience|Experience]] | ||
|WIDTH="50%" VALIGN="TOP"| {{S2frame|[[Image:Guardsman cut off worldmap.jpg|250px]][[Image:Guardsman cut off map.jpg|250px]]|right|'''[[Sacred 2:Map of Ancaria|View the Ancaria Interactive Map]]'''}} | |WIDTH="50%" VALIGN="TOP"| {{S2frame|[[Image:Guardsman cut off worldmap.jpg|250px]][[Image:Guardsman cut off map.jpg|250px]]|right|'''[[Sacred 2:Map of Ancaria|View the Ancaria Interactive Map]]'''}} | ||
| Line 47: | Line 47: | ||
According to the logbook, this story is a single side quest, though it plays like a 5-part chain.<br> | According to the logbook, this story is a single side quest, though it plays like a 5-part chain.<br> | ||
| + | '''Part 1: Guardsmen need a leader'''<br> | ||
| + | You were travelling around the northern [[Sacred 2:Tyr Lysia|Tyr Lysia]] and hunting numerous [[Sacred 2:Kobolds|Kobolds]] east of [[Sacred 2:Benny's Corn Circles|Benny's Corn Circles]], yet significantly west of [[Sacred 2:Clearview|Clearview]]. The area seemed to be quite deserted, since all you noticed there were Kobolds, wild animals and some old ruins. When your trophies became too multiple to fit into you bagpack, you noticed the need to find some more or less inhabited place. There was a marking on your map showing a trading post near the lake, so you headed there. As you came closer, you noticed a tower on the hill. This could have been an elven outpost that promised a place where you can rest for some time. However, you quickly noticed that this place wasn't peaceful and quiet. At least, not yet.<br> | ||
| + | The soldiers that were standing on the road that leads up the hill looked quite worried. They were observing the area as if they were looking for somebody. This fact itself wasn't wery surprising, since it's exactly what the sentry's job is. But this time they weren't looking for an enemy, but for somebody else. Somebody like you.<br> | ||
[[Image:Cut off dialog1.jpg]]<br> | [[Image:Cut off dialog1.jpg]]<br> | ||
| + | If these guys were looking for the fearless warrior to lead them to the battle, they've got what they wanted. You can easely put down any Kobold in the area, and you should do so as fast as possible. Actually, it'd be much better to cut off the nasty little humanoids before brave elven soldiers get to fight them. The first enemies on your way would be these ones just a bit further up the road. You can see them from where you're standing.<br> | ||
| + | ''- Your hirelings aren't immortal and you would fail the quest if they die. However, they would fearlessly try to attack everything in sight. Those idiots! This quest is quite long and may grant you a lot of experience total, as well as unlock an access to one more quest, so be sure to watch your hirelings and not let them die.''<br> | ||
{{S2frame|[[Image:Cut off worldmap1.jpg|250px]][[Image:Cut off map1.jpg|250px]]|left}} | {{S2frame|[[Image:Cut off worldmap1.jpg|250px]][[Image:Cut off map1.jpg|250px]]|left}} | ||
<br clear="both" /> | <br clear="both" /> | ||
| + | Here they are! A group of six Kobolds is running up the hill. And you're running to get them.<br> | ||
{{S2frame|[[Image:Cut off camera2.jpg|400px]]|left}} | {{S2frame|[[Image:Cut off camera2.jpg|400px]]|left}} | ||
<br clear="both" /> | <br clear="both" /> | ||
| + | These Kobolds won't run anymore in this life. Such a small group of pointy-eared beasts could stop the elven soldiers, but not you. The Guardsman who hired you for this task looks quite impressed and wants to talk.<br> | ||
[[Image:Cut off dialog2.jpg]]<br> | [[Image:Cut off dialog2.jpg]]<br> | ||
| + | The first part of your anti-Kobold mission is complete. The next one awaits.<br> | ||
| + | |||
| + | '''Part 2: Hero for the rescue'''<br> | ||
| + | The Guardsman told you to move further up the hill and you'd better do so. Even though one part of your quest is complete, the next one has already started. And therefore run, warrior, run! Run for your life!.. wait, nothing there can threat ''your'' life. However, there are some soldiers in danger, so you should run for their lives (and your quest).<br> | ||
| + | ''- This is probably the best opportunity to fail this quest. If you play with the camera moved close to your character, you may not even notice the battle between Guardsmen and Kobolds from the place where you're standing. And even if you notice, you may not guess that they're a part of the quest. However, these elves are a part of your current task, they are mortal, and you need to save them.'' | ||
{{S2frame|[[Image:Cut off worldmap2.jpg|250px]][[Image:Cut off map2.jpg|250px]]|left}} | {{S2frame|[[Image:Cut off worldmap2.jpg|250px]][[Image:Cut off map2.jpg|250px]]|left}} | ||
<br clear="both" /> | <br clear="both" /> | ||
| + | Another small group of elven soldiers is fighting Kobolds next to the bridge. [[Sacred 2:Dying Soldier|One elf]] has already fallen. You should assist them and rescue the ones who are still alive. There are 7 Kobolds of all varieties (one of each possible variety, to be precise) and only three elves, two swordsmen and an archer. The enemies definitely outnumber, but with you on their side the Guardsmen can win the battle.<br> | ||
{{S2frame|[[Image:Cut off camera3.jpg|400px]]|left}} | {{S2frame|[[Image:Cut off camera3.jpg|400px]]|left}} | ||
<br clear="both" /> | <br clear="both" /> | ||
| + | Now when the Kobolds are down, the soldiers can get a small break. Though they are still holding their ground next to the bridge.<br> | ||
{{S2frame|[[Image:Cut off worldmap3.jpg|250px]][[Image:Cut off map3.jpg|250px]]|left}} | {{S2frame|[[Image:Cut off worldmap3.jpg|250px]][[Image:Cut off map3.jpg|250px]]|left}} | ||
<br clear="both" /> | <br clear="both" /> | ||
| + | [[Sacred 2:Second Guardsman - Cut Off|One of them]] wants to talk to you.<br> | ||
{{S2frame|[[Image:Cut off camera4.jpg|400px]]|left}} | {{S2frame|[[Image:Cut off camera4.jpg|400px]]|left}} | ||
<br clear="both" /> | <br clear="both" /> | ||
| + | Maybe he can explain the situation and clarify your current task.<br> | ||
[[Image:Cut off dialog3.jpg]]<br> | [[Image:Cut off dialog3.jpg]]<br> | ||
| + | He had nothing important to say and just wanted to show his gratitude. Maybe these soldiers' superior can tell you more. You should go to the small fort that is on the other side of the bridge and find the commander, who is standing in the middle of it. Three guards of the bridge will help you to accomplish this hard task.<br> | ||
| + | ''- As the Guardsmen joined you, it'd be better to head directly to the Commander and leave your hirelings to him. Some of the soldiers are most probably wounded, but it's not necessary to heal them, since they would stop being your hirelings before having an opportunity to fight again.''<br> | ||
{{S2frame|[[Image:Cut off camera5.jpg|400px]]|left}} | {{S2frame|[[Image:Cut off camera5.jpg|400px]]|left}} | ||
<br clear="both" /> | <br clear="both" /> | ||
| + | The [[Sacred 2:Commander|Commander]] is waiting for you. This guy is easy to notice, since he is quite oversized by elven standarts. You've brought him some good news and his subordinates. No wonder that he's glad to meet you.<br> | ||
[[Image:Cut off dialog4.jpg]]<br> | [[Image:Cut off dialog4.jpg]]<br> | ||
| + | You've just successfully rescued the fort and its soldiers. The hard part of the quest is now complete. If you've got there, you can't fail anymore. However, if you want to complete the quest, you should do some more things that the brave elven army can't even attempt.<br> | ||
| + | |||
| + | '''Part 3: Kobolds' Mine'''<br> | ||
| + | Just as he mentioned, the Commander has one more task to offer. However, this one isn't urgent, so you can take a break and finally visit the merchant.<br> | ||
{{S2frame|[[Image:Cut off camera6.jpg|400px]]|left}} | {{S2frame|[[Image:Cut off camera6.jpg|400px]]|left}} | ||
<br clear="both" /> | <br clear="both" /> | ||
| + | When you're ready, you can find out what this task is.<br> | ||
[[Image:Cut off dialog5.jpg]]<br> | [[Image:Cut off dialog5.jpg]]<br> | ||
{{S2frame|[[Image:Cut off kobolds worldmap.jpg|250px]][[Image:Cut off kobolds map.jpg|250px]]|left}} | {{S2frame|[[Image:Cut off kobolds worldmap.jpg|250px]][[Image:Cut off kobolds map.jpg|250px]]|left}} | ||
Revision as of 07:45, 28 May 2011

|
This page is about additional content added from the CM Patch.
The contents of this page are exclusive content found only by installing the Community Patch. |
|
| ||||||||||


Quick Walkthrough
|
| |||||||||

Detailed Walkthrough
According to the logbook, this story is a single side quest, though it plays like a 5-part chain.
Part 1: Guardsmen need a leader
You were travelling around the northern Tyr Lysia and hunting numerous Kobolds east of Benny's Corn Circles, yet significantly west of Clearview. The area seemed to be quite deserted, since all you noticed there were Kobolds, wild animals and some old ruins. When your trophies became too multiple to fit into you bagpack, you noticed the need to find some more or less inhabited place. There was a marking on your map showing a trading post near the lake, so you headed there. As you came closer, you noticed a tower on the hill. This could have been an elven outpost that promised a place where you can rest for some time. However, you quickly noticed that this place wasn't peaceful and quiet. At least, not yet.
The soldiers that were standing on the road that leads up the hill looked quite worried. They were observing the area as if they were looking for somebody. This fact itself wasn't wery surprising, since it's exactly what the sentry's job is. But this time they weren't looking for an enemy, but for somebody else. Somebody like you.

If these guys were looking for the fearless warrior to lead them to the battle, they've got what they wanted. You can easely put down any Kobold in the area, and you should do so as fast as possible. Actually, it'd be much better to cut off the nasty little humanoids before brave elven soldiers get to fight them. The first enemies on your way would be these ones just a bit further up the road. You can see them from where you're standing.
- Your hirelings aren't immortal and you would fail the quest if they die. However, they would fearlessly try to attack everything in sight. Those idiots! This quest is quite long and may grant you a lot of experience total, as well as unlock an access to one more quest, so be sure to watch your hirelings and not let them die.
|
| ||
  |
||
Here they are! A group of six Kobolds is running up the hill. And you're running to get them.
|
| ||
 |
||
These Kobolds won't run anymore in this life. Such a small group of pointy-eared beasts could stop the elven soldiers, but not you. The Guardsman who hired you for this task looks quite impressed and wants to talk.

The first part of your anti-Kobold mission is complete. The next one awaits.
Part 2: Hero for the rescue
The Guardsman told you to move further up the hill and you'd better do so. Even though one part of your quest is complete, the next one has already started. And therefore run, warrior, run! Run for your life!.. wait, nothing there can threat your life. However, there are some soldiers in danger, so you should run for their lives (and your quest).
- This is probably the best opportunity to fail this quest. If you play with the camera moved close to your character, you may not even notice the battle between Guardsmen and Kobolds from the place where you're standing. And even if you notice, you may not guess that they're a part of the quest. However, these elves are a part of your current task, they are mortal, and you need to save them.
|
| ||
  |
||
Another small group of elven soldiers is fighting Kobolds next to the bridge. One elf has already fallen. You should assist them and rescue the ones who are still alive. There are 7 Kobolds of all varieties (one of each possible variety, to be precise) and only three elves, two swordsmen and an archer. The enemies definitely outnumber, but with you on their side the Guardsmen can win the battle.
|
| ||
 |
||
Now when the Kobolds are down, the soldiers can get a small break. Though they are still holding their ground next to the bridge.
|
| ||
  |
||
One of them wants to talk to you.
|
| ||
 |
||
Maybe he can explain the situation and clarify your current task.

He had nothing important to say and just wanted to show his gratitude. Maybe these soldiers' superior can tell you more. You should go to the small fort that is on the other side of the bridge and find the commander, who is standing in the middle of it. Three guards of the bridge will help you to accomplish this hard task.
- As the Guardsmen joined you, it'd be better to head directly to the Commander and leave your hirelings to him. Some of the soldiers are most probably wounded, but it's not necessary to heal them, since they would stop being your hirelings before having an opportunity to fight again.
|
| ||
 |
||
The Commander is waiting for you. This guy is easy to notice, since he is quite oversized by elven standarts. You've brought him some good news and his subordinates. No wonder that he's glad to meet you.

You've just successfully rescued the fort and its soldiers. The hard part of the quest is now complete. If you've got there, you can't fail anymore. However, if you want to complete the quest, you should do some more things that the brave elven army can't even attempt.
Part 3: Kobolds' Mine
Just as he mentioned, the Commander has one more task to offer. However, this one isn't urgent, so you can take a break and finally visit the merchant.
|
| ||
 |
||
When you're ready, you can find out what this task is.

|
| ||
  |
||
|
| ||
 |
||
|
| ||
 |
||
|
| ||
 |
||
|
| ||
 |
||


|
| ||
  |
||
|
| ||
 |
||


|
| ||
  |
||
|
| ||
 |
||

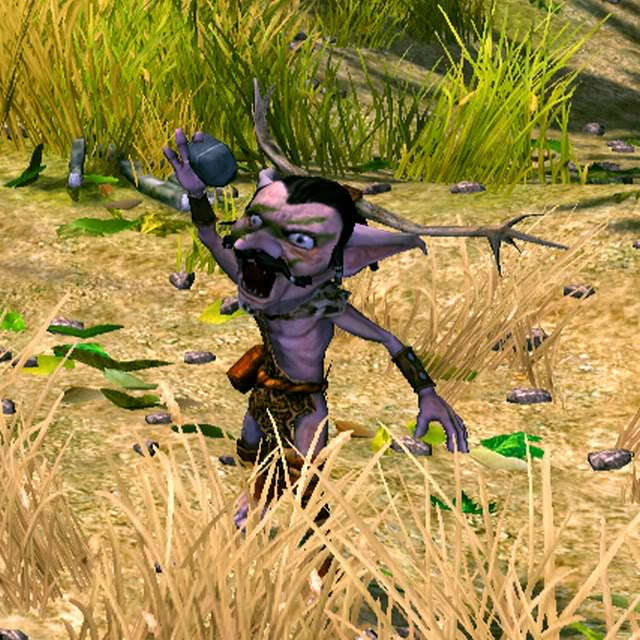
Quest Enemies
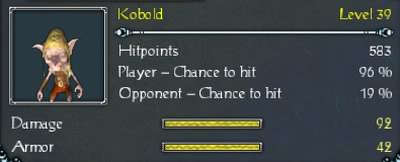
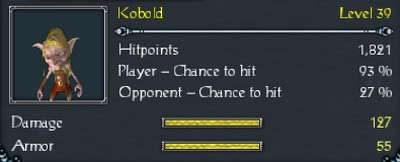
Kobold
|
|
Damage Types: Weakest Against: Region: Tyr Lysia | ||||||||||||||||||


|
|
Damage Types: Weakest Against: Region: Tyr Lysia | ||||||||||||||||||
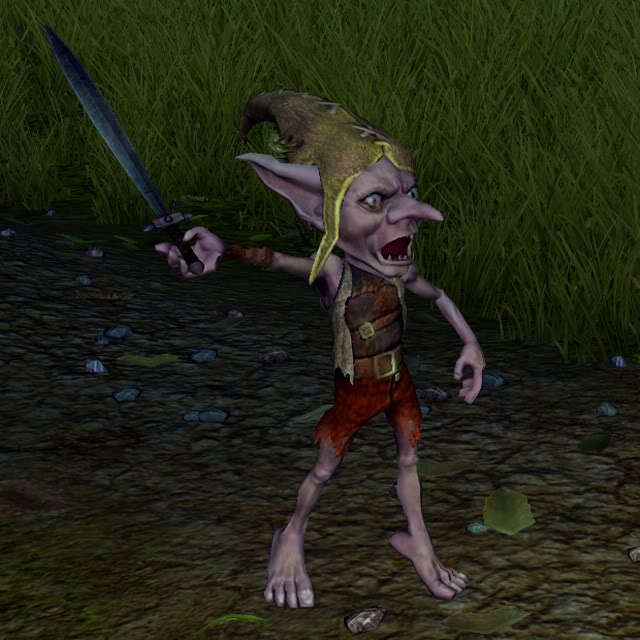
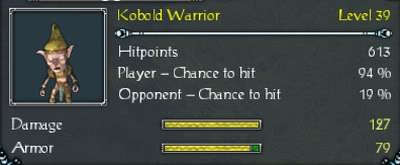
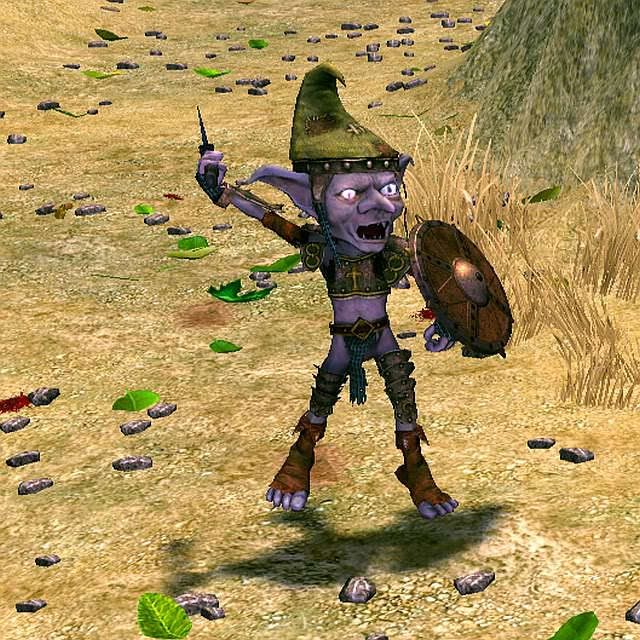
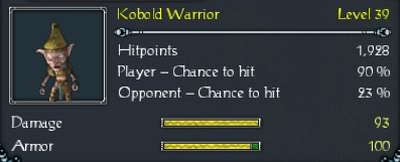
Kobold Warrior
|
|
Damage Types: Weakest Against: Region: Tyr Lysia | ||||||||||||||||||
|
|
Damage Types: Weakest Against: Region: Tyr Lysia | ||||||||||||||||||
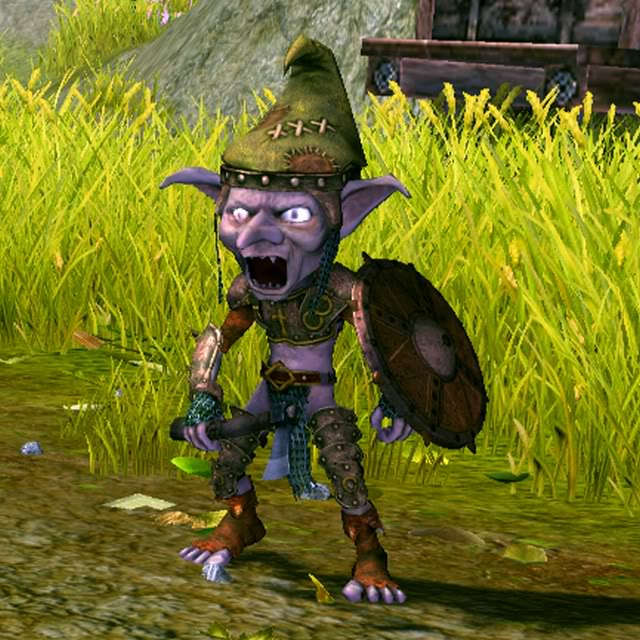
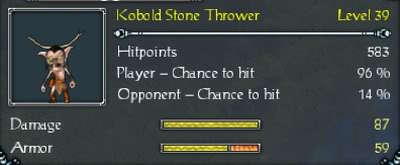
Kobold Stone Thrower
|
|
Damage Types: Weakest Against: Region: Tyr Lysia | ||||||||||||||||||
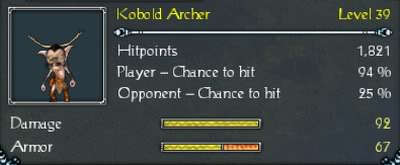
Kobold Archer
|
|
Damage Types: Weakest Against: Region: Tyr Lysia | ||||||||||||||||||

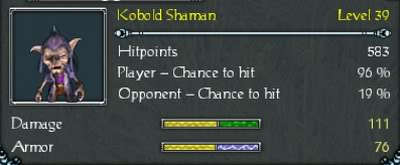
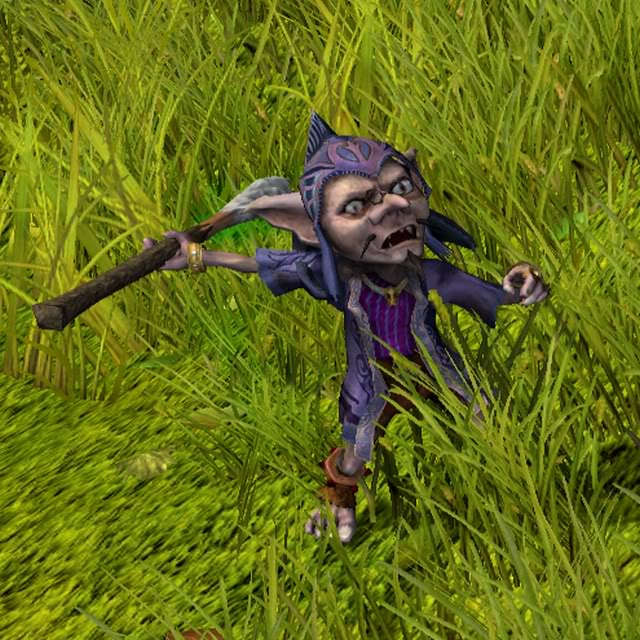
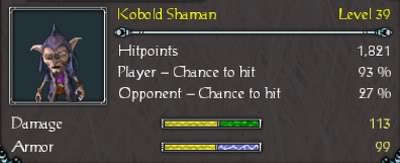
Kobold Shaman
|
|
Damage Types: Weakest Against: Region: Tyr Lysia | ||||||||||||||||||
|
|
Damage Types: Weakest Against: Region: Tyr Lysia | ||||||||||||||||||

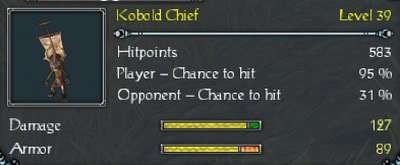
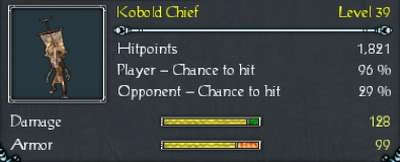
Kobold Chief
|
|
Damage Types: Weakest Against: Region: Tyr Lysia | ||||||||||||||||||

|
|
Damage Types: Weakest Against: Region: Tyr Lysia | ||||||||||||||||||

Hirelings and Escorts
- Guardsmen - Hirelings. Mortal. All three are close combat fighters.
- Other Guardsmen - Hirelings. Mortal. Two combat fighters and one archer.
Logbook Entry
|
| ||||||||||||||||||


| |||||||||
