Difference between revisions of "Sacred 2:End of a Journey - A New Journey Begins"
(→Detailed Walkthrough: linked light campaign to the synopsis page) |
|||
| Line 1: | Line 1: | ||
{{Languages}} | {{Languages}} | ||
| + | |||
| + | |||
| + | |||
| + | <div class="plainlinks"> | ||
| + | |||
| + | {|WIDTH="100%" | ||
| + | |WIDTH="15%" VALIGN="TOP"|__TOC__ | ||
| + | |WIDTH="35%" VALIGN="TOP"| | ||
| + | * '''Quest Objective:''' TYPE IN OBJECTIVE OF QUEST | ||
| + | * '''Quest Difficulty:''' TYPE IN NUMBER OF STARS THIS QUEST INDICATES AS DIFFICULTY | ||
| + | * '''Quest Giver:''' [[Sacred 2:QUEST GIVER |QUEST GIVER ]] TYPE IN FULL NAME OF NPC QUEST GIVER | ||
| + | * '''Location(s):''' [[Sacred 2:REGION|REGION]] [[Sacred 2:PLACE|PLACE]] TYPE IN REGION AND/OR TOWN THE QUEST IS GIVEN IN | ||
| + | * '''Prerequisite Quest:''' [[Sacred 2:QUEST|QUEST]] TYPE IN PREREQUISITE QUEST IF ONE IS NEEDED TO BE GIVEN THIS QUEST | ||
| + | * '''Next Quest:''' [[Sacred 2:QUEST|QUEST]] TYPE IN NAME OF NEXT QUEST | ||
| + | * '''Reward:''' [[Sacred 2:Gold|Gold]] [[Sacred 2:Experience|Experience]] TYPE IN REWARD RECEIVED UPON COMPLETION OF THIS QUEST | ||
| + | |WIDTH="50%" VALIGN="TOP"|UPLOAD A "TAB" MAP AND "M" MAP PICTURE SHOWING THE LOCATION WHERE THIS QUEST BEGINS AND REPLACE THIS TEXT WITH IT HERE. EXAMPLE: | ||
| + | |||
| + | {{S2frame|[[Image:sample_worldmap.jpg|250px]][[Image:Quest_Name_map.jpg|250px]]|right|'''[[Sacred 2:Map of Ancaria|View the Ancaria Interactive Map]]'''}} | ||
| + | |} | ||
| + | {{S2frame|[[Image:Quest_Location.jpg|500px]]}} | ||
| + | == Quest Parts == | ||
| + | This is the name for the NUMBER_OF_PARTS-part 'chain-quest' starting in REPLACE THIS WITH A DESCRIPTION OF THE PLACE WHERE IT STARTS (REMEMBER OF USING LINKS TO PLACES). | ||
| + | |||
| + | The SPELLED_NUMBER_OF_PARTS quests in this chain are: | ||
| + | |||
| + | #[[Sacred 2:FIRST QUEST PAGE|FIRST QUEST PAGE]] | ||
| + | #[[Sacred 2:SECOND QUEST PAGE|SECOND QUEST PAGE]] | ||
| + | #[[Sacred 2:THIRD QUEST PAGE|THIRD QUEST PAGE]] | ||
| + | ... | ||
| + | |||
| + | In order to start your journey towards completing this multi-part quest, you will have to REPLACE THIS WITH A DESCRIPTION ON THE ACTION NEEDED TO START THIS CHAIN QUEST (USUALLY TALK TO SOMEONE). The detailed information on this string of quests starts [[Sacred 2:FIRST QUEST PAGE|HERE]] | ||
| + | |||
| + | |||
| + | |||
| + | == Quick Walkthrough == | ||
| + | |||
| + | PUT HERE ALL QUICK WALKTHROUGHS OF ALL INDIVIDUAL QUESTS IN THIS CHAIN QUEST IN ORDER | ||
| + | |||
| + | |||
| + | |||
| + | === 1. [[Sacred 2:FIRST QUEST PAGE|FIRST QUEST PAGE]] === | ||
| + | |||
| + | * FIRST THING TO DO | ||
| + | * NEXT THING TO DO | ||
| + | * NEXT THING TO DO | ||
| + | |||
| + | |||
| + | |||
| + | === 2. [[Sacred 2:SECOND QUEST PAGE|SECOND QUEST PAGE]] === | ||
| + | |||
| + | * FIRST THING TO DO | ||
| + | * NEXT THING TO DO | ||
| + | * NEXT THING TO DO | ||
| + | |||
| + | |||
| + | |||
| + | === 3. [[Sacred 2:THIRD QUEST PAGE|THIRD QUEST PAGE]] === | ||
| + | |||
| + | * FIRST THING TO DO | ||
| + | * NEXT THING TO DO | ||
| + | * NEXT THING TO DO | ||
| + | |||
| + | |||
| + | |||
| + | == Notes == | ||
| + | |||
| + | * PUT HERE ANY USEFUL NOTES (F.I. IF THIS CHAIN QUEST IS LIGHT OR SHADOW ONLY) | ||
| + | * YOU CAN PUT HERE ALSO THE LINK TO THE LIGHT VERSION (OR SHADOW VERSION) FOR THIS CHAIN QUEST | ||
| + | |||
| + | |||
| + | [[Category:Sacred 2 Quest]][[Category:Sacred 2 Chain Quest]] | ||
| + | |||
| + | |||
| + | |||
| + | |||
| + | |||
| + | |||
| + | |||
{| | {| | ||
Revision as of 18:38, 10 December 2011
|
UPLOAD A "TAB" MAP AND "M" MAP PICTURE SHOWING THE LOCATION WHERE THIS QUEST BEGINS AND REPLACE THIS TEXT WITH IT HERE. EXAMPLE:
| ||||||||||


|
| ||
 |
||
Quest Parts
This is the name for the NUMBER_OF_PARTS-part 'chain-quest' starting in REPLACE THIS WITH A DESCRIPTION OF THE PLACE WHERE IT STARTS (REMEMBER OF USING LINKS TO PLACES).
The SPELLED_NUMBER_OF_PARTS quests in this chain are:
...
In order to start your journey towards completing this multi-part quest, you will have to REPLACE THIS WITH A DESCRIPTION ON THE ACTION NEEDED TO START THIS CHAIN QUEST (USUALLY TALK TO SOMEONE). The detailed information on this string of quests starts HERE
Quick Walkthrough
PUT HERE ALL QUICK WALKTHROUGHS OF ALL INDIVIDUAL QUESTS IN THIS CHAIN QUEST IN ORDER
1. FIRST QUEST PAGE
- FIRST THING TO DO
- NEXT THING TO DO
- NEXT THING TO DO
2. SECOND QUEST PAGE
- FIRST THING TO DO
- NEXT THING TO DO
- NEXT THING TO DO
3. THIRD QUEST PAGE
- FIRST THING TO DO
- NEXT THING TO DO
- NEXT THING TO DO
Notes
- PUT HERE ANY USEFUL NOTES (F.I. IF THIS CHAIN QUEST IS LIGHT OR SHADOW ONLY)
- YOU CAN PUT HERE ALSO THE LINK TO THE LIGHT VERSION (OR SHADOW VERSION) FOR THIS CHAIN QUEST
|
|
Quick Walkthrough
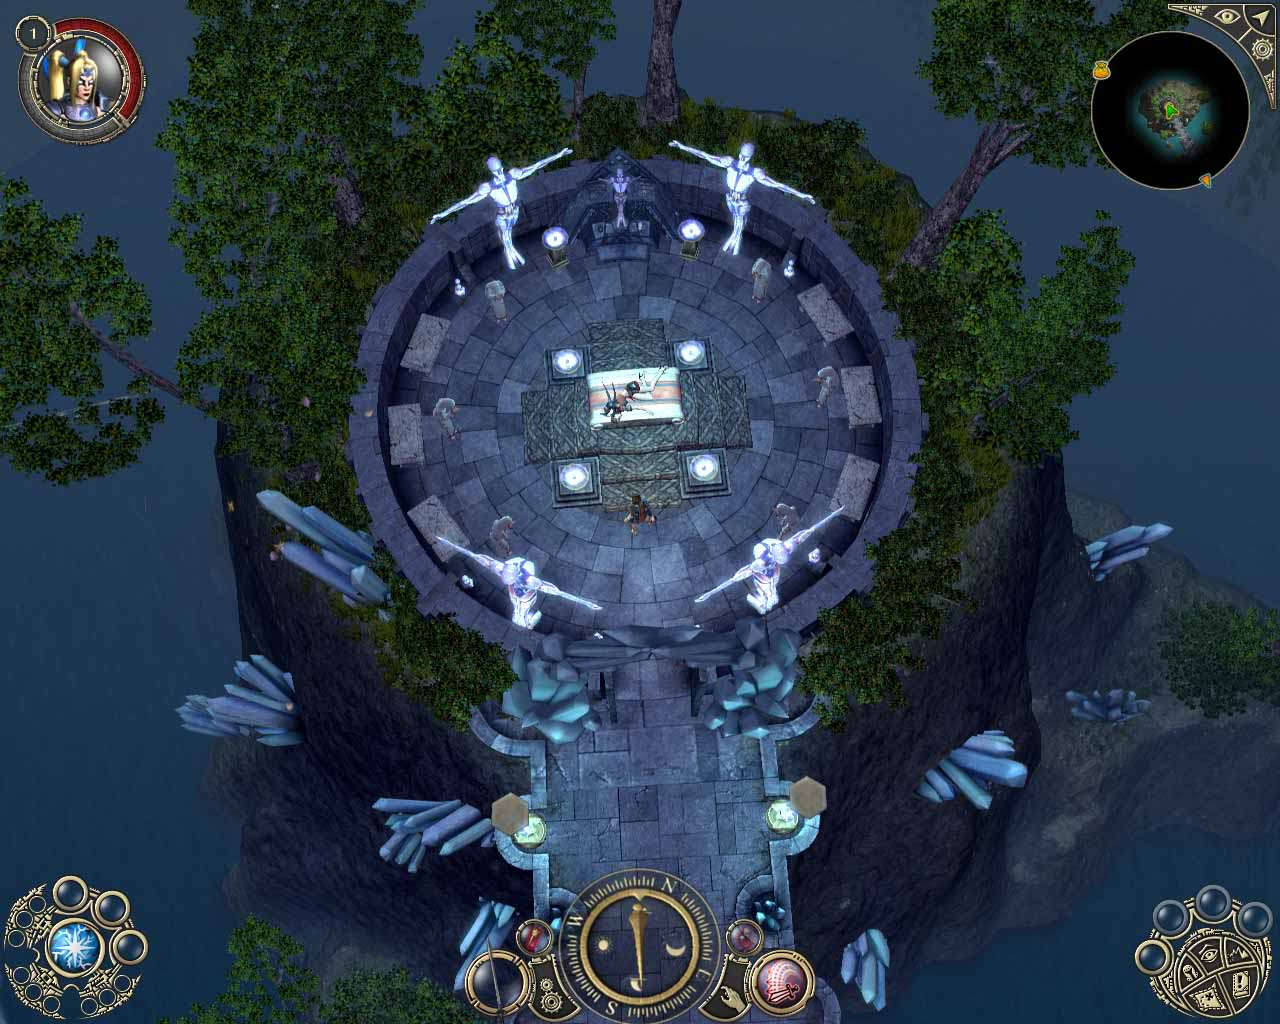
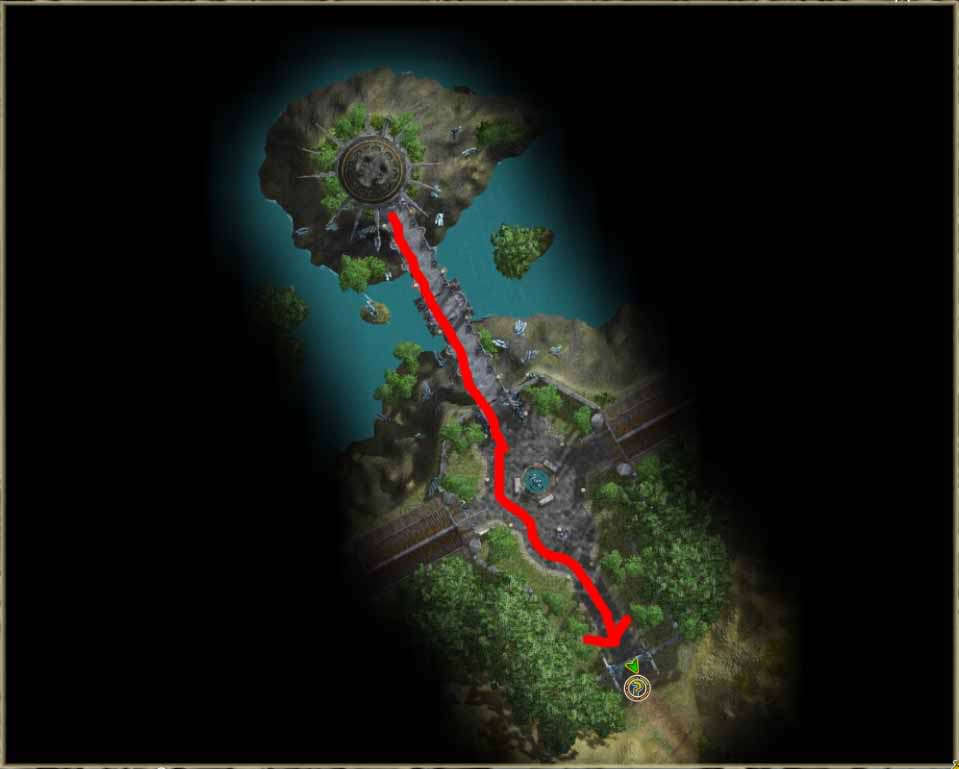
Detailed WalkthroughYou first get control of your character after the opening cutscenes. Your character is outside the room where the other Seraphim has just died. Cross the bridge and you find yourself in a plaza with a fountain in the center, a chapel on one side and a sleeping room on the other side. The gate leading out is directly accross from you.
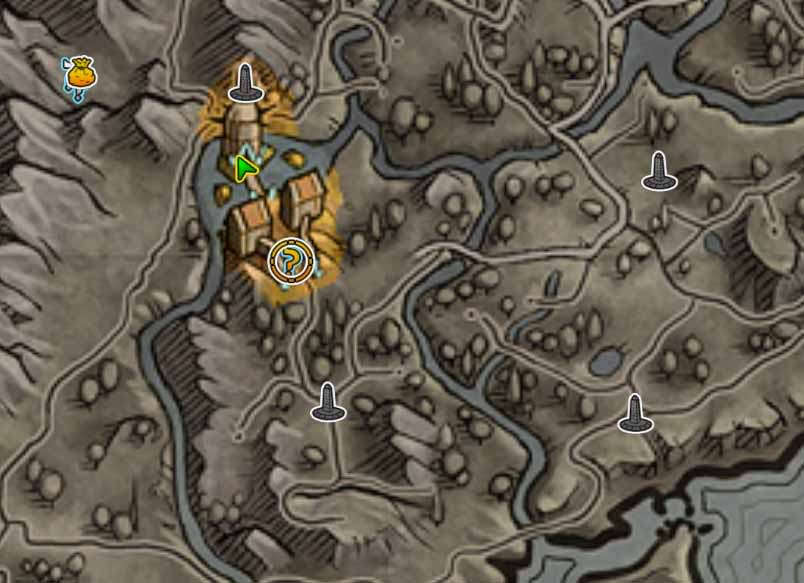
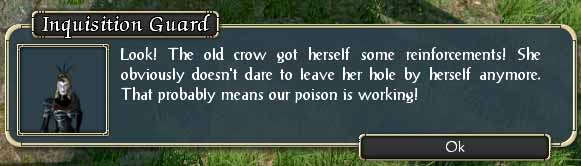
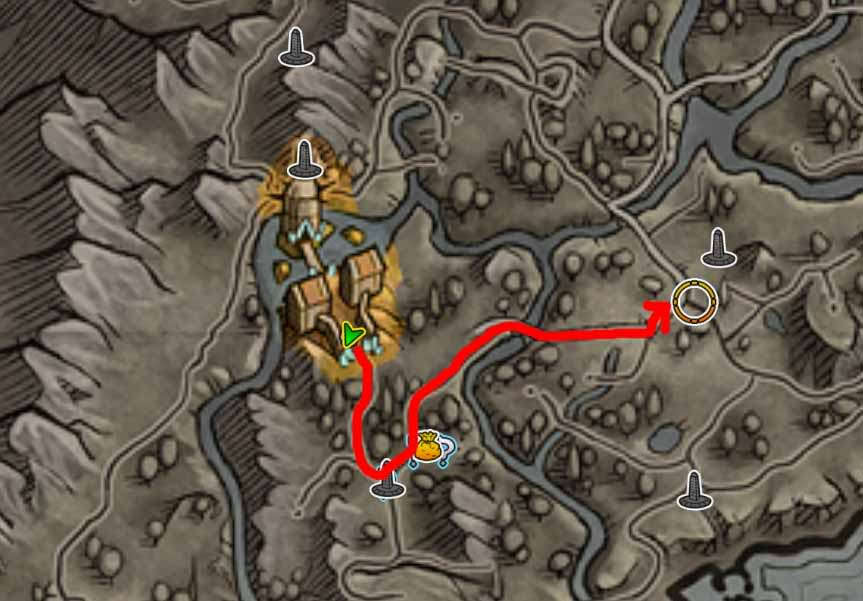
There are two Inquisition Guards waiting for you right outside the gate. Talk to them to learn they are responsible for the other Seraphim's death. Take them out and proceed down the path toward the South Brigand Camp, and from there north and east along the path until you reach Sloeford.
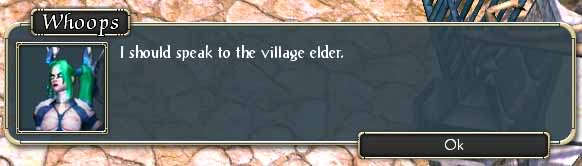
Proceed into the town center where you will receive a message to talk to the village elder. This message will appear as you approach the fountain.
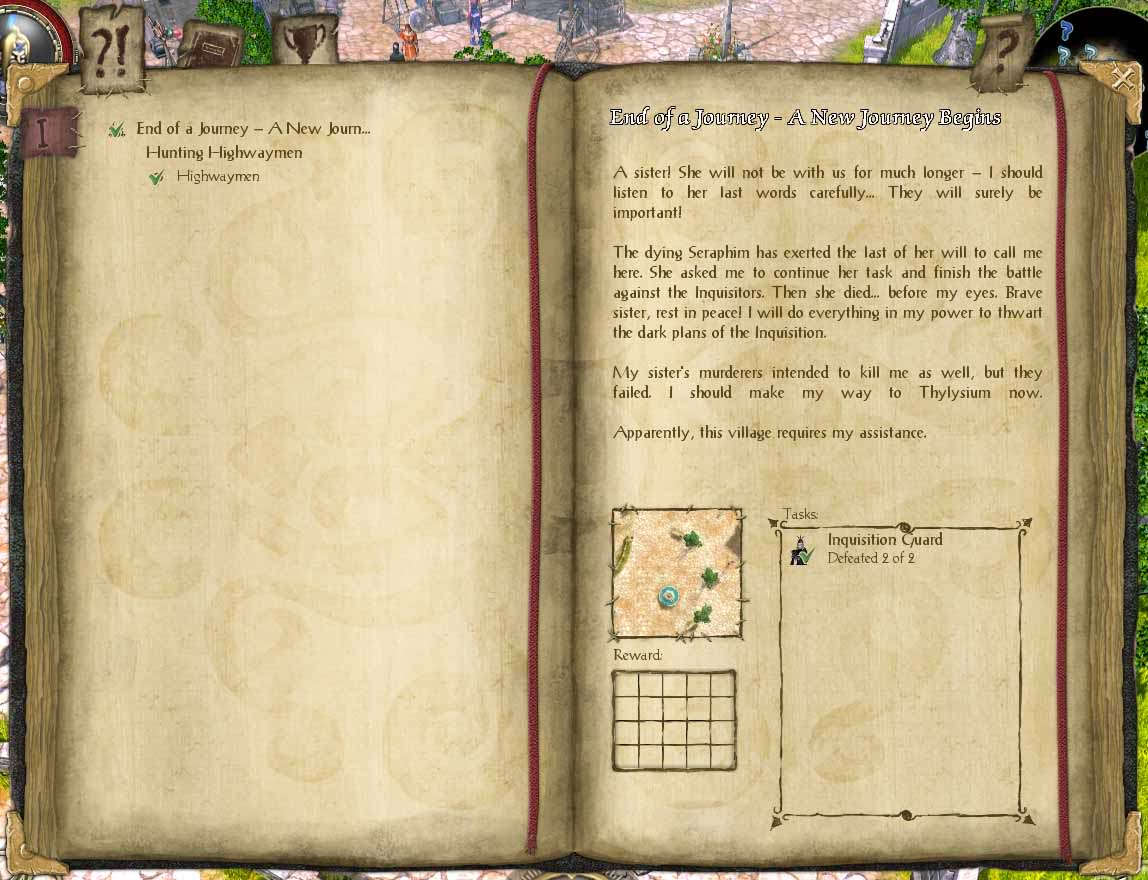
Your gold arrow will point in the direction you need to go to talk to him. At this point you have completed the introductory quest. When you talk to the village elder you will get the next quest in the Light Campaign, Levied Tax. Logbook Entry
The dying Seraphim has exerted the last of her will to call me here. She asked me to continue her task and finish the battle against the Inquisitors. Then she died... before my eyes. Brave sister, rest in peace! I will do everything in my power to thwart the dark plans of the Inquisition. My sister's murderers intended to kill me as well but they failed. I should make my way to Thylysium now. Apparently, this village requires my assistance. Notes
|