Difference between revisions of "Sacred 2:Ingame Tooltips"
Jump to navigation
Jump to search
Gogoblender (talk | contribs) (→Skills) |
(replaced pictures with wiki formatted ones) |
||
| (24 intermediate revisions by 7 users not shown) | |||
| Line 1: | Line 1: | ||
| + | __NOTOC__ | ||
<div class="plainlinks"> | <div class="plainlinks"> | ||
| − | Compilation of | + | == Compilation of Sacred 2 [[Sacred 2:Ice and Blood|Ice and Blood]] Tooltips That Appear When Teleporting and Loading the Game == |
| − | |||
Each time a player starts the game a splash screen with a tooltip appears. The background artwork is random, as is the tooltip. | Each time a player starts the game a splash screen with a tooltip appears. The background artwork is random, as is the tooltip. | ||
Some tooltips are short, a few are a wall of text. See the notes at the bottom for corrections. | Some tooltips are short, a few are a wall of text. See the notes at the bottom for corrections. | ||
Text was reproduced from screen captures, so errors may have been introduced, and some style changes have been made. | Text was reproduced from screen captures, so errors may have been introduced, and some style changes have been made. | ||
| − | |||
== Splash Screens == | == Splash Screens == | ||
| − | {|valign="top | + | <div align="center"> |
| + | {|valign="top" padding="10px" style="font-size:1em;font-weight:bold;text-align:center;" | ||
| + | |-valign="top" | ||
| + | |colspan=2|[[Sacred 2:Seraphim|Seraphim]] in [[Sacred 2:Thylysium|Thylysium]] | ||
| + | <center>{{S2frame|[[File:Seraphim backdrop 0.jpg|x120px]]|none}}</center> | ||
| + | |||
| + | |colspan=2|[[Sacred 2:Inquisitor|Inquisitor]] in a [[Sacred 2:Dungeon Map of Ancaria|Dungeon]] doing bad things with spirits | ||
| + | <center>{{S2frame|[[File:Inquisitor backdrop 4.jpg|x120px]]|none}}</center> | ||
| + | |||
| + | |-valign="top" | ||
| + | |width="250px"|[[Sacred 2:Dryad |Dryad]] in Swamp | ||
| + | <center>{{S2frame|[[File:Dryadlight.jpg|x120px]]|none}}</center> | ||
| + | |||
| + | |width="250px"|[[Sacred 2:Book 6 - T-Energy|T-Energy]] [[Sacred 2:Temple Guardian|Temple Guardian]] | ||
| + | <center>{{S2frame|[[File:Tg light path.jpg|x120px]]|none}}</center> | ||
| + | |||
| + | |width=250px|[[Sacred 2:Dryad |Dryad]] with [[Sacred 2:Blowguns|blowgun]] in forest | ||
| + | <center>{{S2frame|[[File:Dryadshadow.jpg|x120px]]|none}}</center> | ||
| + | |||
| + | |width=250px|[[Sacred 2:Temple Guardian|Temple Guardian]] | ||
| + | <center>{{S2frame|[[File:Tg shadow path.jpg|x120px]]|none}}</center> | ||
| + | |||
|-valign="top" | |-valign="top" | ||
| + | |[[Sacred 2:High Elf|High Elf]] in [[Sacred 2:Thylysium|Thylysium]] | ||
| + | <center>{{S2frame|[[File:High Elf backdrop 1.jpg|x120px]]|none}}</center> | ||
| + | |||
| + | |[[Sacred 2:Shadow Warrior|Shadow Warrior]] in [[Sacred 2:Sloeford|Sloeford]] | ||
| + | <center>{{S2frame|[[File:SW Loading Screen.jpg|x120px]]|none}}</center> | ||
| − | + | |Dark [[Sacred 2:High Elf|High Elf]] Pyromancer | |
| − | + | <center>{{S2frame|[[File:High Elf backdrop 2.jpg|x120px]]|none}}</center> | |
| − | + | ||
| − | + | |Fiery [[Sacred 2:Dragon Mage|Dragon Mage]] | |
| − | + | <center>{{S2frame|[[File:DM Loading Screen.jpg|x120px]]|none}}</center> | |
| − | {{S2frame|[ | ||
| − | |||
| − | |||
| − | |||
| − | |||
| − | |||
| − | |||
| − | |||
| − | |||
| − | |||
| − | {{S2frame|[ | ||
| − | |||
| − | |||
| − | |||
| − | |||
|} | |} | ||
| + | </div> | ||
== Interface == | == Interface == | ||
| Line 63: | Line 74: | ||
| − | *Hero of Ancaria statues give more [[Sacred 2:Experience|experience]] per victory. This temporary buff cannot be combined with the [[Sacred 2:Potion of the Mentor|Potion of the Mentor]]. | + | *[[Sacred 2:Statues|Hero of Ancaria statues]] give more [[Sacred 2:Experience|experience]] per victory. This temporary buff cannot be combined with the [[Sacred 2:Potion of the Mentor|Potion of the Mentor]]. |
== Quests == | == Quests == | ||
| Line 69: | Line 80: | ||
*A [[Sacred 2:Unique Mounts|quest in Orcish Byway]] will lead you to an epic mount which you can buy in addition to your [[Sacred 2:Horse|horse]]. Your character can perform normal combat arts from the back of this mount. | *A [[Sacred 2:Unique Mounts|quest in Orcish Byway]] will lead you to an epic mount which you can buy in addition to your [[Sacred 2:Horse|horse]]. Your character can perform normal combat arts from the back of this mount. | ||
| − | *A quest in the fight against the leader of the Undead Legion starts at a crossroads east of Thylisium. | + | *A quest in the fight against the leader of the [[Sacred 2:The General of the Undead Legion|Undead Legion]] starts at a crossroads east of Thylisium. |
*All across the world, you will find NPC's with an exclamation mark above their heads. Those NPCs [[Sacred 2:Epic Office Quest|are part of an extensive quest]]. | *All across the world, you will find NPC's with an exclamation mark above their heads. Those NPCs [[Sacred 2:Epic Office Quest|are part of an extensive quest]]. | ||
| − | *Completing [[Sacred 2: | + | *Completing [[Sacred 2:Side Quests|side quests]] helps to develop and strengthen your character. They give valuable experience points, gold and items. |
*If you click a quest name in the quest log, the compass arrow will switch to that quest and lead you directly to the quest goal. | *If you click a quest name in the quest log, the compass arrow will switch to that quest and lead you directly to the quest goal. | ||
*In the singleplayer mode, each character can accept [[Sacred 2:Class Specific Side Quests|class-specific quests]]. You can identify them by the special color of the question mark. | *In the singleplayer mode, each character can accept [[Sacred 2:Class Specific Side Quests|class-specific quests]]. You can identify them by the special color of the question mark. | ||
| Line 103: | Line 114: | ||
*Mounts don't have their own health bar. The mount dies right before the health of it's rider is reduced to zero. | *Mounts don't have their own health bar. The mount dies right before the health of it's rider is reduced to zero. | ||
*Press and hold the right mouse button to move the world map. Press and hold the middle mouse button to view explored areas in detail. | *Press and hold the right mouse button to move the world map. Press and hold the middle mouse button to view explored areas in detail. | ||
| − | *Use the [[Sacred 2: | + | *Use the [[Sacred 2:GUI Map|GUI Map]] to jump to discovered teleporters and to your currently active soul stone. |
*When your character dies, he will be resurrected at the currently active soul stone. You can activate a sould stone by clicking on it. | *When your character dies, he will be resurrected at the currently active soul stone. You can activate a sould stone by clicking on it. | ||
*You can buy horses at a horse vendor. If your character is on horseback, he can only perform special [[Sacred 2:Horse|mounted combat arts]], depending on the type of horse. | *You can buy horses at a horse vendor. If your character is on horseback, he can only perform special [[Sacred 2:Horse|mounted combat arts]], depending on the type of horse. | ||
| Line 145: | Line 156: | ||
*A vendor's wares will remain for a certain time after your last visit. After that, the merchants inventory will be replaced with new items bit by bit. | *A vendor's wares will remain for a certain time after your last visit. After that, the merchants inventory will be replaced with new items bit by bit. | ||
| − | *Armor sets are very special and rare. A set consists of several well-matched pieces. The more you equip, the more properties of the set will be unlocked. | + | *[[Sacred 2:Set Items|Armor sets]] are very special and rare. A set consists of several well-matched pieces. The more you equip, the more properties of the set will be unlocked. |
| − | *Each weapon has a gray socket for damage modifiers. Use them to convert part of the physical weapon damage to fire, frost, poison, or magic damage. | + | *Each weapon has a gray socket for damage modifiers. Use them to [[Sacred 2:Forging|convert part of the physical weapon damage]] to fire, frost, poison, or magic damage. |
*If opponents are too tough, check their level, the quality and level of your equipment and the levels of combat arts. | *If opponents are too tough, check their level, the quality and level of your equipment and the levels of combat arts. | ||
*If you pick up a piece of armor and your character has not yet equipped an item in that slot, the picked-up item will be equipped automatically. | *If you pick up a piece of armor and your character has not yet equipped an item in that slot, the picked-up item will be equipped automatically. | ||
| − | *Press the ALT key to see the names of any objects nearby. If you move the cursor over a name, you will be shown the object's attributes. | + | *Press the ALT key to see the names of any objects nearby. If you move the cursor over a name, you will be shown [[Sacred 2:Excalibran|the object's attributes]]. |
| − | *In order to activate relics necessary for protection against fire, frost, poison and magic, put them in the | + | *In order to activate relics necessary for protection against fire, frost, poison and magic, put them in the [[Sacred 2:Relics|ORB]] to the bottom left. You can prepare up to 4 sets of relics, but only the one at the top will be active. |
*Since socketed blacksmith arts require recrafting of the item, you can't remove them after resocketing. | *Since socketed blacksmith arts require recrafting of the item, you can't remove them after resocketing. | ||
| − | *Some weapons and armor have sockets. Visit a smith to see which items can be inserted in the socket since some items don't fit in some sockets. | + | *Some weapons and armor have sockets. Visit a [[Sacred 2:BlackSmith NPC|smith]] to see which items can be inserted in the socket since some items don't fit in some sockets. |
*Any items you pick up will be stored in your inventory (default F). You can also change armor and check your characters's attributes in the inventory window. The sigma sign shows all bonuses currently active for your character. | *Any items you pick up will be stored in your inventory (default F). You can also change armor and check your characters's attributes in the inventory window. The sigma sign shows all bonuses currently active for your character. | ||
*The color of an item's name indicates its quality. Grey means very low quality, whereas gold or green color indicates extremely valuable and high-quality items. | *The color of an item's name indicates its quality. Grey means very low quality, whereas gold or green color indicates extremely valuable and high-quality items. | ||
*The player's chest consists of two parts. One that is only visible to the current character and one for all your characters. | *The player's chest consists of two parts. One that is only visible to the current character and one for all your characters. | ||
*There are player's chests available in some cities and villages. You can access them via any player's chest in other places. | *There are player's chests available in some cities and villages. You can access them via any player's chest in other places. | ||
| − | *If the level of an equipped armor piece is too high, your character's movement speed will be greatly reduced. If the level of an equipped weapon is too high, your character's attack speed will be greatly reduced. | + | *If the level of an equipped armor piece is too high, your character's movement speed will be greatly reduced. If the [[Sacred 2:Items/Usable Item Levels|level of an equipped weapon]] is too high, your character's attack speed will be greatly reduced. |
| − | *The Dryad can loot shrunken heads from defeated enemies. Enemies will become weaker if you have a shrunken head of their species equipped. So you should chose the head depending on the current type of enemies. | + | *The Dryad can loot [[Sacred 2:Shrunken Head|shrunken heads]] from defeated enemies. Enemies will become weaker if you have a shrunken head of their species equipped. So you should chose the head depending on the current type of enemies. |
*You can also insert runes in weapons or armor. Equipping that item will enhance your combat art, but the cooldown will increase. | *You can also insert runes in weapons or armor. Equipping that item will enhance your combat art, but the cooldown will increase. | ||
| − | *You can gather books again at each difficulty level. | + | *You can gather [[Sacred 2:Books|books]] again at each difficulty level. |
*You can insert blacksmith arts and runes in a bronze socket. | *You can insert blacksmith arts and runes in a bronze socket. | ||
*You can insert blacksmith arts runes rings and amulets in a gold socket. This socket will also give a 15 percent bonus to their attributes. | *You can insert blacksmith arts runes rings and amulets in a gold socket. This socket will also give a 15 percent bonus to their attributes. | ||
*You can insert blacksmith arts, runes and rings in a silver socket. This socket will also give a 7 percent bonus to their attributes. | *You can insert blacksmith arts, runes and rings in a silver socket. This socket will also give a 7 percent bonus to their attributes. | ||
| − | *You can put any kind of potion and trophy in potion | + | *You can put any kind of potion and trophy in [[Sacred 2:Graphical User Interface|potion slots]]. |
*You can remove items from a weapon by visiting a blacksmith. Be careful, though, because removing an item, any other inserted items will be destroyed, as well. | *You can remove items from a weapon by visiting a blacksmith. Be careful, though, because removing an item, any other inserted items will be destroyed, as well. | ||
*You will find chests and other hiding places you can open all across the world. You can identify them by the shimmer that surrounds them. | *You will find chests and other hiding places you can open all across the world. You can identify them by the shimmer that surrounds them. | ||
| − | |||
== Combat Arts == | == Combat Arts == | ||
| − | *All weapon-based combat arts can also be performed with a bow. They will be interpreted for ranged weapons accordingly. | + | *All weapon-based combat arts can also be performed with a [[Sacred 2:Weapons|bow]]. They will be interpreted for ranged weapons accordingly. |
*Dryads can use the combat art TORTURED SOUL to create a ghost familiar. The type of ghost is determined by the type and quality of the shrunken head. | *Dryads can use the combat art TORTURED SOUL to create a ghost familiar. The type of ghost is determined by the type and quality of the shrunken head. | ||
*Even though permanent combat arts (buffs) increase the combat art cooldown, your character should always have one buff active. The tactical benefits are huge. | *Even though permanent combat arts (buffs) increase the combat art cooldown, your character should always have one buff active. The tactical benefits are huge. | ||
| − | *If you read a rune to enhance a combat art, the additional attributes of the rune expire. The additional attributes only become active if you insert the rune in an item. | + | *If you read a rune to enhance a combat art, the [[Sacred 2:Runes|additional attributes]] of the rune expire. The additional attributes only become active if you insert the rune in an item. |
| − | *Of Ker's divine gift, the Sakkara Demon, only one can exist in the world. Even in multiplayer mode. A Sakkara Demon must die before it can be summoned again. | + | *Of [[Sacred 2:Deities|Ker's divine gift]], the Sakkara Demon, only one can exist in the world. Even in multiplayer mode. A Sakkara Demon must die before it can be summoned again. |
*Reading a rune increases the combat art by one at most. Higher values on a rune, e.g. +6, only apply if you insert a rune in an item. | *Reading a rune increases the combat art by one at most. Higher values on a rune, e.g. +6, only apply if you insert a rune in an item. | ||
*Reading a rune will upgrade the respective combat art but it will also increase that combat art's cooldown. | *Reading a rune will upgrade the respective combat art but it will also increase that combat art's cooldown. | ||
*As a rule of thumb, a combat art is considered appropriate if its level equals about one quarter of the character level. If the combat arts level is lower it will do less damage but also has a lower cooldown. | *As a rule of thumb, a combat art is considered appropriate if its level equals about one quarter of the character level. If the combat arts level is lower it will do less damage but also has a lower cooldown. | ||
| − | *Select a modification of a pair to enhance a combat art. The other | + | *Select a [[Sacred 2:Combat Art Modifications|modification]] of a pair to enhance a combat art. The other modification of the pair cannot be selected anymore afterwards. You can modify each combat art up to three times. |
| − | *Some combat arts are strong against individual, tough foes, others are better suited for fighting groups. | + | *Some combat arts are strong against individual, tough foes, others are better suited for fighting [[Sacred 2:Area of Effect|groups]]. |
*Use modifications to change the tactical aspects of combat arts. Some combat arts will only become really exciting with modifications. | *Use modifications to change the tactical aspects of combat arts. Some combat arts will only become really exciting with modifications. | ||
*You can give orders to your familiars and companions with CNTRL + mouse button, they will attack. With # (default) you can specify the radius in which they will attack on their own. With - you can specify if they attack as a group or individually. | *You can give orders to your familiars and companions with CNTRL + mouse button, they will attack. With # (default) you can specify the radius in which they will attack on their own. With - you can specify if they attack as a group or individually. | ||
| − | *You can focus the High Elf's Glacial Storm and Blazing Tempest by clicking on the ground some feet behind the target enemy. | + | *You can focus the [[Sacred 2:High Elf|High Elf]]'s [[Sacred 2:Glacial Thorns|Glacial Storm]] and [[Sacred 2:Blazing Tempest|Blazing Tempest]] by clicking on the ground some feet behind the target enemy. |
*You will find runes in the course of the game. You can read runes for your character class by righ-clicking them in order to enhance your combat arts. | *You will find runes in the course of the game. You can read runes for your character class by righ-clicking them in order to enhance your combat arts. | ||
| Line 190: | Line 200: | ||
---- | ---- | ||
| − | |||
| − | |||
== Notes: == | == Notes: == | ||
| − | *Each weapon has a ''BLUE'' socket for damage modifiers. Use them to convert part of the physical weapon damage to fire, frost, poison, or magic damage. | + | *Each weapon has a ''BLUE'' socket for [[Sacred 2:Damage Types|damage modifiers]]. Use them to convert part of the physical weapon damage to fire, frost, poison, or magic damage. |
| − | *No longer true in | + | *No longer true in Ice & Blood: |
If you pick up a piece of armor and your character has not yet equipped an item in that slot, the picked-up item will be equipped automatically. | If you pick up a piece of armor and your character has not yet equipped an item in that slot, the picked-up item will be equipped automatically. | ||
| − | *Dryads can use the combat art | + | *Dryads can use the combat art [[Sacred 2:Moribund Animus|Moribund Animus]] to create a ghost familiar. The type of ghost is determined by the type and quality of the shrunken head. |
*This was a biggie for me: too much text to digest in the (to very short) time it appeared on the screen: | *This was a biggie for me: too much text to digest in the (to very short) time it appeared on the screen: | ||
You can give orders to your familiars and companions with CNTRL + mouse button, they will attack. With # (default) you can specify the radius in which they will attack on their own. With - you can specify if they attack as a group or individually. | You can give orders to your familiars and companions with CNTRL + mouse button, they will attack. With # (default) you can specify the radius in which they will attack on their own. With - you can specify if they attack as a group or individually. | ||
| − | *You can focus the High Elf's '' | + | *You can focus the High Elf's ''[[Sacred 2:Raging Nimbus|Raging Nimbus]]'' and [[Sacred 2:Blazing Tempest|Blazing Tempest]] by clicking on the ground some feet behind the target enemy. |
*In the singleplayer mode, each character can accept class-specific quests. You can identify them by the special color of the ''QUESTIONMARK''. | *In the singleplayer mode, each character can accept class-specific quests. You can identify them by the special color of the ''QUESTIONMARK''. | ||
Latest revision as of 03:16, 20 October 2013
Compilation of Sacred 2 Ice and Blood Tooltips That Appear When Teleporting and Loading the Game
Each time a player starts the game a splash screen with a tooltip appears. The background artwork is random, as is the tooltip. Some tooltips are short, a few are a wall of text. See the notes at the bottom for corrections. Text was reproduced from screen captures, so errors may have been introduced, and some style changes have been made.
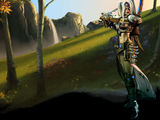
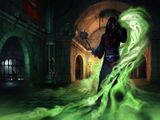
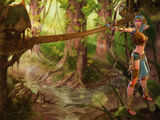
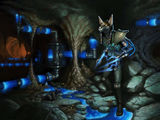
Splash Screens
Seraphim in Thylysium
|
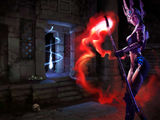
Inquisitor in a Dungeon doing bad things with spirits
| ||||||||||||||||||||||||||||||||||||||
Dryad in Swamp
|
T-Energy Temple Guardian
|
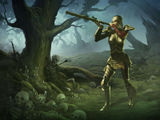
Dryad with blowgun in forest
|
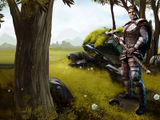
Temple Guardian
| ||||||||||||||||||||||||||||||||||||
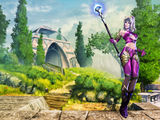
High Elf in Thylysium
|
Shadow Warrior in Sloeford
|
Dark High Elf Pyromancer
|
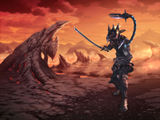
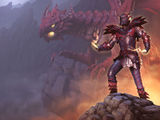
Fiery Dragon Mage
| ||||||||||||||||||||||||||||||||||||
Interface
- A high magic resistance protects opponents with low spellpower. It reduces the damage taken from spells and their side effects.
- Attributes are the basic characteristics of each avatar. They automatically increase with each level you gain. You also receive free points at each level-up.
- Creatures can mutate when they come in contact with T-Energy! They will become stronger and more resilient to damage.
- If reading a rune only slightly enhances a combat art, it will help to increase the character level and the aspect focus ability. The cooldown will still increase.
- If you press and hold the CTRL key, you can force your character to perform many attacks even if he doesn't have a target.
- If you press and hold the SHIFT key, your character will switch to a defensive stance which will reduce his chance to get hit. This will also slow your avatar's movement speed.
- In order to put combat arts in the quick slots, select them in the combat arts menu (default E) and drop them on the desired slot to the bottom right. It will be even quicker by right clicking on the combat art menu.
- Skill or combat art enhancements on items only count if the character has already unlocked that skill or combat art.
- Taking potions quickly one after the other will reduce their effect.
- Use the mouse wheel to adjust camera distance. Pressing the middle mouse button will rotate the camera. Use Y (default) to align the camera north.
- Use the Q key (default) to pick up any items in the immediate vicinity of your character and put them in your inventory. Change the settings in the options menu to pick up only valuable items.
- Use the round button next to the buff slots at the bottom right to call your mount or dismount from a mount. You can also use the 0 key (default setting).
- Use keys F1-F5 to quickly switch between weapon slots. Use keys 1-5 to switch between combat art slots.
- Use X (default) to call our carrier imp with your player's chest. The chest will disappear after you opened and closed it once.
- If your inventory is full, you can convert items to gold immediately. Use CTRL + left mouse button to click on the item or drop it on the moneybag icon above the inventory. You will get less money doing this than vendoring the item.
- The Temple Guardian changes its left arm depending on the currently active combat art. If he uses it to shoot enemies at a range, the damage will be determined by the battery. He can't use a melee arm to shoot.
- You can access important background information ingame by clicking the Help question mark --to the top right in menu.
- You can easily combine combat arts using combos. You cannot use the same combat art multiple times in one combo.
- You can put any kind of potion and trophy in potion slots.
- You can trade runes for another class at the rune master. The more runes you trade against a new rune, the less it will cost you.
- You can unlock combat arts by reading runes. Place them in one of the slots next to the bottom right next to the compass in order to have them ready immediately.
- Your permanent combat arts (buffs) must be activated by mouseclick on the buff slots.
Experience
- Hero of Ancaria statues give more experience per victory. This temporary buff cannot be combined with the Potion of the Mentor.
Quests
- A quest in Orcish Byway will lead you to an epic mount which you can buy in addition to your horse. Your character can perform normal combat arts from the back of this mount.
- A quest in the fight against the leader of the Undead Legion starts at a crossroads east of Thylisium.
- All across the world, you will find NPC's with an exclamation mark above their heads. Those NPCs are part of an extensive quest.
- Completing side quests helps to develop and strengthen your character. They give valuable experience points, gold and items.
- If you click a quest name in the quest log, the compass arrow will switch to that quest and lead you directly to the quest goal.
- In the singleplayer mode, each character can accept class-specific quests. You can identify them by the special color of the question mark.
- The band BLIND GUARDIAN contributed a song exclusively for Sacred 2. If you want to see their show, you should visit Clearview for a quest in the single player mode.
- The chance to be rewarded with an armor set piece in addition to the quest reward increases with every completed quest.
- The compass needles at the bottom show the direction of the next quest goal. The big needle indicates the main quest, the gray needle indicates the current side quest.
- The quest log also lists the special achievements of all your characters.
- The vendors will make you a better price if you solve many side quests in their vicinity.
Damage
- If you get a lot of damage while being mounted, your mount will die first and throw you. Use the time gained to flee or to heal yourself.
- If your character suddenly takes a lot of damage in combat, check your opponents health bar to see if your character is protected by relics against your enemy's damage type fire frost magic poison.
- If a character doesn't die over a long period of time, his survival bonus will increase. This will boost the enemy level and their items above the character level. The chance for more valuable loot is increased, as well.
- Some foes are exceptionally strong. Those are elite enemies. You can recognize them by their gold aura and a special symbol on the minimap.
- The attack value does not determine the damage but the chance your weapon will hit. The higher the value, the better the chance for you to score a hit with your weapon.
- The best protection for your character are breastplate, spaulders and a helmet. A shield will provide additional protection.
- The damage type magic damage does not refer to damage from spells.
- The defense value is independent from armor. During an attack, the attack value and the defense value will be compared to calculate whether the attack succeeds or not.
- The different damage types have fixed side effects fire and poison deal additional damage-over-time, frost slows movement and magic reduces the target's attributes.
- The glowing circle around an enemy shows if the enemy is lower than (gray or green circle), equal to (yellow circle) or much higher than (red or purple circle) that of the player character.
- The survival bonus is a reward for not dying. It increases your character's attributes and thus strengthens attack and defensive skills.
Travel
- A horse will gain levels if your character rides on it and receives experience points. A horse levels very fast, so it will soon catch up on the character's level.
- If you create a character in the hardcore mode, this character cannot be played anymore if he dies in the game.
- If you killed all enemies in a region, they will slowly start to respawn.
- Mounts don't have their own health bar. The mount dies right before the health of it's rider is reduced to zero.
- Press and hold the right mouse button to move the world map. Press and hold the middle mouse button to view explored areas in detail.
- Use the GUI Map to jump to discovered teleporters and to your currently active soul stone.
- When your character dies, he will be resurrected at the currently active soul stone. You can activate a sould stone by clicking on it.
- You can buy horses at a horse vendor. If your character is on horseback, he can only perform special mounted combat arts, depending on the type of horse.
- You can find merchants all across Ancaria. You dont have to return to previous locations in order to sell items.
- You can only enter dungeons on foot.
Skills
- A character can use a weapon's special ability if he has learned the respective weapon skill. The higher the skill value, the better the skill.
- A combo will trigger combat arts in succession without waiting for the recharge but the combat arts will go on cooldown after the combo.
- A high spell resistance protects opponents with low spellpower. It reduces the damage taken from spells and their side effects.
- As soon as you invested 75 points in a skill, you will receive a special MASTER BONUS.
- Attributes or skills that are increased by items will be shown in blue in the attributes and skills menu.
- Don't forget that your avatar has received a powerful divine gift. This depends on the deity you choose during character creation. Use it wisely, because it has a long cooldown.
- Each avatar has 3 aspects. Each aspect has an individual play style. These play styles can be combined freely.
- Each combat art aspect has two skills. Lore increases the damage and the speed of all the aspect's combat arts, Focus reduces the cooldown and increases the maximum level.
- If an enemy is well protected against the damage types of your combat arts, the skill ANCIENT MAGIC can help you to deal damage nevertheless.
- If you spend skill points on aspect skills, you will receive modification points. You can use those to unlock modifications of the aspect's combat arts.
- Riding on a mount decreases the combat art regeneration. You can negate this negative effect with the riding skill.
- Some characters and foes have a technological energy shield. It functions like bonus health that can recharge quickly.
- The Alchemy skill allows you to boost your trophies. This will open new tactical possiblities.
- The cooldown of the divine gift can only be reduced by the DIVINE DEVOTION skill. You can also reduce the recharge time by PRAYING at deities' statues.
- The heavier your armor, the longer the cooldown of the combat arts. The cooldown can be reduced by armor lore.
- The skills ENHANCED PERCEPTION and BARGAINING will help you to get better items.
- You can distribute skillpoints to increase a skill's level up to the the current character level. You can exceed that limit by using itemsAll Skills with skill increase values.
- You need 75 points in a skill to receive the master bonus for that skill. Items that increase skill value levels (rings, amulets etc) to 75 will not award you the master bonus.
Multiplayer
- In a multiplayer game, you can only pick up items with the auto pick-up key (default Q) that are reserved for you.
- In a team with multiple players, only those players close to the place where the quest is handed-in will receive quest rewards.
- Only those players in a team that are nearby share experience points and loot from enemies. They will receive markedly more together than they would individually.
- The enemy strength will be adjusted to the size of the player team in multiplayer mode.
- Use CTRL + left mouse click on another player's character portrait to teleport yourself to that player.
- You can only team up for campaigns with other characters of the same alignment.
Equipment
- A vendor's wares will remain for a certain time after your last visit. After that, the merchants inventory will be replaced with new items bit by bit.
- Armor sets are very special and rare. A set consists of several well-matched pieces. The more you equip, the more properties of the set will be unlocked.
- Each weapon has a gray socket for damage modifiers. Use them to convert part of the physical weapon damage to fire, frost, poison, or magic damage.
- If opponents are too tough, check their level, the quality and level of your equipment and the levels of combat arts.
- If you pick up a piece of armor and your character has not yet equipped an item in that slot, the picked-up item will be equipped automatically.
- Press the ALT key to see the names of any objects nearby. If you move the cursor over a name, you will be shown the object's attributes.
- In order to activate relics necessary for protection against fire, frost, poison and magic, put them in the ORB to the bottom left. You can prepare up to 4 sets of relics, but only the one at the top will be active.
- Since socketed blacksmith arts require recrafting of the item, you can't remove them after resocketing.
- Some weapons and armor have sockets. Visit a smith to see which items can be inserted in the socket since some items don't fit in some sockets.
- Any items you pick up will be stored in your inventory (default F). You can also change armor and check your characters's attributes in the inventory window. The sigma sign shows all bonuses currently active for your character.
- The color of an item's name indicates its quality. Grey means very low quality, whereas gold or green color indicates extremely valuable and high-quality items.
- The player's chest consists of two parts. One that is only visible to the current character and one for all your characters.
- There are player's chests available in some cities and villages. You can access them via any player's chest in other places.
- If the level of an equipped armor piece is too high, your character's movement speed will be greatly reduced. If the level of an equipped weapon is too high, your character's attack speed will be greatly reduced.
- The Dryad can loot shrunken heads from defeated enemies. Enemies will become weaker if you have a shrunken head of their species equipped. So you should chose the head depending on the current type of enemies.
- You can also insert runes in weapons or armor. Equipping that item will enhance your combat art, but the cooldown will increase.
- You can gather books again at each difficulty level.
- You can insert blacksmith arts and runes in a bronze socket.
- You can insert blacksmith arts runes rings and amulets in a gold socket. This socket will also give a 15 percent bonus to their attributes.
- You can insert blacksmith arts, runes and rings in a silver socket. This socket will also give a 7 percent bonus to their attributes.
- You can put any kind of potion and trophy in potion slots.
- You can remove items from a weapon by visiting a blacksmith. Be careful, though, because removing an item, any other inserted items will be destroyed, as well.
- You will find chests and other hiding places you can open all across the world. You can identify them by the shimmer that surrounds them.
Combat Arts
- All weapon-based combat arts can also be performed with a bow. They will be interpreted for ranged weapons accordingly.
- Dryads can use the combat art TORTURED SOUL to create a ghost familiar. The type of ghost is determined by the type and quality of the shrunken head.
- Even though permanent combat arts (buffs) increase the combat art cooldown, your character should always have one buff active. The tactical benefits are huge.
- If you read a rune to enhance a combat art, the additional attributes of the rune expire. The additional attributes only become active if you insert the rune in an item.
- Of Ker's divine gift, the Sakkara Demon, only one can exist in the world. Even in multiplayer mode. A Sakkara Demon must die before it can be summoned again.
- Reading a rune increases the combat art by one at most. Higher values on a rune, e.g. +6, only apply if you insert a rune in an item.
- Reading a rune will upgrade the respective combat art but it will also increase that combat art's cooldown.
- As a rule of thumb, a combat art is considered appropriate if its level equals about one quarter of the character level. If the combat arts level is lower it will do less damage but also has a lower cooldown.
- Select a modification of a pair to enhance a combat art. The other modification of the pair cannot be selected anymore afterwards. You can modify each combat art up to three times.
- Some combat arts are strong against individual, tough foes, others are better suited for fighting groups.
- Use modifications to change the tactical aspects of combat arts. Some combat arts will only become really exciting with modifications.
- You can give orders to your familiars and companions with CNTRL + mouse button, they will attack. With # (default) you can specify the radius in which they will attack on their own. With - you can specify if they attack as a group or individually.
- You can focus the High Elf's Glacial Storm and Blazing Tempest by clicking on the ground some feet behind the target enemy.
- You will find runes in the course of the game. You can read runes for your character class by righ-clicking them in order to enhance your combat arts.
Notes:
- Each weapon has a BLUE socket for damage modifiers. Use them to convert part of the physical weapon damage to fire, frost, poison, or magic damage.
- No longer true in Ice & Blood:
If you pick up a piece of armor and your character has not yet equipped an item in that slot, the picked-up item will be equipped automatically.
- Dryads can use the combat art Moribund Animus to create a ghost familiar. The type of ghost is determined by the type and quality of the shrunken head.
- This was a biggie for me: too much text to digest in the (to very short) time it appeared on the screen:
You can give orders to your familiars and companions with CNTRL + mouse button, they will attack. With # (default) you can specify the radius in which they will attack on their own. With - you can specify if they attack as a group or individually.
- You can focus the High Elf's Raging Nimbus and Blazing Tempest by clicking on the ground some feet behind the target enemy.
- In the singleplayer mode, each character can accept class-specific quests. You can identify them by the special color of the QUESTIONMARK.
